Sunday, April 30, 2023

Stitched Kindness Cards

 These cards were made using a new set from Concord and 9th. There is a stamp, a set of dies and layering stencils. 

I die cut the backgrounds first and then stencilled the images using shades of blue for one card and purple and teal for the other. The die cuts stitching holes so I dug out coordinating colours of embroidery floss and stitched the sections using similar colours. The sentiment for the purple and teal card was stamped using two shades of purple and the I embossed the sentiment in white for the blue card. Since I had a LOT of stitched pieces adhered on the back of each card, I raised the backgrounds with foam tape and adhered them to a piece of coloured cardstock and then to the card base. Some clear gems were placed around the stems of the flowers.


Enjoy,

Alyson


Saturday, April 29, 2023

Stencilled Hello Card

 This card is the result from one of the classes from Online Card Classes. It has taken me this long to find the time to try out some of the techniques. 

My card didn't turn out exactly as I had anticipated... I ended up stamping the first layer too dark but I will revisit this technique as it's really neat. The stamped background (gingham) shows through the stencilled floral and creates an interesting pattern. I adhered the dark piece to white cardstock and then to the card base with craft foam. A few blue gems were added around the white die cut sentiment as well. 


This was my second attempt... I stamped and inked the first layer lighter and was able to stamp a text design on the background but some of the embossing didn't come out well... ah, such is life. There are a lot of techniques on this card and it is difficult to make all of them work together! 

Enjoy, 

Alyson

Friday, April 28, 2023

DT 137 - A Trio of Piggies

 Welcome to Double Trouble Challenge 137! 

It's all about nursery rhymes this week. The small graphic is below - please visit the Double Trouble Challenge Blog for detailed information. 

I chose to use "Old MacDonald Had a Farm" for my nursery rhyme. Of course, Old MacDonald had every animal imaginable on his farm so I chose pigs! 

The background for my card was ink blended and splattered with water before being die cut. I used the inner dies to cut the white circles and stamped and coloured the pigs. Two of the pigs are holding blue hearts as well (Thing 3). I die cut additional circles - dark blue ones to fit behind each image and light pink ones to surround the dark blue sections. Small sentiments were added under each pig. 


Come and join us at Double Trouble and show us your nursery rhyme inspired projects. 

You have two weeks to link up your project. 

I am also linking up my card with Heart's Quest Challenge 31 (use hearts or love).

We can't wait to see what you create! 

Enjoy,

Alyson

MTTCC 59 - The Twelve Days of Christmas

 Welcome to My Time to Craft - Christmas! 

The theme for this week's challenge is The Twelve Days of Christmas.

This was a difficult theme for me - I don't have any products related to this theme at all. I had to go to my Cricut machine to find something that would work. 

I cut an image of a partridge in a pear tree. The original image was large - 18" or so - and making it small enough to fit on a card was hard as the pieces were tiny! I didn't use the highlight pieces for the hearts and pears and chose to draw them on using a white gel pen. I inked the edges of the card front in red and adhered it to a black card base. The sentiment was stamped in black and added at the bottom of the tree. I also used Liquid Pearls on the flowers instead of cutting such tiny pieces! 

Come and join us at MTTCC and show us how you interpret this week's theme. 

You have two weeks to link up your project. 

We can't wait to see what you create! 

Enjoy,

Alyson

Thursday, April 27, 2023

Mini Squares Card

This simple card design is one I saw on Pinterest quite some time ago. I have already used it to make several sets of cards but this is an individual card. 

I chose a turquoise colour scheme. I cut three turquoise patterns into small squares - two of each. They were arranged on a white card front. The flower and leaves were die cut in white and I inked them with oxide inks. I also cut a leaf from vellum. Those pieces were arranged at the left side, along with a sentiment. I drew a line around the card front with a black marker and that piece was adhered to a black mat and finally to a turquoise card base. I added some iridescent sequins around the card and some clear Stickles to the centre of the flower. 


Enjoy,

Alyson

Wednesday, April 26, 2023

Floral Arch Card

 Arches are all the rage right now - I decided to jump on the bandwagon and use a set that I recently purchased. 

I die cut a detailed background from white cardstock and then die cut an arch shape from the centre of that piece. A few other arch images were stamped and die cut to create the opening in the front of the card. I inked a piece of pink cardstock with Distress Oxide ink and used that behind the arch opening. The flowers were stamped, coloured and die cut and arranged around the arch. I added a silver foiled sentiment along with some metallic thread in the centre. The last step was to add some iridescent gems around the card. 

Enjoy,

Alyson

Tuesday, April 25, 2023

Rainbow Butterfly Card

 This card is the result of another Tuesday Evening Card Making Stash and Dash event. 

The roll of the die gave these requirements: a shaped card, rainbow colours, inking and crafter's choice of embellishments. 

I used a butterfly stencil and eight Distress Oxide inks to create a rainbow effect across the butterfly. That piece was die cut and I used the same shape to die cut a butterfly card base. The body was die cut in black and I stamped the sentiment and added it across the centre. I used little dew drop embellishments to finish off the card. Best of all, I finished in 23 minutes! 

Enjoy,

Alyson

TSOT 604 - Blue Leaf Birthday

 Welcome to Try Stampin' on Tuesday Challenge 604!

The optional theme (in addition to the sketch) is to use brads or eyelets. 

I don't have any brads or eyelets left in my stash - they have been gone for a long time! 

I created a background with Lindy's Magical Powders and let that dry. I wanted to pull the gold from the background so I used gold paper for the banners and also as a border around the entire card. The leaves were stamped with dark blue pigment ink and embossed before they were coloured. They were arranged on a piece of dark blue cardstock and I added a gold birthday sentiment across the bottom. Some gold gems were placed around the banners to finish off the card. 

Come and join us at TSOT and show us how you interpret this week's challenge. 

You have two weeks to link up your project. 

We can't wait to see what you create! 

Enjoy,

Alyson

Monday, April 24, 2023

AH 522 - You're Awesome

 Welcome to Atlantic Hearts Sketch Challenge 522!

The sketch is shown in landscape format - I rotated it 90 degrees.

The background of my card was created with two diagonal pieces - one was hot foiled in teal and the leaves were coloured and the other half was created with Distress Oxide sprays. I adhered those pieces to a teal background and added a teal glitter strip across the centre. The sentiment panels were die cut with stitched rectangle dies and I stamped a sentiment on the white panel. The leaves were die cut and adhered around the sentiment. There was enough happening on this card so no other embellishments were added but I did brush the leaves with a shimmer brush. 

Come and join us at Atlantic Hearts and show us how you interpret this challenge. 

You have until Sunday evening to link up your project. 

We can't wait to see what you create! 

Enjoy,

Alyson


Sunday, April 23, 2023

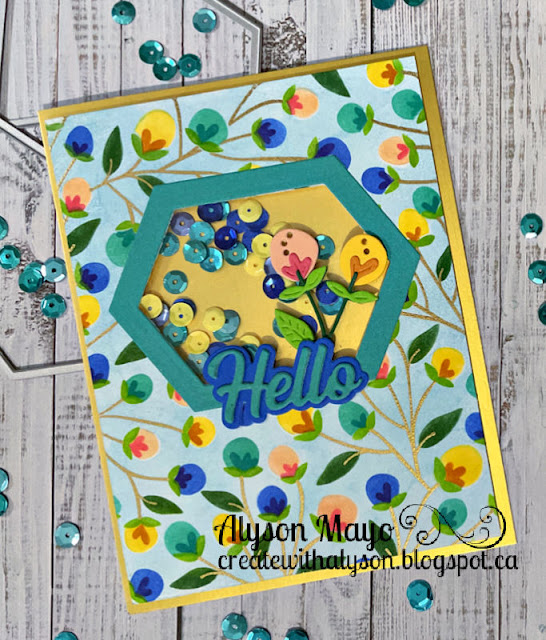
Multi-Coloured Stencilled Flower Shaker

For this card, I used a set of stamps and layering stencils from Taylored Expressions. 

The blue background is not cardstock nor is it a fully inked background. I used the first stencil and inked that up with light blue ink and ran it through my die cutting machine to add colour to the background. After that, I used four colours of ink (yellow, coral, turquoise and blue) for the flower bases. A darker shade of each was used for the details on the flowers. The leaves were stencilled in two shades of green ink. That stencilling took quite a bit of time! 

A hexagon shape was die cut from the card base and I placed a piece of gold foil paper behind that piece so it was large enough to also provide a border for the stencilled piece. I added some coordinating colours of sequins inside the shaker and die cut a sentiment along with some extra flowers and leaves. This is so pretty in real life! 

Enjoy,

Alyson

Saturday, April 22, 2023

SS 724 - Hello Floral Stamp Image Card

 Welcome to Sketch Saturday Challenge 724!

The optional theme this week (in addition to the sketch) is monochromatic. 

I rotated the sketch 90 degrees so the squares would fit along the left side. I stencilled some small background pieces using shades of turquoise and die cut them with a postage stamp die. The flowers were die cut in white and I inked them with Distress Oxide inks. Those panels were arranged along the left side and a few were adhered with foam tape. The white background is a cover plate die that fits an A2 size card so I die cut it twice, cut off the straight edges and pieced it together to fit my larger card size. I also manually cut a white border. The sentiment was die cut and stacked before it was added to the card. A few turquoise enamel dots finished off the card. 

Come and join us at Sketch Saturday and show us how you interpret the sketch shown above. 

You have two weeks to link up your project. 

We can’t wait to see what you create! 

Enjoy, 

Alyson

Friday, April 21, 2023

CD 545 - Birthday Blossoms

 Welcome to Colour Dare Challenge 545! 

Choose at least three colours from the graphic below. Neutrals and metallics are free to use. 

I used all five colours. I took advantage of Close To My Heart's double sided cardstock with the lighter colour on the reverse side. I die cut rows of diamonds and layered them from darkest lightest several times. That background was trimmed down to fit the front of my card. The flowers and leaves were die cut from both the light and dark sides of the other three colours and I inked those pieces for added interest. They were arranged to the left side of the hot foiled sentiment. A few clear dew drops finished off this card.

Come and join us at Colour Dare and show us how you use the colours shown above. 

You have two weeks to link up your project. 

We can’t wait to see what you create! 

Enjoy,

Alyson

MTTC 506 - Gnome-Body Loves You Like I Do

 Welcome to My Time to Craft Challenge 506!

The theme for this week's challenge is fantasy. 

Fantasy is not an easy theme for me - I don't follow shows like Star Trek, Star Wars, Lord of the Rings or anything with a theme of that nature. I decided to use gnomes for the fantasy theme. 

The background of this card was stencilled with both cloud and grass stencils. I stamped, coloured and die cut the gnomes, the butterfly and the collection of plants. Those pieces were arranged on the card and I added a sentiment at the top corner. Nothing else was added to this card. 


Come and join us at MTTC and show us how you interpret this week's challenge. 

You have two weeks to link up your project. 

We can't wait to see what you create! 

Enjoy,

Alyson

Thursday, April 20, 2023

Corner Shaker Card

 This cute card was inspired by one made by Laura Rumble. 

The right bottom corner is a shaker and it is attached between two pieces of cardstock. I tried this using a plastic bag and it wasn't strong enough for the card to stand up. I ended up using a flip flap (CTMH) as the plastic is strong and durable. 

The images were die cut and arranged along the side of the shaker and I added a sentiment across the bottom. The colours of the sequins match the colours of the images. I added a few coloured gems to the flowers but that was it! 

Enjoy,

Alyson


Wednesday, April 19, 2023

Inside Flap Card

 I saw a card like this somewhere on Facebook - I always forget to record the name of the poster... 

The outside looks like a normal side folding card but inside, there is a flap that lifts up to reveal a place to write a message. 

I used some of my favourite patterned papers - they look like alcohol inked backgrounds. I paired that with shades of blue, orange and gold. The flowers were die cut in shades of orange and I die cut a bunch of leaves in a matte gold. The were assembled on the front where I also added a hot foiled sentiment. Inside, I used the same floral images to decorate the front of the flap. Inside the flap, there is a piece of light blue cardstock on which a message can be written. Some flat gold gems were added to the centres of the flowers. 


Enjoy,

Alyson


Tuesday, April 18, 2023

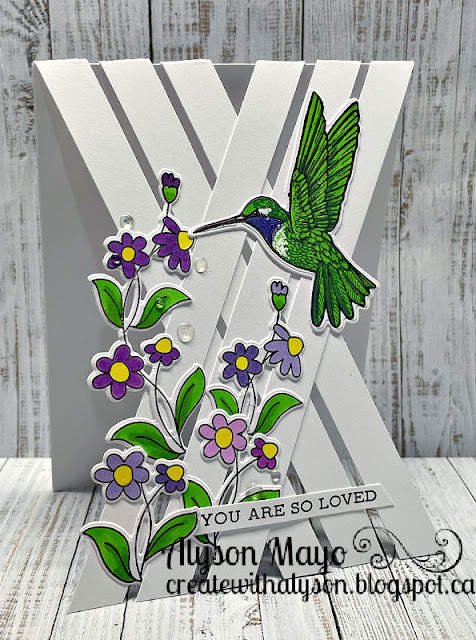
Angled Lattice Card

 This cool card style is one I saw posted by Bibi Cameron - she has done a few lattice style cards in the past. 

This one is open under the lattice so the message would need to be written on the back of the card. I used a hummingbird and flower stamp from my stash. The bird is a layered stamp and I coloured the flowers. Once the pieces were die cut, I arranged them on the lattice with a sentiment tucked under one of the leaves. I added a few dew drops to finish off the card. 

Enjoy,

Alyson

Monochromatic Friend Card

 This is another card made for the 30 Minute Card Making Stash and Dash - and I finished in 30 minutes! 

The parameters were as follows: A2 landscape card, monochromatic colour scheme, metal or metallics and inking. 

I inked a background using three shades of Distress Oxide ink and splattered it with water. I then die cut a leaf background into that piece. I die cut several leaves from silver foil and placed them around the card. The sentiment was embossed in white and added to two hexagon background pieces before being placed on top of the leaves with foam tape. Some iridescent sequins were added to finish off the card. 


Enjoy,

Alyson

Monday, April 17, 2023

Do All Things with Kindness

 This cute card was inspired by one I found on Pinterest. 

I dry embossed a thin panel of white cardstock using my scoring board. That piece was wrapped with white twine and attached the the card front. The flowers and leaves were die cut from various shades of turquoise and teal and I inked the flowers for more interest. That was adhered on the embossed strip and I stamped the sentiment off to the right side. I tied a bow with the twine and added it under the flower. Some silver sequins were added and I adhered the card front to the base with craft foam. 

Enjoy, 

Alyson

Sunday, April 16, 2023

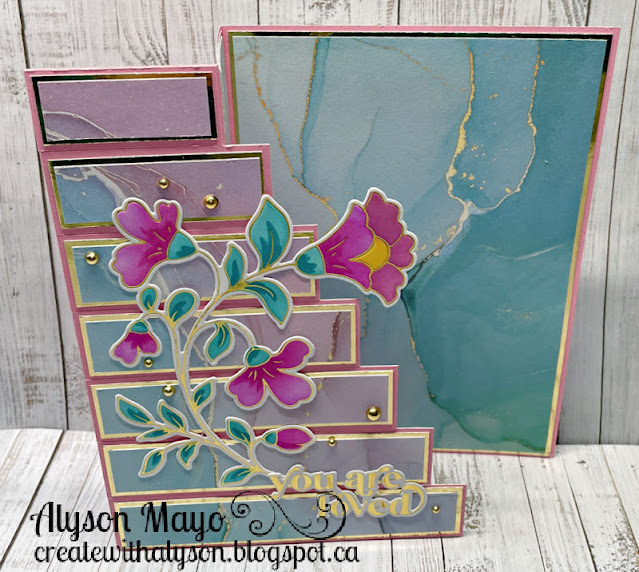
Staggered Z-Fold Card - Birthday

 This is such an easy card to make - it looks far more difficult than it really is! 

I used some papers from my stash that have an alcohol inked pattern on them. The patterns are simply beautiful. I cut the pieces so the pattern would continue down the staggered sections. Since there were a few colours in the paper, I chose the pink and aqua shades to stencil my hot foiled floral image. That was added to the front of the card and I used a hot foiled sentiment at the bottom. Some gold gems were added to finish off the card. There is a place on the back to write a message. 

This is actually the second card that I created in this style and I added a gold foil border around each of the patterned paper pieces. The original card is further down. 


Enjoy,

Alyson
Saturday, April 15, 2023

DT 136 - You are a Treasure

 Welcome to Double Trouble Challenge 136!

This week, it's all about celebrating the special women in our lives. Our partner challenge requires flowers to be used as well. The small graphic is below - please visit the Double Trouble Challenge blog for detailed information. 


I created a card design that I have used before but it fit perfectly for this challenge. The background was inked with Distress Oxide inks and splattered with Distress Oxide sprays. The flowers were hot foiled in gold and I coloured them with markers. They were die cut and I arranged them on the inked background. The sentiment was heat embossed in black in the corner and I added some clear dew drops to finish off the card. 

Come and join us at Double Trouble and show us how you interpret this week's challenge. 

You have two weeks to link up your project. 

I am also entering my card into the Beautiful Blossoms Challenge

We can’t wait to see what you create! 

Enjoy,

Alyson

Friday, April 14, 2023

MTTCC 58 - The Most Wonderful Time of the Year

 Welcome to My Time to Craft Christmas Challenge 58!

The theme this week is to use a Christmas quote. 

I wasn't sure what I was going to do for this challenge and then I remembered a wonderful commercial that shows up in August around here. It is for an office supply store and they advertise back to school sales for the kids. The father is riding a shopping card with glee as he is thrilled his kids are returning to school after the summer break. It always makes me laugh! The commercial is set to the song "It's the Most Wonderful Time of the Year"! 

In this case, I used the same quote for a Christmas card. The quote itself was embossed with white twinkle embossing powder on black cardstock. I die cut the poinsettia and greenery pieces from white cardstock and inked them before assembling the pieces. The background was embossed with a holly and ivy embossing folder and I added the sentiment with foam tape. The flowers were placed around the sentiment and I added some iridescent gems to finish off the card. 

Come and join us at MTTCC and show us your projects with Christmas quotes. 

You have two weeks to link up your project. 

We can’t wait to see what you create! 

Enjoy,

Alyson

Thursday, April 13, 2023

Hugs with Orange Flowers

 Sometimes colour combinations that we don't usually choose just work and this is one of them. I was afraid the orange and black would be kind of Halloween-looking but it turned out ok. 

The flowers were hot foiled, stencilled and die cut. I hot foiled a leaf background in gold on black glitter paper and used that for the base. I added a die cut floral border in white and then arranged the flowers just under the black stitched rectangle. I chose a large sentiment for the top and I didn't add any embellishments as there was enough detail on the card already! 

Enjoy,

Alyson
Wednesday, April 12, 2023

No-one Compares to You in Yellow

 I have had this floral set for a while and just haven't had time to play with it until today! I used the hot foil plate, the stencils and the die for the flowers. 

Once the flowers were complete, I cut them apart so I could arrange them on the card. I put a die cut lace background on the card base and then arranged the flowers where I wanted them around the rectangle border. The border and the flowers were adhered with foam tape and I added a hot foiled sentiment at the top. Several gold gems were placed around the card as a finishing touch. 

Enjoy,

Alyson

Tuesday, April 11, 2023

TSOT 602 - Rainbow Thinking of You

 Welcome to Try Stampin' on Tuesday Challenge 602!

It is an either/or challenge this week - choose the theme or the sketch - or do both! 

I chose to use both elements. 

I stencilled a flourish background using distress oxide inks and matted it with black cardstock. The circle was die cut and I added a piece of grey cardstock in the centre. Those pieces were adhered to a background that was die cut with a stitched background die. The sentiment was adhered across the elements and I coloured some tiny sparkles in rainbow colours to add around the circle. A few iridescent gems were placed around the card to finish it off. 

Come and join us at TSOT and show us how you interpret this week's challenge. 

You have two weeks to link up your project. 

We can’t wait to see what you create!

Enjoy,

Alyson

Monday, April 10, 2023

AH 520 - You're Amazing Blue Wreath


Welcome to Atlantic Hearts Sketch Challenge 520!

There are so many possibilities with this sketch - I kept pretty much to what is shown although I did eliminate the square behind the wreath. 

The background was ink blended with four shades of oxide inks and splattered with water. I cut a piece a silver glitter paper on which to build the wreath. The dark blue wreath was die cut and I cut several pieces of "greenery" from several shades of blue cardstock. I traced the wreath onto white cardstock and cut a background to go behind it. The leaves were arranged around the wreath and I added a stamped sentiment across the centre. Some clear gems were added to finish off the card. 

Come and join us at Atlantic Hearts and show us how you interpret the sketch shown above. 

You have until Sunday evening to link up your project. 

We can’t wait to see what you create! 

Enjoy,

Alyson

Sunday, April 9, 2023

Birthday Card with Vines

 I recently received this vine stencil and wanted to use it for something! 

I used shades of yellow and green Distress Oxide inks to stencil the vines onto white cardstock. The sentiment was stamped with dark green ink and I coloured in the tiny flowers and leaves. That piece was adhered to the same dark green cardstock as I used to mat the vines and the smaller word. Some yellow gems were added to finish off the card. Easy! 

Enjoy,

Alyson

Saturday, April 8, 2023

SS 723 - Yesterday was Heavy...

 Welcome to Sketch Saturday Challenge 723!

The optional theme (in addition to the sketch) is "pick me up". 

I started by inking a piece of white cardstock with blue ink and splattering it with water. The background piece was created by dragging a dark blue in pad around the edges and I did the same thing to create the diagonal strip and the mat for sentiment. The flower was stamped, coloured and fussy cut and added to a die cut circle with a yellow border. The sentiment was placed at the top and I added a few clear gems and then brushed the lines of the flower with a clear shimmer brush. 


Come and join us at Sketch Saturday and show us how you interpret this week's sketch. 

You have two weeks to link up your project. 

We can’t wait to see what you create! 

Enjoy, 

Alyson

Friday, April 7, 2023

CD 543 - Happy B-Day

 Welcome to Colour Dare Challenge 543! 

I love challenges like this one - pick ONE colour and use it with black and white. I chose to use yellow. 

I created my own base background by laying white cardstock strips on a white base. It provides a little extra dimension. That piece was adhered to a black mat and then to the white card base. The word HAPPY was die cut and I used the black outline only. I layered thin strips of three shades of yellow cardstock onto a piece of printer paper and then die cut the word again. Those inner pieces were inserted back into the black outline. A small bee was stamped, coloured and die cut and I stamped the word "day" and placed it under the bee. No embellishments were added - I thought this looked great as a clean and simple card!


Come and join us at Colour Dare and show us how you interpret this week's challenge. 

You have two weeks to link up your project. 

We can’t wait to see what you create! 

Enjoy,

Alyson