Wednesday, May 31, 2023

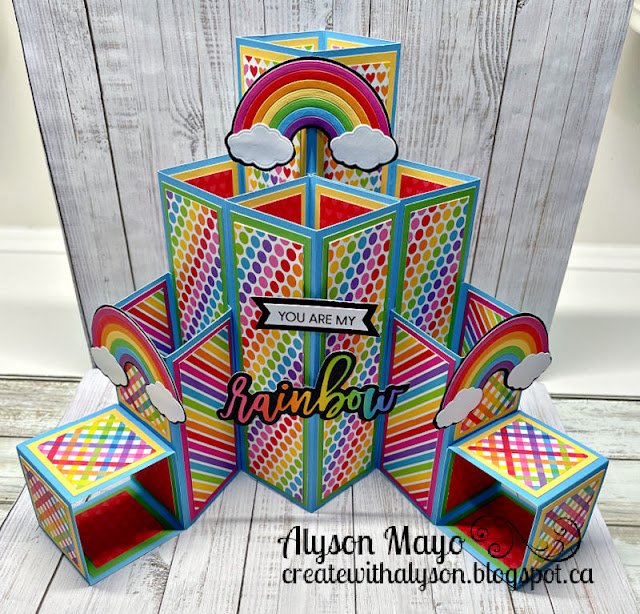
Rainbow Extended Cube Card

 Well this was a lot of fun to make! 

Rainbow colour schemes always make me happy so I decided to use that. This card honestly is not difficult but it is extremely time consuming to make. There are a lot of layers and deciding which patterns go in each spot does take some time. 

Once all the panels were covered, I die cut some rainbow pieces and added two clouds at the bottom of each. I adhered the rainbows to black cardstock and fussy cut around them because the colours were getting lost with so much going on in the background. I used several DO inks to blend a rainbow background and die cut the word "rainbow from that. I didn't add any embellishments as this card is pretty thick when it is folded down (folds down to 8" x 8"). I finished the back as well and there is a place there to write a message. 


I am entering my card in the Creative Creases Challenge (anything goes with a fun fold). 

Enjoy,

Alyson


Butterfly Tunnel Card

 Once in a while, I need a special thank you card - this is one of them. 

The tunnel layers were die cut from white cardstock and adhered together with thin foam tape. The background was ink blended with three shades of ink and placed behind the opening. I die cut the butterflies from some alcohol inked cardstock and added a black body to each. They were placed around the tunnel opening and I added some clear gems around the card. The inside is finished as well. 

Enjoy,

Alyson

Tuesday, May 30, 2023

Stencilled Flowers

 This stamp and stencil set from Altenew is simply gorgeous! There is also an embossing folder but I didn't use it for these cards.

My intention was to stencil the peonies in two different colours - one set in orange and the other in yellow. I accidentally used the orange ink on the LAST stencil on the yellow flowers so I had to adjust and go back with some other orange inks... such is life. I adhered each card to a black glitter foam background and then to the card base. The sentiments were die cut from black glitter paper and white cardstock and I stamped the second half. I added some Stickles to the centres of the flowers to finish off these pretty cards. 

Enjoy,

Alyson

Monday, May 29, 2023

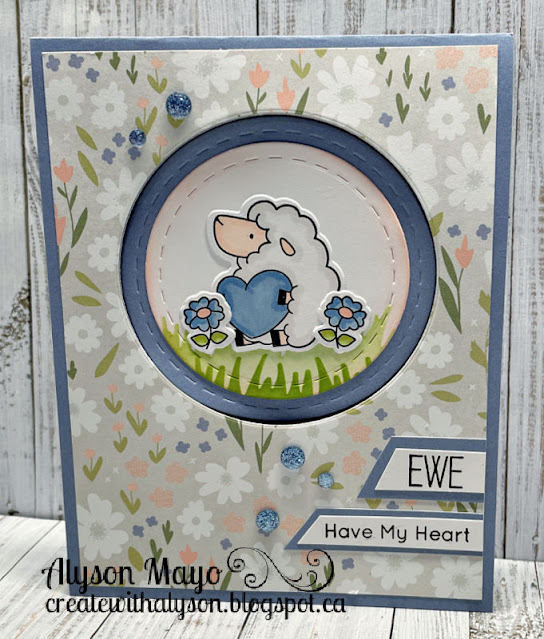
Ewe Have my Heart Fun Fold Card

 This cute fun fold card design was shared with me by a good friend - she had arranged it on the Cricut but it is easy to cut manually as well (that's what I did). 

The patterned paper is old CTMH paper and I based the colours around that paper. The ewe and the flowers were stamped, coloured and die cut. Those images were arranged on a die cut circle and I stencilled some grass and inked the edges of that piece. Inside the card, a piece of peach cardstock was embossed on one side and the circle image was attached to that so it opens with the inside piece. There is also a sentiment stamped on another circle that fits under the top one (it sounds confusing but it really is easy!) I added a few blue gems to the front of the card, along with the sentiment strips. 


Enjoy,

Alyson

Sunday, May 28, 2023

A Happy Hello Card Set

 Card sets are what I create when I attend events - they are way to prep ahead of time and bring only what I need to make several cards at once. 

This pretty set was created using A Happy Hello from Gina K. Designs. I stamped and stencilled lots of flowers and leaves in two colour schemes and die cut them. They were arranged on four different card styles. Each card also has a stamped sentiment. I made three sets of eight cards in this style. 

Enjoy, 

Alyson


Saturday, May 27, 2023

Love You in Blue

 This pretty card was scrap-lifted from Gina K Designs' website. I love the soft appearance of the flower with the stencilling underneath. 

I stencilled the flower and fussy cut it, along with a few leaves. The background was stencilled with a lattice stencil and grey ink, gradually getting lighter toward the bottom. I also inked white cardstock and die cut the work LOVE from that. The flower and sentiment pieces were arranged on a white card front and then adhered to a black mat before being adhered to the card base. Some clear dew drops finished off this pretty card. 

Enjoy,

Alyson

Friday, May 26, 2023

DT 139 - Bluebird with Plaid

 Welcome to Double Trouble Challenge 139!

It's a masculine challenge this time, with a touch of plaid. Please visit the Double Trouble Challenge Blog for detailed information. 

I pulled out a layered bird stamp that I haven't used for ages! The bird was stamped in three shades of blue ink and I coloured the beak and added the feet before die cutting that image. A blue plaid background was adhered to my card base and I added a die cut frame on top of that. A smaller frame was cut for the centre and I inked that with the lightest shade of blue before adding the bird on the branch. The sentiment was stamped in the same three shades of blue ink to create an ombre effect. Aside from a few blue gems, I didn't add anything else to this card. 

The photo below shows that frustrating moment when you think your paper is lined up and it isn't... we have all been there, right? 

Come and join us at Double Trouble and show us your masculine cards. 

You have two weeks to link up your project. 

I am also linking up my card with the Festive Friday Challenge (I used the following: monochromatic, blue, masculine, plaid and die cuts).

We can’t wait to see what you create! 

Enjoy,

Alyson

MTTCC 61 - Two Holiday Cards in Shades of Blue

Welcome to My Time to Craft Christmas Challenge 61!

The theme this week is to use branches, wreaths or greenery. 

I was not sure if my idea for this project would work but I am very happy with how it turned out! There was a lot of preparation work for this card before it was assembled. The background was created with magical powders and while that was drying, I stamped, stencilled and die cut several poinsettias images. I also hot foiled some circles and holiday sentiments and die cut those. The gold background was also die cut. Once everything was prepared, I added the gold die cut to the background and trimmed that to fit on a piece of blue cardstock. The circle was added and the poinsettias were placed around the left side. The sentiment was adhered with foam tape and I added some gold gems to the centres of the flowers. 


I made a second card for this challenge. 

I embossed the branch along with the three hanging snowflakes in silver. The snowflakes were coloured and I splattered blue paint on the entire card front after inking the edges with a dark blue ink. The sentiment was stamped at the bottom and I used craft foam to adhere the card front to the base. 


Come and join us at MTTCC and show us your Christmas projects with a sentiment. 

You have two weeks to link up your project. 

We can't wait to see what you create! 

Enjoy,

Alyson

Thursday, May 25, 2023

Triple Butterfly Split Panel Cards

 These two cards were inspired by a recent video done by Jennifer McGuire. 

The butterflies for both cards were stamped, stencilled and die cut. I chose different butterflies for each card but the premise is the same. There of them were aligned along the left side of a split front fold card. The backgrounds were embossed - the white one using a chevron pattern and the mixed colour one using a  quilt pattern. I added a stamped sentiment across the centre of the middle butterfly and placed some teal gems around the images to finish off each of the cards. I also added a butterfly inside each card. 


Enjoy,

Alyson

Wednesday, May 24, 2023

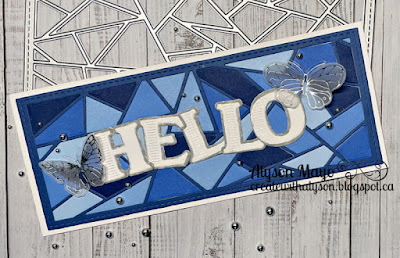
Paper Pieced Slimline Cards

 I have a slimline die that cuts all sorts of triangular shapes. I die cut six of them in shades of blue. My intention was to create six separate cards but keeping track of the pieces became a little overwhelming so I made two cards instead. 

The various shades of blue pieces were inserted back into the outline for these two cards. I hot foiled some letter dies and coloured around the outside edges with a silver glitter pen. They were arranged on the front of the cards and I added some butterflies that were hot foiled on vellum. A few silver gems finished off each card. 


Enjoy,

Alyson

Tuesday, May 23, 2023

TSOT 608 - You're Awesome Flowers

 Welcome to Try Stampin' on Tuesday Challenge 608! 

The optional theme (in addition to the sketch) is to create a scene. 

I sort of created a scene with the flowers on my card. I used a hot foiled hexagon for the outline and lightly inked inside that section and used a darker ink for the outside and splattered that with water. The flowers were stamped, stencilled and die cut and I arranged them inside the hexagon. The bottom of the sketch called for a border so I used two colours of glitter paper and punched a scalloped border on one of them. The sentiment was stamped and outlined with another hot foiled hexagon. A few white gems were added in the corners to finish off the card. 


Come and join us at TSOT and show us how you interpret this week's sketch.

You have two weeks to link up your project. 

We can’t wait to see what you create! 

Enjoy,

Alyson

Monday, May 22, 2023

AH 526 - So Grateful for You

 Welcome to Atlantic Hearts Sketch Challenge 526!

I decided to use a green theme with various leaf images. 

The background paper is what drove my decision and the types of leaves I used. I have a die set that has a few of the same types of images and I die cut some of them from various shades of green. I blended grey ink around the outside of the centre circle and arranged the leaves inside an ornate circle outline and adhered that to the left side of the card. I stamped a sentiment in dark grey and added it across the lower half of the circle. There are a few grey gems placed at the edge of the sentiment was well. 

Come and join us at Atlantic Hearts and show us how you interpret this week's challenge. 

You have until Sunday evening to link up your project. 

We can’t wait to see what you create! 

Enjoy,

Alyson


Sunday, May 21, 2023

Stencilled Magnolia Cards

 I just love the cling magnolia stamp and layering stencil set from Pinkfresh Studio - the stencil colours in some of the flowers, but not all of them. 

These two cards are based on ideas found on the Pinkfresh website. The magnolias were stamped and stencilled and I used glitter paste on top of the last layer. The flower pieces were cut down to fit behind a scalloped border die. I used varying shades of pink and purple cardstock across one of them and heat embossed the sentiment on black cardstock. The other one has a piece of vellum across the card with the sentiment embossed in black. A few clear gems were added around the sentiments to finish off each card.


Enjoy,

Alyson

Saturday, May 20, 2023

SS 726 - Just a Note Tiny Triangles

 Welcome to Sketch Saturday Challenge 726!

The optional technique this week (in addition to the sketch) is sponging. 

I ink blended (sort of sponged) a panel with Distress Oxide inks and die cut a pile of tiny triangles. They were arranged on a black card front along the left side. I realized after I had adhered them that the centre line of images was darker on the sketch. I decide to add a gold gem in the centre of each "circle" for that component. The sentiment was hot foiled in gold and placed at the bottom with foam tape. I added a few more gems around the sentiment and mounted the black front to a gold piece and then to the white card base. 


Come and join us at Sketch Saturday and show us how you interpret this week's challenge. 

You have two weeks to link up your project. 

We can't wait to see what you create!

Enjoy,

Alyson

Friday, May 19, 2023

CD 549 - You are Beautiful

 Welcome to Colour Dare Challenge 549!

It's a tic-tac-toe board this week - choose any row, column or diagonal for your colours. You may use additional colours but they must be from the colours on the grid. 

I used the bottom row (Seabrook, Peach and Papaya) plus Harbour, Shortbread and Pine.

The background was die cut from Harbour cardstock using a piercing plate. The flowers were stamped and colour was added using layering stencils. They were die cut and I placed them above and below the stamped centre piece (Shortbread). I used that same colour for the card base. Some dew drops were added around the card to finish it off. 

Come and join us at Colour Dare and show us how you interpret this week's challenge. 

I am also entering this card into the Beautiful Blossoms challenge

You have two weeks to link up your project. 

We can’t wait to see what you create! 

Enjoy,

Alyson

MTTC 508 - Pair of Floral Cards

 Welcome to My Time to Craft Challenge 508!

The theme for this challenge is dry embossing. That can be done using an embossing folder or manually using a stylus. 

I based my first card from one made in a recent video by Jennifer McGuire. The flowers and leaves were stamped (layering stamps) and die cut. I arranged them on a die cut shape that extended from the top to the bottom of the card. One flower and a leaf allow the card to stand on its own. The panel behind the images was embossed with a rose embossing folder. The sentiment was hot foiled with silver holographic foil and that was added with foam tape. Some dew drops were also placed on the flowers. I added a flat section inside for a place to write a message. 


I also made a second card for this challenge. 

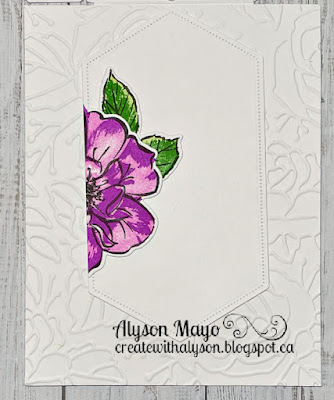
This one uses a background that was embossed using a stencil. I inked the cardstock first and then ran it through my die cutting machine using a stencil to emboss the maze-like pattern. I splattered white ink on that piece and then die cut the flowers and leaves. They were inked for more dimension and added to the bottom of the card, along with a hot foiled sentiment. Some gold metallic thread and gold gems finished off this card. 

Come and join us at MTTC and show us your projects that include dry embossing. 

 I am also entering my first card into the Beautiful Blossoms challenge

You have two weeks to link up your project. 

We can't wait to see what you create!

Enjoy,

Alyson

Thursday, May 18, 2023

Inset Panel Card

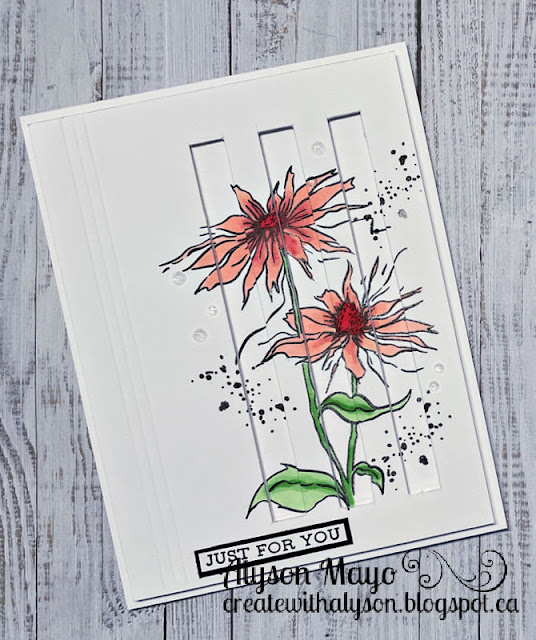
 I have seen several versions of this card style - the raised background against the inset panels creates such a neat effect. 

I stamped and coloured a floral image and also dry embossed three lines on the left side of the card front. I carefully cut out three sections using a craft knife. The front panel was adhered to a white card base with foam tape and I replaced the cut out panels without foam tape, creating a dimensional scene. The sentiment was stamped and adhered to black cardstock before being adhered to the card front. A few clear gems finished off this pretty card. 

Enjoy,

Alyson

Wednesday, May 17, 2023

Hugs Floral Wreath

 Scrapbook and Cards posts terrific sketches each month and I decided to use one of them as the basis for this card. 

I die cut two hexagons and offset them on a piece of woodgrain paper. The flowers and leaves were die cut from coloured cardstock and inked for additional interest. They were arranged along the left side and bottom of the wreath. I added two hot foiled sentiments and a few dew drops to finish off the card. 


Enjoy,

Alyson

Tuesday, May 16, 2023

Floral Gift Card Holder

 This card is another that was created for the 30 Minute Card Making Stash and Dash.

The parameters were as follows: card with a pocket, purple and grey, colouring and use a sticker. The sticker element can also be to stamp and adhere something since not everyone uses stickers (I don't). 

I made a card design that I have made before - it has a gift card opening inside. I used some beautiful patterned papers with a purple and grey theme (plus some blue). I added a film strip die with stamped and coloured images both on the front and inside. The second inside panel has a butterfly on it. A few dew drops were added to the front of the card. I also stamped You are Loved all around the inside edge. 


Enjoy,

Alyson

Monday, May 15, 2023

DT 138 - Skunky Birthday

 Welcome to Double Trouble Challenge 138!

Kraft and animals - a great combo! Check out the detailed information on the Double Trouble Challenge blog

I wanted to use this adorable little skunk on my card. I stamped and fussy cut him and created a stump on which he could stand. The background was die cut using a background die (just enough to put a pattern onto the Kraft paper). I added the skunk in a hexagonal frame and die cut two more frames to go around that one. The sentiment was added at the bottom and a few clear dew drops were placed around the card. 

Come and join us at Double Trouble and show us how you interpret this week's challenge. 

You have two weeks to link up your project. 

I am also linking up my card with the challenge at Crafter's Cafe (animals).

We can’t wait to see what you create! 

Enjoy,

Alyson

Sunday, May 14, 2023

Triple Leaf Card

 I like to participate in Sketchy Saturday, posted by a friend of mine. 

The sketch is shown below. 

I chose shades of blue-purple for the side pieces. They each have a leaf embossed on vellum and I arranged them from lightest to darkest. The sentiment was stamped along the left side and I inked around the edges of the base piece in the same shades as the papers, gradually getting darker toward the bottom. A few patterned gems were added to finish off this easy card. 

Enjoy,

Alyson

Corner Bookmark Card

 I have wanted to make one of these cards for a long time - it's just time... I need more hours in the day! 

The colours in the pictures didn't turn out well - this card is much more vibrant than what the photos show. The bookmark is attached on the top right corner of the front panel. That piece can be removed and used to mark a reading spot in a novel. The front section opens to the side and the entire card also opens to the side, leaving a place to write a longer message inside. I used some retired SU papers and a leaf stamp set to stamp and die cut the leaves.  A small splatter stamp was used around the bookmark image and inside the first flap as well. I did not add any embellishments - this card is very front heavy and I didn't want to make it any heavier! 


Enjoy,

Alyson