Thursday, September 30, 2021

Pull Tab Gnome Card

Laura Beacham shared an adorable pull up card on her Facebook page and she also included a free Cricut Design Space file. I used that file to create this card.

The base, gifts and moveable parts were all Cricut cut. I stamped, coloured and die cut the little gnome and added him to the slider. Happy Birthday was stamped under the gnome so it shows only when the slider is at the bottom. I used a background stamp for the colours along the sides and outlined the card front with a Sharpie marker.


Products used are Close To My Heart unless otherwise indicated: 

Paper: White Daisy Cardstock, Bluebird Cardstock, Capri Cardstock, Sapphire Cardstock, Sapphire Glitter Paper, White Cards and Envelopes 

Stamps and Dies: Mini Garden Gnomes plus Dies, Splash of Colour, Happy Birthday

Inks: Capri, Intense Black (SSS)

Accessories: Cricut File, Sharpie Marker, Tri-Blend Markers, Foam Tape, Thin Foam Tape

Enjoy,

Alyson

Wednesday, September 29, 2021

I Woof You Slimline

I love dog images and this stamp set is such a cute one. The dogs look so playful and are hard to resist! 

The background was die cut to provide a stitched border and I cut three circles from the brick paper. I also cut borders for the circles and the inside of the circles were die cut from red cardstock. The doggies were stamped, coloured and die cut and added to the centres of the circles. The sentiment was stamped and die cut with a circle border and I brushed the words with a red shimmer brush. The last step was to colour some white acrylic hearts and add them around the images. 


Products used are Close To My Heart unless otherwise indicated: 

Paper: In Good Taste Paper Collection (SU), White Daisy Cardstock, Candy Apple Cardstock, Pewter Cardstock 

Stamps: I Woof You (plus thin cuts) 

Inks: Intense Black (SSS)

Accessories: Circle Dies (Nestabilities), Slim Stitched Rectangle Essentials Dies (PFS), Touch Markers (misc.), Red Sharpie Marker, White Acrylic Hearts, Red Shimmer Brush

Enjoy,
Alyson


Tuesday, September 28, 2021

Sending You a Hug - Heart

I find colouring to be relaxing and it is often a good project to do when I don't feel like pursuing something larger. I have some digital images ready to colour for that very reason and this is one of them. 

The image and the sentiment were printed on the same paper and I used a variety of markers to colour the heart. I wanted to stay with a few colours rather than using a larger mix. Once the colouring was finished, I added some black dots around the image and also two shades of Liquid Pearls. I hand-stitched a pink metallic border before adhering the card to a border piece and then to the card base. 

Products used are as follows: 

Paper: White Daisy Cardstock, Teal Cardstock (scrapbook.com), Neenah Solar White Cardstock 

Stamps: none

Inks: none

Accessories: Digital Heart and Sentiment (Angie Blom Digital Designs), Copic Markers, Tri-Blend Markers, Juniper Liquid Pearls, Dazzle Liquid Pearls, Sharpie Marker, Pink Metallic Thread. 

Enjoy,

Alyson

Monday, September 27, 2021

AH 440 - Hello Lovely

Welcome to Atlantic Hearts Sketch Challenge 440! 

The sketch is shown in horizontal orientation and I used that format for my card. 

The black patterned papers are from the Black Love Story paper pack from CTMH. I left a small white outline around each piece. The square was die cut from black cardstock and a white piece was adhered behind. I used Tumbled Glass DO ink to lightly add some blue to that background piece. The flowers and leaves were stamped, coloured and die cut. They were added to the centre of the square, some pieces with foam tape. The sentiment was stamped and placed along the left side of the square. I added some metallic thread and used a black marker to add some dots around the image. The last step was to brush the lines of the flowers with a clear shimmer brush. 


Come and join us at Atlantic Hearts and show us how you interpret the sketch shown above.

You have until Sunday evening to link up your project. 

We can’t wait to see what you create! 

Products used are Close To My Heart unless otherwise indicated: 

Paper: Love Story - Black Paper Pack, White Daisy Cardstock, Black Cardstock, White Cards and Envelopes 

Stamps: Isabella Scrapbooking Stamp and Thin Cut, Easy Expressions (The Ton)

Inks: Intense Black (SSS), Tumbled Glass DO Ink

Accessories: Stitched Square Thin Cuts, Clear Shimmer Brush, Copic Markers, Foam Tape, Pink Metallic Thread, Black Journaling Pen 

Enjoy,

Alyson


Sunday, September 26, 2021

Giraffe Humour

More digital images... still something that is very new to me. These ones are humorous giraffes. There are several images in the group but only two are shown here. 

The images were printed on white cardstock for colouring purposes. I didn't want a white background so I printed them again on sticker paper and fussy cut each image. I applied the sticky paper to the coloured images and then used Distress Oxide inks to create a background for each. The pink one was blended from dark in the center to a lighter shade around the edges. The other card was blended in a rainbow colour scheme and then I splattered water on top. I added a few pieces of black patterned paper at the top of each card. 


Products used are as follows: 

Paper: White Daisy Cardstock, Wildberry Cardstock, Black Cardstock, Misc. Patterned Paper (all CTMH), Neenah Solar White Cardstock 

Stamps: none

Inks: DO Inks - Spun Sugar, Kitsch Flamingo, Picked Raspberry, Squeezed Lemonade, Carved Pumpkin, Festive Berries, Wilted Violet, Mermaid Lagoon, Mowed Lawn

Accessories: Angie Blom Digital Designs, Copic Markers, Tri-Blend Markers, Black Journaling Marker, Clear Shimmer Brush (CTMH)

Enjoy,

Alyson

Saturday, September 25, 2021

Circle Swing Fold Cards - Poinsettias and Pumpkins

This is a circle swing fold card. The first card was created using a Cricut Design Space file from Julie Carriere. It made the assembly of this card so very easy as everything was cut on the Cricut. She also provided the pieces for the poinsettia so I used that for the centre of the circle. 

The patterned papers have beautiful poinsettia and holly images on them - I paired them with some CTMH cardstock. The panels were decorated and I assembled the poinsettia to go in the front circle. White beads were used for the center of the flower. The sentiment "joy" on the back was stamped and I added some Stickles to the flourish. 


The second card was resized to a standard A2 size card - that wasn't the easiest thing to do! Rather than using the Cricut, I used circle dies to cut the opening and the extra circles. Lining up dies exactly is difficult... The theme of this second card is autumn with a focus on pumpkins. I coloured and fussy cut the pumpkins and leaves to add to the front. The sentiment on the back was stamped with two colours and I added some Goldenrod Stickles around the phrase. 


Products used are Close To My Heart unless otherwise indicated: 

Paper: Jingle All the Way Paper Collection (Simple Stories), Pumpkin Spice Paper Pack, White Daisy Cardstock, Ruby Cardstock, Scarlet Cardstock, Evergreen Cardstock, Black Cardstock, Paprika Cardstock, Harbour Cardstock, Sage Cardstock

Stamps; Flourishing Joy, A World with Octobers

Inks: Intense Black (SSS), Paprika, Harbour 

Accessories: Nesting Circle Dies (Spellbinders), White Beads (misc.), Copic Markers, Touch Markers, Ruby Slippers Stickles, Goldenrod Stickles

Enjoy,

Alyson

Friday, September 24, 2021

CD 463 - Thankful x2

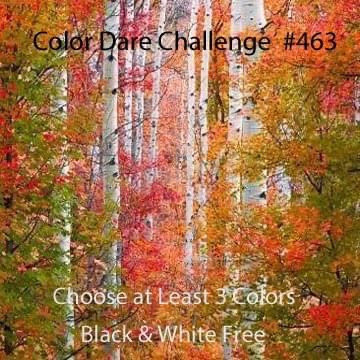
Welcome to Colour Dare Challenge 463! 

We have a beautiful autumn image this week - you can select any colours from the image plus black and white. 

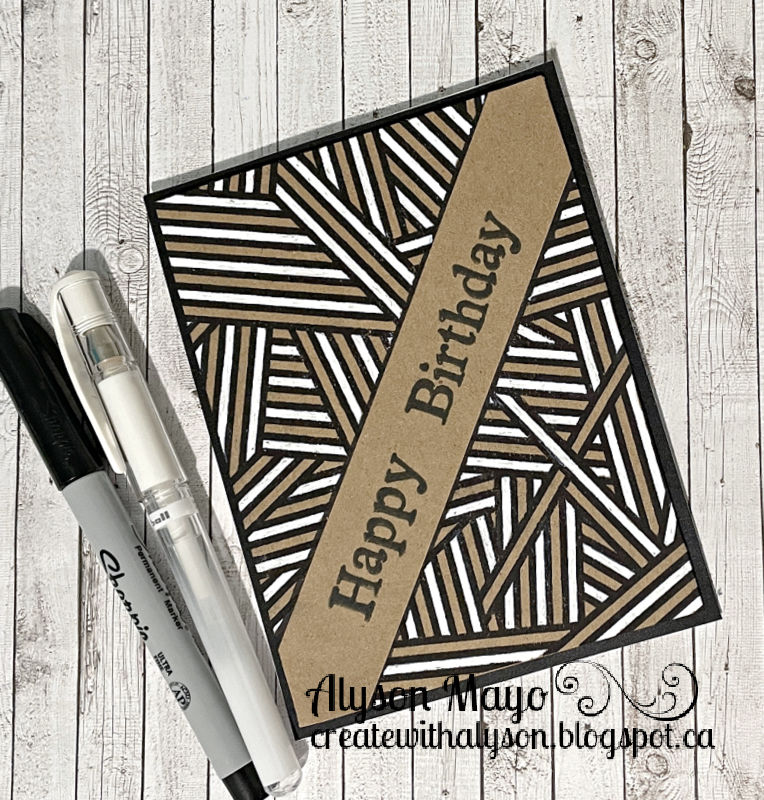
I created two cards - not intentionally - but the first one didn't turn out quite as I had expected... I will post both of them here. 

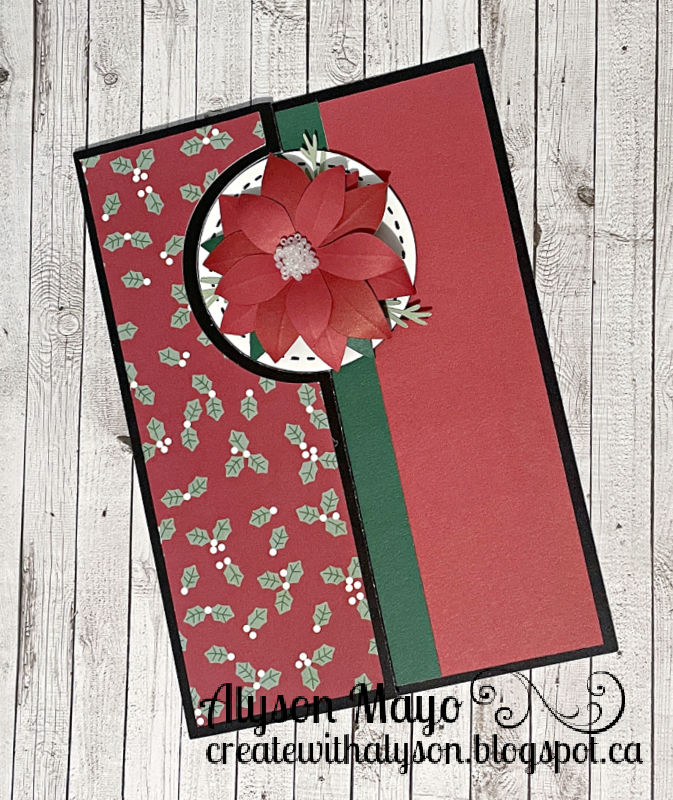
This is actually the second card that I made... I used a pattern from Make It From Your Heart Volume 4 (CTMH). The panels of patterned paper are from a variety of paper packs. I disassembled the packs where I only had 1 full sheet of paper or less and combined them into colour related packages. The cross piece was stamped on Linen cardstcok in two colours and adhered to green glitter paper. After the panels were adhered, I stamped a border around the edge as well. The flower was cut from an inked piece (using Distress Oxides) and a backing piece of Fern cardstock was placed behind the leaf. It looks like the veins are on top but they really are on the back. I added a fw sequins to finish off my card. 

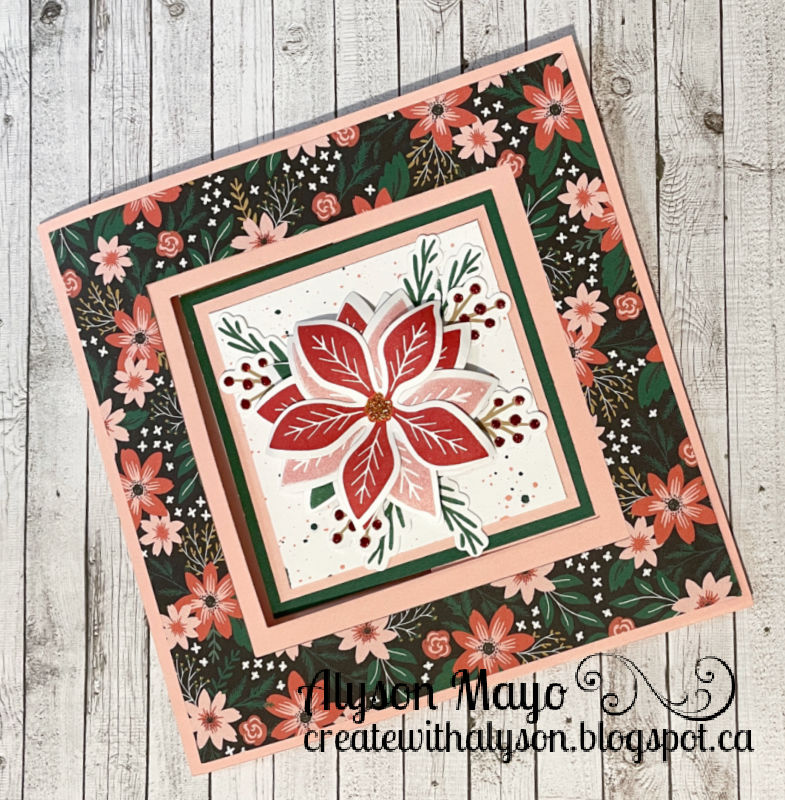
The first card that I made is below. I used a birch tree background die and rather than cutting it, I embossed it onto Linen cardstock. I used the same colour ink to drag over the embossed image, separating the trees a little better. The trees along the bottom were masked and stamped on Linen cardstock and fussy cut at the top. I added some coordinating ink around the edges. A simple sentiment was stamped in two colours and added to the top. 

Come and join us at Colour Dare and show us how you interpret this week's challenge. 

You have two weeks to link up your project. 

We can’t wait to see what you create! 

Products used are Close To My Heart unless otherwise indicated: 

Paper: Misc. Patterned Paper, Linen Cardstock, Fern Cardstock, Green Glitter Paper, Neenah Solar White Cardstock

Stamps: Always Grateful, Boutique Cardmaking

Inks: Ruby, Goldrush, Sundance, Fern, Espresso, Linen, DO Inks: Mustard Seed, Candied Apple, Peeled Paint 

Accessories: Leaves Thin Cuts, Birch Tree Die (GMD), Touch Markers, Green Sequins (misc.) 

Enjoy,

Alyson

Thursday, September 23, 2021

Daisy Wreath Fold Out Card

This is a fold out card - there are five sections. The idea came from Jennifer McGuire - she used a solid sunflower image to create her card. I chose an open wreath - and it was much more difficult to make as there were only very small sections that touched each other when the panels were reversed. 

The wreath was created using a series of five stencils. Two panels were inked on the correct side and two panels were inked with the stencils turned backwards. Each panel was die cut and I also cut five extra white ones so each of the inked panels would have a backing and there would be one panel remaining to write a message (in a circle...)

The sentiments were all stamped and cut to the same width. Once the first one was placed, the others were lined up with that piece so all the wreaths and sentiments would all be aligned. The wreath parts were joined with tiny pieces of acetate. Had I thought about this carefully before I began, I would have chosen a solid image and one where the edges touched the reverse image in more spots!


Products used are as follows: 

Paper: White Daisy Cardstock (CTMH), Acetate

Inks: Be Mine, Flirty Fuchsia, Royal Treatment, Limoncello, Tiara, Grass Skirt, Lime Rickey (all Catherine Pooler)

Stamps/Dies/Stencils: Daisy Wreath, Choose Hope (both Pink Fresh Studio) 

Enjoy,

Alyson

Wednesday, September 22, 2021

Fishy Pull Tab Card

This was so fun to create! The fish slides back and forth when the tab is pulled.

The background was created using a wide variety of Distress Oxide inks and a sunburst stencil. Once all the colours were blended, water droplets were splattered over the background. That piece was left to dry and in the meantime, I stamped, coloured and fussy cut all the images on the card. I didn't want a white border around the images which is why I chose to fussy cut each of them. 

Once the background was dry, I adhered the seaweed and also stamped some small fish. If you look carefully, you will see that there are bubbles coming from the yellow and green fish's mouth. The pull tab was created and the fish was attached. It's so neat to see the fish side back and forth. There is a video link below where you can see the fish in action. 

Here is the video

.

Products used are listed below: 

Paper: Neenah Solar White Cardstock, Black Cardstock 

Stamps: Fishy Greetings, Border Tab (both CTMH)

Inks: Archival Black Ink, Lagoon Ink (both CTMH), DO Inks: Black Soot, Chipped Sapphire, Mermaid Lagoon, Salty Ocean, Broken China, Peacock Feathers, Stormy Sky, Tumbled Glass

Accessories: Layered Sunburst Stencil (Pink Fresh Studio), Tri-Blend Markers, Foam Tape, Small Magnets 

Enjoy,

Alyson

Tuesday, September 21, 2021

TSOT 525 - Praying for You

Welcome to Try Stampin' on Tuesday Challenge 525!

It's an either-or challenge this week... you can use the sketch, the theme or both! I decided to use both for my card. I rotated the sketch 90 degrees. 

I used some green-grey patterned paper (Mink) for the front and the coordinating cardstock for the base. Since the pattern is in white, I used white as the middle piece. A circle punch was used to punch out the top right corner. The flowers and leaves were stamped (Mink pigment ink and embossed), coloured and die cut. They were placed over the cut circle section and the sentiment was adhered just under the flowers. I brushed the flowers with a clear shimmer brush and added three clear gems. 


Come and join us at TSOT and show us how you interpret this week's challenge.

You have two weeks to link up your project. 

We can’t wait to see what you create! 

Products used are Close To My Heart unless otherwise indicated: 

Paper: Love Story - Mink Paper Pack, White Daisy Cardstock, Mink Cardstock, Neenah Solar White Cardstock

Stamps/Dies: Isabella Scrapbooking Stamp and Thin Cut, Angel Hugs

Inks: Mink Pigment Ink, Green Apple 

Accessories: Circle Punch, Clear Embossing Powder, Heat Tool, Touch Markers, Tri-Blend Markers, Glacier Gems (Pink Fresh Studio), Clear Shimmer Brush

Enjoy,

Alyson

Monday, September 20, 2021

Blue Poinsettia

A friend of mine posted a sketch challenge on her Facebook page (the sketch is a retired one from a while ago) and I decided to play along. 

Aside from the background for the poinsettia, the papers are all cardstock. The background piece has birch tree images on it and I thought that was an appropriate background for the flower. The poinsettia, berries, leaves and the sentiment are all images from The Ton Stamps that are group layering stamps. The images were stamped and die cut and I spend some time sorting thorough them to find the ones I wanted. 

I inked the edges of the papers to provide more definition. The flower and coordinating images were adhered to the front and the sentiment was raised with foam tape. I added some silver metallic thread and silver glitter gems. The last step was to brush the darkest inked sections on the flower and berries with a clear shimmer brush. 


Products used are as follows: 

Paper: White Daisy Cardstock, Willow Cardstock, Pewter Cardstock, Sapphire Glitter Paper, White Cards and Envelopes, Misc. Patterned Paper (all CTMH)

Stamps and Dies: Easy Expressions - Holiday, Poinsettia Wishes, Berry Branches (all The Ton Stamps) 

Inks: Carolina, Bluebird, Sapphire, Versamark, Black, Willow, Clover, Pewter (all CTMH)

Accessories: Clear Shimmer Brush, Silver Glitter Gems (both CTMH), Silver Embossing Powder (Ranger), Heat Tool, Silver Metallic Thread, Thin Foam Tape 

Enjoy,

Alyson

Sunday, September 19, 2021

Poinsettia Swing Fold Card

I posted an autumn card in this same swing fold style a while ago... this one is for Christmas. 

There is a sentiment inside the card so I chose to create the front of the card without using a sentiment. The poinsettia was stamped and die cut, along with the branches and berry pieces. The pieces were arranged on a series of layered papers, the top one being splattered with two shimmer brushes. Inside, there is a decorative panel as well as a panel with a sentiment and a place to write a message. 


Products used are Close To My Heart unless otherwise indicated: 

Paper: Holiday Stack, White Daisy Cardstock, Peach Cardstock, Evergreen Cardstock 

Stamps: A Dash of Joy, Comfort and Joy (plus Thin Cuts) Inks: Evergreen, Toffee, Candy Apple, Peach, Black 

Accessories: Stitched Square Dies (GMD), Christmas Red Stickles, Goldenrod Stickles, Peach Shimmer Brush, Evergreen Shimmer Brush

Enjoy,

Alyson


Saturday, September 18, 2021

Slimline Celebration

Slimline cards are a terrific way to create a scene using a variety of images. I purchased Close To My Heart's September special called Slimline Celebration. You can create a set of twelve cards (two each of six designs) with a variety of sentiments. I loved the kit and created all twelve of the cards. It was VERY time consuming... tons of die cutting and colouring, both which take a lot of time. 

The set is shown here. There are two of each of these cards and there is a sentiment inside each card as well. This will make a great set of cards for a gift! 


Products used are all Close To My Heart: 

Paper: White Daisy Cardstock, Glacier Cardstock, Lagoon Cardstock, Shortbread Cardstock, Toffee Cardstock, Wild Berry Cardstock, Espresso Cardstock, Peach Cardstock, Avocado Cardstock, Mint Cardstock, Slimline Cards and Envelopes

Stamps and Dies: Fishy Greetings, Thoughtful Critters, Mini Garden Gnomes, Slimline Sentiments 

Inks: Intense Black 

Accessories: Clear Sparkles, Tri-Blend Markers 

Enjoy,

Alyson

Friday, September 17, 2021

Double Trouble 93 and Colour Dare 462 - Ah, Autumn

Welcome to Double Trouble Challenge 93! 

This post is a sneak peek at what is coming on Monday, September 20. 

It's a Something, Anything, Everything challenge this week and Thing 3 also suggests that you include something harvest related in your project. The small graphic is below - please visit the Double Trouble challenge blog for detailed information. 

I am also linking up my card with the Colour Dare challenge. It's a tic-tac-toe grid and I used the following combinations: right column (Toffee, Paprika, Nectarine) plus Harbour, Gold, Shortbread and Mink. 

I used a card design that I love - an open circle background with the focal point in the corner. I die cut three multi-circle window pieces and stacked them on top of Harbour glitter paper. Harbour is a neat colour as it is kind of blue-grey but it can also take on shades of dark green when paired with certain colours. The pumpkins and branches were stamped, coloured and fussy cut. They were arranged in the bottom left corner. I added a stamped sentiment, gold embellishing thread and gold sequins to finish off the card. 

Come and join us at both Double Trouble and Colour Dare and show us how you interpret each of these challenges. 

Double Trouble 93 ends on October 3 and Colour Dare 462 ends on September 30.

We can’t wait to see what you create! 

Products used are Close To My Heart unless otherwise indicated: 

Paper: Shortbread Cardstock, Mink Cardstock, Harbour Glitter Paper, Neenah Solar White Cardstock 

Stamps: A World with Octobers, Always Grateful 

Inks: Harbour, Intense Black (SSS)

Accessories: Multi Circle Thin Cut, Loose Gold Sequins, Gold Embellishing Thread (Misc.), Copic Markers, Tri-Blend Markers

Enjoy,

Alyson


Thursday, September 16, 2021

Embossing on Vellum - White on White Cards

I watched a video by Natasha Foote that had a great idea that I wanted to try. She showed a variety of ways to use embossing folders but this was my favourite! 

Her video showed the concept of dry embossing on vellum and then dragging a Versamark ink pad over the raised sections and wet embossing that section. More about that in a moment...

I decided instead to use an old wood mounted stamp to emboss that image in gold on vellum. I did it twice so I could cut away the outside section of the flower. The centre section was adhered on top of the full flower with foam tape. The background was embossed with a floral embossing folder and I die cut a couple of leaves in white and adhered them beside the vellum flower. I added a small gem in the centre. A sentiment was embossed and adhered to a foil background. The entire card front was mounted on craft foam. 

Back to the original idea... The concept was to emboss part of the embossing folder on vellum and cut out the image. That was to be wet embossed and then adhered back on the dry embossed panel in the same location. Wet embossing vellum that has been raised with an embossing folder is considerably more difficult than it sounds - I had to do it a several times before I figured out how much pressure to put on the Versamark ink pad so as not to get powder on everything! You will notice that the flower has been placed back on the same section where it was dry embossed from the embossing folder. It is a very neat effect! 

Products used are as follows:

Paper: Neenah Solar White Cardstock, Vellum, Silver Foil (CTMH), Gold Foil (CTMH)

Stamps: Card Captions, For All Occasions (both CTMH), Blended Bloom (SU)

Inks: Versamark

Accessories: Rose Embossing Folder, Silver Glitter Gems, Gold Glitter Gems, Heat Tool (all CTMH), Silver Embossing Powder, Gold Embossing Powder (both Ranger), Fancy Flourishing Thinlets (SU), Leaf Stem Die (Melissa Francis), Craft Foam, Foam Tape

Enjoy,

Alyson


Wednesday, September 15, 2021

Merry Christmas Pop-Out Card

My wonderful friend, Trina Wirihana, creates fabulous interactive card designs, colouring sheets and all sorts of other awesome projects. Some can be purchased as a one time purchase and others are available only with a subscription to her site. Her files are all in SVG format so they will work with any electronic cutting machine. The link to her site is here - be sure to check it out! 

This card was created using a Christmas pop-out feature and one of her colouring sheets. I printed the colouring sheet and coloured several presents in various colours. The pop-out feature inside the card was cut from Capri cardstock and mounted inside a slimline card base. I also cut a piece of silver glitter paper to add to the top. A fine tip marker was used to draw lines around the outside. 

The front cardstock was die cut using a stitched die and then three circles were die cut from that panel. I added glitter paper behind and then arranged the presents in each circle. A few clear sparkles were added to finish off the card. 


Products used are Close To My Heart unless otherwise indicated:

Paper: White Daisy Cardstock, Capri Cardstock, Sapphire Cardstock, Silver Glitter Paper, Slimline Cards and Envelopes 

Stamps: none

Inks: none

Accessories: SVG File and Colouring Sheet (Trina Wirihana Designs), Stitched Slimline Dies (Pink and Main), Pointed Circle Dies (Nestabilities), Copic Markers, Touch Markers, Clear Shimmer Brush, Red Shimmer Brush, Green Apple Shimmer Brush, Lagoon Shimmer Brush, Clear Sparkles, Bitty Sparkles, Sharpie Marker 

Enjoy,

Alyson

Tuesday, September 14, 2021

Colouring on Kraft - Birthday x2

I watched a video recently by Natasha Foote and she demonstrated a neat technique on Kraft cardstock. Some images work better for this than others as I learned... ideally an image with lines is the best. 

The only products used are a white gel pen, a black fine tip marker and the stamped image. A stamp press is very helpful because the black image needs to be stamped after the white sections are coloured. It's almost impossible to remain within the lines and stamping a second time help to define those black lines. 

My better attempt at this (my second card) is shown first. I used a background stamp with lines so I could colour in only the ones that I wanted to be white. I had to stamp the image multiple times and realized after I removed the masking tape for the sentiment that the multiple stamping had gone through the tape and left marks on the sentiment panel. I cut another piece of Kraft cardstock and adhered it over the damaged section - no big deal. 

This card was my first attempt... and it was obviously not the best stamp to use for this. After I coloured in sections in both black and white, I restamped the image and added the sentiment. I also drew tiny black dots around the flowers. 

Both cards were adhered to a black base using craft foam for some dimension.

Products used are as follows: 

Paper: Kraft Cardstock, Black Cardstock (both CMTH), Neenah Solar White Cardstock

Stamps: Happy Birthday (CTMH), Striped Jungle Background (SSS), Peony Cluster (Sweet and Sassy Stamps), Handmade Essentials (scrapbook.com)

Inks: Archival Black (CTMH), Obsidian Black Amalgum Ink (Gina K. Designs) 

Accessories: Craft Foam, Black Sharpie Marker, White Gel Pen

Enjoy,

Alyson

Monday, September 13, 2021

AH 438 - Hello in Blue

Welcome to Atlantic Hearts Sketch Challenge #438!

The sketch is very straightforward this week... and I stayed true to the design. 

The background of my card was inked using four shades of blue Distress Oxide inks and then splattered with water. That piece was lightly embossed using a scalloped embossing folder. I cut a piece of Bluebird cardstock slightly larger than the front and then die cut a stitched rectangle from Sapphire cardstock to provide some layers. The sentiment was die cut from silver foil and Bluebird cardstock and adhered to a silver foil stitched bracket die cut. As per the sketch, a small piece of glitter trim was added along the right side along with a bow. I added a few silver sequins to finish off the card. 

Come and join us at Atlantic Hearts and show us how you interpret the sketch shown above. 

You have until Sunday evening to link up your project. 

We can’t wait to see what you create!

Products used are Close To My Heart unless otherwise indicated: 

Paper: Bluebird Cardstock, Sapphire Cardstock, Neenah Solar White Cardstock, Silver Foil 

Stamps: none

Inks: DO Inks: Tumbled Glass, Salty Ocean, Prize Ribbon, Chipped Sapphire 

Accessories: Stitched Rectangle Dies (GMD), Stitched Scalloped Bracket Dies, Phrase Builder - Hello Dies (Pink Fresh Studio), Scalloped Embossing Folder, Blue Glitter Trim (Misc.), Blue Ribbon (misc.), Silver Loose Sequins 

Enjoy,

Alyson

Sunday, September 12, 2021

Stacked Mini Album

This is a stacked mini album. I created it with a friend in mind as she has two young grandchildren. I used the As You Grow collection from CTMH as I also had the Picture My Life (PML) cards and the sticker sheet. It made decorating the album so much faster and easier! 

The album was designed by Janice Gilhooly, a CTMH Maker. If you are interested in the files, contact her via Facebook Messenger. There is a Cricut Design Space file as well. 

The album opens from both sides or it can be opened as an accordion. There are several places for photos and journaling - this is determined by the pieces that you add.

The first photo is the folded album with a tied ribbon. The next two photos show the expanded album from the front and the back. 


Products used are Close To My Heart unless otherwise indicated: 

Paper: As You Grow Paper Pack and Sticker Sheet, As You Grow PML Cards, Linen Cardstock, New England Ivy Cardstock, Harbour Cardstock 

Stamps: none

Inks: none

Accessories: Cricut file, Block Alphabet Thin Cuts, White Ribbon (SU)

Enjoy,

Alyson

Saturday, September 11, 2021

Iris Shaker - Let's Celebrate

Today's card is another iris shaker card - this time for a birthday.

The sentiment reads Let's Celebrate - set on a pair of shimmer tape strips. The iris itself was created using three foil patterns. I wanted the blue to stand out so I alternated the two shades of blue with silver. Some sequins and confetti stars were added inside the shaker and the white paper on top is actually a shimmer white cardstock. That same paper is the border around the card. 

Products used are as follows: 

Paper: Brights Paper Pack (Doodlebug), White Shimmer Cardstock (misc.), White Daisy Cardstock (CTMH), Patterned Foil Paper (misc.), Neenah Solar White Cardstock 

Stamps: Wordfetti (CTMH)

Inks: Sundance (CTMH)

Accessories: Circle Shaker Window Thin Cut (CTMH), Circle Shaker Window Foam and Acetate (CTMH), Silver Shimmer Trim (CTMH), Blue Shimmer Tape (misc.), Blue Sequins (misc.), Silver Star Confetti (CTMH)

Enjoy,

Alyson

Friday, September 10, 2021

Colour Dare 561 - Double Complementary on the Colour Wheel

Welcome to this week's Colour Dare challenge!

We have a specific pattern on the colour wheel for you - it's called a double complementary colour combination. There are six possible combinations and whichever you choose, you must use all four colours. Neutrals are free. 

I really struggled with this challenge - my first three attempts ended up in the recycling bin. I just don't use these colour combinations together... I finally decided on a mixed colour background and used a sunburst die to create that. 

The outline of the die was cut using a grey-black sparkle paper and I cut that twice. The inner pieces were cut from the same die but in four colours. I organized the pieces I wanted into the openings, removed the outline and embossed the pieces before placing them back into the outline. I stamped and die cut some poppies and the sentiment was die cut and stacked several times. Some clear gems were added around the card and the center of the poppy was brushed with a black shimmer brush. 

Come and join us at Colour Dare and show us how you interpret this colour challenge.

You have two weeks to link up your project. 

We can’t wait to see what you create! 

Products used are as follows:

Paper: White Daisy Cardstock, Candy Apple Cardstock, Nectarine Cardstock, Willow Cardstock, Bluebird Cardstock (all CTMH), Grey-Black Shimmer Paper (unknown), Neenah Solar White Cardstock

Stamps/Dies: Painted Poppy (Altenew), Blessings (Photoplay), Sunburst Die (CTMH)

Inks: Willow, Clover, Candy Apple, Ruby, Archival Black (all CTMH)

Accessories: Glacier Gems (Pink Fresh Studio), Dot Embossing Folder (Cuttlebug), Black Shimmer Brush (CTMH)

Enjoy,

Alyson