Monday, November 30, 2020

Double Trouble 72 - Winter Scene

Welcome to Double Trouble Challenge 72! 

Since it’s the 5th Monday in the month, this is a “Something, Anything, Everything” challenge, meaning anything goes. However, there are extra chances to be entered into the prize draw by creating something with snow and linking your project to one of our partner challenges. All details can be found on the Double Trouble Challenge Blog

I decided to create a winter scene and the best way to do that was to use a slimline card. I inked the background using Chipped Sapphire and Black Soot inks to create a night sky with a moon. I splattered some water and also used the Clear Shimmer Brush to both brighten the sky a bit and add the effect of falling snow. I used a small star stamp and white pigment ink to stamp some random stars in the sky as well. 

The images were stamped and die cut (and coloured where needed). I used an embossing pen to add some white and white glitter embossing powder to the trees and I used the Clear Shimmer Brush on the edges of the snowbanks. This took a while to complete but I an happy with the finished product. 


Come and join us at Double Trouble and show us your creations. Complete details can be found on the Double Trouble Challenge Blog

I am also entering my card into the Colour Dare challenge (#422) for a tic tac toe (left column of Blue Belle, Toffee and Sapphire plus Sage).

You have just one week to link up your project for the DT challenge.

We can't wait to see what you create! 

Products are Close To My Heart unless otherwise indicated: 

Paper: White Daisy Cardstock, Blue Belle Cardstock, Sapphire Cardstock, White Glitter Paper

Stamps: Winter Woods (SU), The Jubilee Crew

Inks: Intense Black, Sage, White Pigment Ink, Chipper Sapphire Distress Oxide Ink, Black Soot Distress Oxide Ink

Accessories: In the Woods Dies (SU), The Jubilee Crew Thin Cuts, Fancy Borders Thin Cuts, Slim Stitched Rectangle Dies (Pink Fresh Studio), Clear Shimmer Brush, Embossing Pen, White Embossing Powder, White Glitter Embossing Powder (WOW!), Tri-Blend Markers

Enjoy,

Alyson

H2H - Peace Wreath

Welcome to this week's Heart 2 Heart challenge! 

The theme this week is Peace on Earth.

The Serenity paper collection has fast become my favourite paper and colour combination... the blue hues are just so pretty. I decided to use some images from the Serenity Cricut collection to create my card. 

I started by embossing the French Vanilla background with a small dotted embossing folder and then die cut it using the Stitched Rectangle Thin Cuts. I Cricut cut the wreath using Blue Belle cardstock and Gold Glitter Paper. I stamped PEACE on a piece of Sapphire cardstock and embossed it with gold embossing powder. It took me a long time to cut in just the right places to attach the sentiment behind the wreath without any extra pieces showing. The flower was assembled and added to the bottom of the wreath. I brushed the centre section of the flower with the Gold Shimmer Brush and then added some embellishing thread and gems. 


Come and join us at Heart 2 Heart and show us how you interpret the Peace on Earth theme. 

You have until the end of December to link up your project. 

We can’t wait to see what you create! 

Products used are Close To My Heart unless otherwise indicated: 

Paper: French Vanilla Cardstock, Sapphire Cardstock, Blue Belle Cardstock, Gold Glitter Paper 

Stamps: First Noel

Inks: Versamark

Accessories: Serenity Cricut Collection, Stitched Rectangle Thin Cuts, Dot Embossing Folder (not CTMH), Gold Embossing Powder, Heat Tool, Gold Glitter Gems, Gold Shimmer Brush, Goldenrod Stickles, Gold Embellishing Thread, Thin Foam Tape

Enjoy,

Alyson

Saturday, November 28, 2020

Half Circle Cards

I recently found a tutorial that showed how to create these terrific cards. It's a matter of die cutting three nested circles and layering them on each other to create the neat patterns. 

One set of three circles (although you need to cut two of each to make a set) will create two cards. I can’t decide which pattern I like better. I placed a thin piece of white cardstock with a sentiment across the section where the pieces join. An image was stamped for each card and adhered to the right of the sentiment. I made two birthday cards and two Christmas cards. 


If you are interested in the tutorial, that can be found here

Thanks to Lynn Dunn for sharing her terrific idea! 

Products used are Close To My Heart unless otherwise indicated: 

Paper: Holiday Stack Paper Collection, White Daisy Cardstock, Candy Apple Cardstock, Evergreen Cardstock, Peach Cardstock, Lemonade Cardstock, Nectarine Cardstock, Green Apple Cardstock, Neenah Solar White Cardstock, White Cards and Envelopes

Stamps: Florals and Flutters, Stitched Florals, Wonder of the Season, Christmas Blessings, On Your Birthday

Inks: Intense Black, Green Apple, Lemonade, Nectarine, Evergreen

Accessories: Florals and Flutters Thin Cuts, Stitched Florals Thin Cuts, Wonder of the Season Thin Cuts, Fancy Borders Thin Cuts, Stitched Circle Dies (GMD), TriBlend Markers, Goldenrod Stickles, Julep Glitter Gems, Clear Shimmer Brush, Thin Foam Tape 

Enjoy,

Alyson


Thursday, November 26, 2020

Large Flower Slimline Cards

I recently saw a card similar to one of these in a Facebook cardmaking group that I follow. I really wanted to try something similar. I wasn't able to find a link to the artist but the flower design was a digital one, made by Rachel Vass Designs. 

The one that I saw had only the centre flower coloured. I wanted to try that - and also try colouring all three flowers.

I chose a large floral stamp and created a mask for it. The centre flower was stamped first and then masked to stamp the flowers on each side. Before I began, I splattered both papers with the Bluebird Shimmer Brush. I used the same sentiment on both, just die cut in different colours. I also added some coloured Bitty Sparkles around the right side of the card. The single colour flower card was die cut using a stitched slimline die but the other one was just cut on my trimmer. 


Supplies used are Close To My Heart unless otherwise indicated: 

Paper: White Daisy Cardstock, Black Cardstock, Bluebird Cardstock

Stamps: Blended Bloom (SU)

Inks: Intense Black

Accessories: Slim Stitched Rectangles (Pink Fresh Studios), Hello Sunshine Die (Creative Expressions), Bluebird Shimmer Brush, Bitty Sparkles, Tri-Blend Markers, Touch Markers (misc.), Sharpie Markers (misc.) 

Enjoy,

Alyson

Wednesday, November 25, 2020

Humourous Card Set

As Christmas approaches, I create a lot of card sets. One friend of mine loves cards with humorous sentiments which is the reason for this set. The designs are simple, leaving the focus on the sentiments. 

I hope she enjoys these - there is no doubt in my mind that she will quickly find appropriate recipients for each of these cards! 


Products used are Close To My Heart unless otherwise indicated: 

Paper: Bright Stack, White Daisy Cardstock, Black Cardstock, Lagoon Cardstock, Carolina Cardstock, Lemonade Cardstock, Raspberry Cardstock, Ballerina Cardstock, Clover Cardstock, Peach Cardstock, Bluebird Cardsock, Thistle Cardstock, Sapphire Cardstock, Mint Cardstock, White Cards and Envelopes

Stamps: Nursery Days, Little Buddies, Florals and Flutters, Serenity Cardmaking Workshop, Wishing You Everything, The Jubilee Crew, Mondays (Impression Obsession), Successful Adulting (Impression Obsession), Quote Bubbles (Dylusions) 

Inks: Sapphire, Lagoon, Bluebird, Raspberry, Black, Intense Black 

Accessories: Nursery Days Thin Cuts, Florals and Flutters Thin Cuts, Serenity Cardmaking Workshop Thin Cuts, Wishing You Everything Thin Cuts, The Jubilee Crew Thin Cuts, Decorative Borders Thin Cuts, Scalloped Borders Thin Cuts, Border Tab Thin Cuts, Stitched Bracket Thin Cuts, Stitched Fancy Bracket Thin Cuts, Stitched Scalloped Bracket Thin Cuts, Rounded Rectangle Dies (Hero Arts), Pale Pink Shimmer Trim, Blue Shimmer Trim, Teal Shimmer Trim, Silver Shimmer Trim, Black Journaling Pen, Blue Sharpie Marker, Clear Shimmer Brush, Tri-Blend Markers, Green Triangle Gems, Red Sequins, Blue Dot Gems, Clear Sparkles, Turquoise Gems (not CTMH), Flamingo Gems 

Enjoy,

Alyson

Tuesday, November 24, 2020

TSOT 485 - Peace Flower

Welcome to Try Stampin' on Tuesday Challenge #485!

In addition to the sketch, the optional theme is non-traditional Christmas. 

I create a LOT of Christmas cards each year (100+) and mine are already written, addressed and ready to send. This one is a bonus - and I prefer non-traditional colours for Christmas. 

I used a gorgeous paper pack called Serenity for the patterned papers. I stamped the sentiment in Sapphire ink, along with a floral cluster. Both were die cut. The floral cluster was coloured and the flower was brushed with the Gold Shimmer Brush. I added a strip of Sapphire glitter paper - this card came together very easily. 


Come and join us at TSOT and show us how you interpret the sketch shown above. 

You have two weeks to link up your project. 

We can’t wait to see what you create! 

Products used are Close To My Heart unless otherwise indicated: 

Paper: Serenity Paper Pack, French Vanilla Cardstock, Blue Belle Cardstock, Sapphire Glitter Paper

Stamps; Serenity Cardmaking Workshop, Peaceful Boughs (SU)

Inks: Sapphire 

Accessories: Serenity Cardmaking Workshop Thin Cuts, Stitched Fancy Brackets Thin Cuts, Gold Glitter Gems, Gold Shimmer Brush, Tri-Blend Markers, ShinHan Markers (not CTMH)

Enjoy,

Alyson

Monday, November 23, 2020

AH 396 - Someone Special Shaker

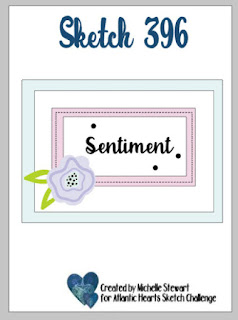
Welcome to Atlantic Hearts Sketch Challenge #396!

It is a horizontal sketch this week but that could certainly be rotated to create a project in portrait mode. 

I have had some Kaisercraft papers here for quite a while and I always forget to check in my extra papers to see what I have... these papers are from the Morning Dew collection and they are just gorgeous! 

The centre section was perfect for a shaker so I cut a section of one of the patterned papers to show a selection of flowers. There was just enough room in the top corner to stamp a sentiment, which I did using Espresso ink. The inner frame was cut using the same colour of cardstock. The outer frame was cut using Lagoon cardstock to coordinate with the outside paper. I cut a similar flower using the Flower Market Cricut collection. Using Mink, Mint and Pewter inks, I shaded and outlined the flower to look like the ones inside the shaker. Three gems were applied in the centre of the flower and I used a stylus on the leaves to create some dimension. 

Come and join us at Atlantic Hearts and show us how you interpret the sketch shown above. 

You have until Sunday evening to link up your project. 

We can’t wait to see what you create! 

Products used are Close To My Heart unless otherwise indicated: 

Paper: Morning Dew Collection (Kaisercraft), French Vanilla Cardstock, Lagoon Cardstock, Espresso Cardstock, Evergreen Cardstock, White Cards and Envelopes

Stamps: Serenity Cardmaking 

Inks: Evergreen, Espresso, Mint, Mink, Pewter

Accessories: Flower Market Cricut Collection, Stitched Rectangle Thin Cuts, Silver Loose Sequins, Green Sequins (not CTMH), Stylus, Acetate (not CTMH), Foam Tape, Holly Jolly Dots

Enjoy,

Alyson

Friday, November 20, 2020

CD 421 - One Friend...

Welcome to Colour Dare Challenge 421!

This week, there is a grid of six colours plus black, white and metallics if desired. You are to select at least three colours from the grid. 

I used Scarlet, Sundance, Sage and Mint. 

The Stitched Floral stamp set is so pretty with the stitched flowers so I decided to use that along with a large sentiment. I embossed a piece of Sage cardstock and the stamped and die cut the sentiment. I wanted the sentiment to hang off the edge of my card. The flowers were stamped and coloured and then die cut. I brushed around the edges of the stitching with the Clear Shimmer Brush and added a few gold gems. 


Come and join us at Colour Dare and show us how you use the grid shown above. 

You have two weeks to link up your project. 

We can’t wait to see what you create! 

Products used are Close To My Heart unless otherwise indicated: 

Paper: White Daisy Cardstock, Sage Cardstock, Neenah Solar White Cardstock 

Stamps: Stitched Florals, One Friend

Inks: Intense Black 

Accessories: Stitched Florals The Cuts, Stitched Fancy Brackets Thin Cuts, Dot Embossing Folder, Tri-Blend Markers, Gold Glitter Gems, Clear Shimmer Brush, Foam Tape 

Enjoy,

Alyson

Wednesday, November 18, 2020

November/December New Product Blog Hop


Welcome to the New Product Blog Hop for the November/December catalog! 

There are so many awesome new products in this catalog - I am sure you will see some terrific artwork on this blog hop. 

You should have arrived here from Krista Hershberger's blog

If you get lost along the way, a complete list of participants can be found on Melinda Everitt's blog

I think a lot of Makers along this hop will choose to use the Serenity products as that paper is just so beautiful... so I wanted to do something different. I chose to use the Jingle Joy papers but combine them with the Serenity stamps. 

I used the small flower and leaf image from the Serenity cardmaking workshop and I masked it to create a wreath. The images were coloured with the Tri-Blend markers and I added a sentiment along the right side. One piece of patterned paper plus a zip strip and some Silver Shimmer Trim were added at the bottom of the card. It wasn't until I had adhered everything together that I decided I wanted shimmer brush splatters on my card... I always forget to do that at the beginning! So, I covered up the sentiment and the banners and I also lined the edge of the card so only the white piece was showing. I splattered the front using the Raspberry and Evergreen Shimmer Brushes. That's why some of the splatters are on top of the flowers... Silver Glitter Gems were added to the center of the flowers. 

I hope you enjoyed my card. 

The next blog on this hop is Darlys Recker's blog. I am sure she has something awesome to share with you! 

Products used are all Close To My Heart: 

Paper: Jingle Joy Paper Pack, White Daisy Cardstock, Raspberry Cardstock, Evergreen Cardstock 

Stamps: Serenity Cardmaking, Serenity Cardmaking Workshop

Inks: Intense Black, Clover

Accessories: Stitched Simple Brackets Thin Cuts, Silver Shimmer Trim, Raspberry Shimmer Brush, Evergreen Shimmer Brush, Tri-Blend Markers, Foam Tape, Silver Glitter Gems

Enjoy,

Alyson


Monday, November 16, 2020

Double Trouble 71 - Thankful for You LONG card

Welcome to Double Trouble Challenge #71!

We have a tic tac toe board this week along with some other factors. Check out the full details on the Double Trouble Challenge Blog


Thanksgiving has passed here in Canada - it was in early October. The leaves have fallen off the trees and have been gone for some time. For those reasons, I really didn't want to create a fall card but I wanted to do something else. The tic tac toe board offers a lot of options. My tic tac toe lines are as follows: 

Middle column (leaves, free, digital or stamp) 

Middle row (patterned paper, free, frame)

This card is one I found on the internet along with a terrific tutorial. That tutorial can be found here. The finished card is 36" long - yes - 36" long! It would make a great display piece on a mantle for Christmas!

I used the Serenity paper collection to create this card. The primary colours are French Vanilla, Blue Belle and Sapphire. I cut the base pieces using Blue Belle cardstock and the accent pieces using Sapphire cardstock. The scalloped frames around the inside sections were cut using a Nestabilites die. The square has to be a specific size to allow the inner piece to move freely and that was the only die I had that fit the opening. Gold is an accent colour with this collection so I used gold foil for the letters to spell Thankful and also as a mat layer. The leaves and branches under the letters were stamped and/or die cut in the same colours with some of them being cut using coordinating glitter paper.  The sentiment on the front was masked so it could be stamped in two colours. I added some gold embellishing thread and gold glitter gems as well. There is a place on the back of the card to write a message. This card was so much fun to create - it's the decorating that takes so much time! 


Come and join us at Double Trouble and show us how you interpret this week's challenge. 

You have two weeks to link up your project. 

I am also linking up my project with the Paper Funday Challenge (requires a thankful or grateful-based project). 

We can’t wait to see what you create! 

Products used are Close To My Heart unless otherwise indicated: 

Paper: Serenity Paper Pack, French Vanilla Cardstock, Blue Belle Cardstock, Sapphire Cardstock, Gold Foil Paper, Blue Belle Glitter Paper, Sapphire Glitter Paper 

Stamps: With a Thankful Heart, Say it in Style

Inks: Sapphire, Blue Belle

Accessories: Stitched Squares Dies (GMD), Scalloped Squares Dies (Nestabilites), Stitched Fancy Brackets Thin Cuts, Block Alphabet Thin Cuts, Comfort and Joy Scrapbooking Thin Cuts, Gold Embellishing Thread, Gold Glitter Gems, Foam Tape

Enjoy,

Alyson

H2H - Card Creations (Slimline)

Welcome to this week's Heart 2 Heart challenge! 

Attention all card makers - this challenge is for YOU! The topic is "Card Creations" and any type of card is fine - just make sure to use some CTMH products in your project. 

I have just started experimenting with slimline cards - and this is one of them. 

The three squares are all shakers and they are embedded in the card front. I used images from The Jubilee Crew stamp set and coloured them with a blue and yellow theme. The background was inked using Chipped Sapphire and Black Soot Distress Oxide inks and then some water droplets were splattered while the ink was still wet. I love the look the added water creates - it lightens the ink. A sentiment was stamped in Sapphire ink, a ribbon was wrapped and tied across the top and some yellow holographic sequins were added. The images were selectively brushed with the Clear Shimmer Brush, as was the title. 

Come and join us at Heart 2 Heart and show us your card creations! 

You have until the end of November to link up your project. 

We can’t wait to see what you create! 

Products used are Close To My Heart unless otherwise indicated:

Paper: White Daisy Cardstock, Lemonade Cardstock, Sapphire Cardstock

Inks: Intense Black, Sapphire, Chipped Sapphire DO Ink, Black Soot DO Ink

Stamps: The Jubilee Crew, Beary Christmas Cardmaking

Accessories: Merry Christmas Dies (SU), Stitched Squares (GMD), Stitched Slimline Dies (PinkFresh Studio), Blue Ribbon (misc), Yellow Sequins, Clear Shimmer Brush, Tri-Blend Markers, Acetate (misc), Foam Tape, Snow Filler (misc), Corner Rounder 

Enjoy,

Alyson

Sunday, November 15, 2020

Inky Fingers Technique Blog Hop

Welcome to the November Technique Blog Hop! 

This month, the technique is "inky fingers". How many of you have used inks while crafting and had to go out before all the ink washed off? I know my fingers have been all shades of blue, green and everything in between at times. 

You should have arrived here from Katy Taylor's blog

I am loving the loving the (new to CTMH) Distress Oxide inks - but they can definitely be messy. I used two colours to create the background on the Lattice Background Thin Cut piece. Peacock Feathers mixed with a little Chipped Sapphire is on the inner section and the Chipped Sapphire is around the outside of the piece. After it was dry, I splattered the Clear Shimmer Brush on top and from the front, it just looks like water droplets but from the side, the shimmer can be seen.  

The gnome and sentiment were stamped and embossed using Sapphire pigment ink and the gnome was coloured using shades of orange and blue. I placed a piece of Paprika cardstock (the light side) under the lattice background and added some Gold Shimmer Trim plus Gold Embellishing Thread to the front of the card. A few Gold Glitter Gems were added and sections of the gnome and the key word in the sentiment were brushed with the Gold Shimmer Brush. 


I hope you enjoyed my project. 

The next stop on this blog hop is Darlys Recker's blog. I am sure she has something terrific to share with you! 

Products used are all Close To My Heart:

Paper: White Daisy Cardstock, Paprika Cardstock

Stamps: Gnome for Christmas

Inks: Sapphire Pigment Ink, Lemonade, Peacock Feathers DO Ink, Chipped Sapphire DO Ink

Accessories: Gnome for Christmas Thin Cuts, Stitched Simple Brackets Thin Cuts, Lattice Background Thin Cuts, Clear Detail Embossing Powder, Heat Tool, Tri-Blend Markers, Gold Shimmer Trim, Gold Embellishing Thread, Gold Glitter Gems, Gold Shimmer Brush, Clear Shimmer Brush, Thin Foam Tape 

Enjoy,

Alyson


Friday, November 13, 2020

Lovely Roll Up Box

I was recently searching for some interactive paper craft ideas and I came across this awesome roll up box. It isn't as hard to create as it appears but it does use quite a bit of paper. To give you an idea of the size, each inside box is 1 3/4" x 7" so there is lots of room for treats or other gifts. This would make a terrific box for Christmas but I chose to create one with a generic theme. 

One thing to note - directional patterned papers are hard to use as the patterns will be sideways when the box is closed but upright when the boxes are rolled out. It is probably better to use non-directional patterned paper for this project. 

The link to complete instructions and a video is here

I chose to use the Lovely paper pack and coordinating cardstock. Since there are six double sided papers in that pack, there are 12 patterns available. 

The top was created using a border die - it is easiest to do if the pattern is one that can be flipped to match the second cut. I had to line up the die and cut it twice to get the 7" piece. Those pieces are held together using velcro dots, therefore holding the package together. 

So... here are some photos. The picture of the inside doesn't show the heart or leaf pattern running in the correct direction as the flap is open, but it is facing the right way up! I stamped a sentiment and added a few little extras at the top of the box. 


Products used are all Close To My Heart: 

Paper: Lovely Paper Pack, White Daisy Cardstock, Ballerina Cardstock, Evergreen Cardstock, Canary Cardstock, Sage Cardstock, Blue Belle Cardstock

Stamps: Wishing You Everything

Inks: Blue Belle, Sage, Evergreen

Accessories: Wishing You Everything Thin Cuts, Fancy Borders Thin Cuts, Basic Circle Thin Cuts, Stitched Circle Thin Cuts, Hook and Loop Dots, Tri-Blend Markers, Gold Liquid Pearls

Enjoy,

Alyson

Wednesday, November 11, 2020

Congratulations Fancy Fold

I was asked by a friend to create a congratulations card ... it's for her grandson for his Confirmation so I chose a blue colour scheme. 

When the card is closed, it looks like a basic card. The centre square is actually attached on the inside of the card to fold back over to the front. There is lots of room to write a message. I used three shades of blue - Sapphire, Bluebird and Carolina. The patterned papers also contain those colours. The dove was embossed in white and the sentiment was embossed in Sapphire. I stamped the background with a leaf stamp to add a little more interest and all the edges were ink distressed. 


Products used are Close To My Heart unless otherwise indicated: 

Paper: Bright Stack Paper Pack, Blue Skies Paper Pack, White Daisy Cardstock, Carolina Cardstock, Bluebird Cardstock, Sapphire Cardstock

Stamps: Botanical Backgrounds, Card Captions, Blessings of Peace

Inks: Sapphire, Carolina, Bluebird, Versamark, Sapphire Pigment Ink

Accessories: Stitched Square Dies (GMD), White Embossing Powder, Clear Detail Embossing Powder, Heat Tool, Blue Enamel Gems, Blue Sharpie Marker (not CTMH)

Enjoy,

Alyson

Tuesday, November 10, 2020

TSOT 483 - Ladybug Dreams

Welcome to this week's Try Stampin' on Tuesday challenge!

The extra theme this week is to use OLD embellishments - brads, buttons or eyelets. 

I had to look deep to find brads to use on my project. I recently sorted through tons of buttons and only held onto a handful - luckily some coordinated with the idea I had in mind. Eyelets... haven't used them (or kept them) for years! 

I have had this ladybug die for some time - and this is the first occasion I have had to use it. The wings were die cut from vellum and the dots were coloured on the backside of the vellum. The wings are attached to the base using a silver brad. The base shape is a shaker so I added lots of silver confetti stars inside. I die cut a stitched rectangle boarder and an additional piece to go across the top of the card (I rotated the sketch 90 degrees). This sentiment was perfect to use with the ladybug image. The buttons are tiny little white ones with silver around the edges. I don't like "naked" buttons so I added a piece of silver and white twine on top of each. 

Come and join us at TSOT and show us how you interpret the sketch shown above. 

You have two weeks to link up your project. 

We can’t wait to see what you create!

Products used are Close To My Heart unless otherwise indicated: 

Paper: Ballerina Cardstock, Silver Foil Paper, Vellum

Stamps: Hello Ladybug, Fragrant Flowers (Penny Black)

Inks: Raspberry, Charcoal

Accessories: Stitched Rectangle Thin Cuts, Ladybug Thin Cut, Circle Shaker Window Foam and Acetate, Silver Confetti Stars, Silver Brad, Clear Sparkles, Tiny Buttons, White and Grey Twine, Tri-Blend Markers, Sharpie Markers (not CTMH)

Enjoy,

Alyson

Monday, November 9, 2020

Pumpkin Spice

 It is a little late here to be creating a hot drink card with a pumpkin spice theme because our Thanksgiving is over and we are now preparing for winter. However, I participated in Mary Gunn FUNN's Craft Roulette challenge and one of the requirements this week was to include a pumpkin!

The only pumpkin image I have (aside from going to the Cricut) is the one on this card. Incorporating a pumpkin with primary colours wasn't the easiest task (and there were two other requirements to meet as well). 

I used a retired stamp set - Perk Up - for the cup and sentiment and the lid is from the November Stamp of the Month. I embossed the Canary cardstock and placed the rectangles on an angle. I also die cut a few hearts (hearts was another requirement) and assembled the card. I brushed the hearts with the Clear Shimmer Brush to add some emphasis. The sentiment was masked so I could stamp it in two different colours. 


Products used are Close To My Heart unless otherwise indicated: 

Paper: 'Tis the Season Paper Pack, Mix-In Paper Pack, White Daisy Cardstock, Sapphire Cardstock, Carolina Cardstock, Bluebird Cardstock, Candy Apple Cardstock

Stamps: Perk Up, You Warm My Heart, Giving Thanks 

Inks: Intense Black, Sapphire, Bluebird, Canary, Candy Apple 

Accessories: Perk Up Thin Cuts, Stitched Simple Brackets Thin Cuts, Heart Shaker Window Thin Cuts, Tri-Blend Markers, Sharpie Markers (not CTMH), Leaf Embossing Folder (SU), Foam Tape

Enjoy,

Alyson

Sunday, November 8, 2020

Floral Background - Just for You

Every now and then I pull out the Distress Oxide inks and play for a while. Since they can be messy, I tend to do a lot of work with them at one time. 

This card was created using the Floral Background Thin Cut. It was cut in white and inked with three Distress Oxide colours (all shades of blue). It's hard to see the difference between the two colours at the top. I added some Oasis Holographic paper under the die cut and then stamped a sentiment and fussy cut it. A few gems were added to the flowers on the die. 


Products used are Close To My Heart unless otherwise indicated:

Paper: White Daisy Cardstock, Oasis Holographic Paper, White Cards and Envelopes 

Stamps: Wordfetti

Inks: Sapphire, Distress Oxide Inks: Chipped Sapphire, Peacock Feathers, Broken China (not CTMH)  

Accessories: Floral Background Thin Cut, Foam Tape, Gold Glitter Gems 

Enjoy,

Alyson

Friday, November 6, 2020

Holiday Cards Blog Hop

Welcome to the Holiday Cards blog hop! 

You should have arrived here from Pam Furlong's blog.

If you get lost, there is a list of all participants on Melinda Everitt's blog

I am a fan of non-traditional coloured Christmas cards. I really like blue holiday cards in particular although I did one card in blue and a second one in traditional red and green. I chose to use the Floral Details and Background stamp set for my background and then turned both of my cards into shakers. The background was embossed in Sapphire ink for the first card and Black ink for the second card. Since the centre wasn't the same size as our standard circle shakers, I had to cut the circles on my Cricut. I wanted them to be approximately the same size as the circle on the stamp. The hardest part was cutting craft foam with my Cricut, which is what I used to replace foam tape for my shakers. It has a tendency to stretch when being removed from the sticky mat. 

The flowers in the background were coloured using a variety of Tri-Blend markers. I matted the cards on either two or three pieces of cardstock to bring out the colours in the designs. The shaker centres were stamped in coordinating colours and I added both sequins and confetti stars to each. The sentiments were also brushed with the Clear Shimmer Brush. These cards took me longer than expected, only because of the shaker components as I prefer to embed my shakers in the card front rather than adhering them on top.


I hope you enjoyed my cards! 

The next blog on this hop is Darlys Recker's blog. I am sure she has something awesome to share with you!

Products used are Close To My Heart unless otherwise indicated: 

Paper: White Daisy Cardstock, Bluebird Cardstock, Pebble Cardstock, Candy Apple Cardstock, Evergreen Cardstock

Stamps: Floral Details and Background, Comfort and Joy Cardmaking, The Jubilee Crew

Inks: Sapphire Pigment Ink, Black Pigment Ink, Candy Apple, Evergreen, Sapphire, Bluebird

Accessories: Cricut Basic Shapes (not CMTH), Acetate (not CTMH), Silver Loose Sequins, Gold Loose Sequins, Silver Confetti Stars, Gold Confetti Stars, Tri-Blend Markers, Clear Detail Embossing Powder, Heat Tool, Clear Shimmer Brush, Craft Foam (not CTMH)

Enjoy,

Alyson

CD 419 - Gnome Christmas

Welcome to Colour Dare Challenge #419!

We have a tic tac toe board this week - select a row, column or diagonal and use those colours in your project. You are welcome to add any other colours that are ON THE BOARD. Please note that black, white and grey are free to use. 

I have 4 different tac tac toes... left column (Glacier, Sapphire and Raspberry), bottom row (Raspberry, Evergreen, Clover) and both diagonals (Glacier, Gold, Clover and Flamingo, Gold and Raspberry. The only colours I didn't use were Blue Belle and Lilac.

I am still working on Christmas cards - and this was an opportunity to create another one!

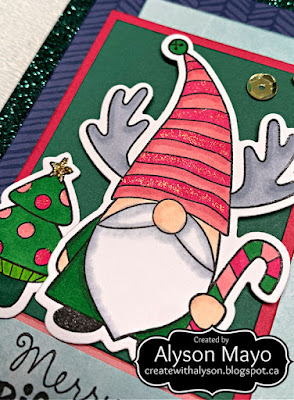
I used the Gnome for Christmas stamp set for the gnome, the mushroom tree and the sentiment. I coloured the images using various colours on the board. The card design is from Make It From Your Heart - Vol. 4. I chose some patterned papers in Sapphire and Glacier and mounted them on a piece of Evergreen glitter paper. The images were adhered with foam tape and I added a few gold sequins and brushed some areas with the Gold Shimmer Brush. 


Come and join us at Colour Dare and show us how you use the board shown above. 

You have two weeks to link up your project. 

We can’t wait to see what you create! 

Products used are Close To My Heart unless otherwise indicated:

Paper: Mix-In Paper Packs, White Daisy Cardstock, Flamingo Cardstock, Evergreen Cardstock, Raspberry Cardstock, Evergreen Glitter Paper, Neenah Solar White Cardstock

Stamps: Gnome for Christmas 

Inks: Intense Black, Raspberry, Glacier, Sapphire, Evergreen

Accessories: Gnome for Christmas Thin Cuts, Tri-Blend Markers, Gold Shimmer Brush, Loose Gold Sequins, Foam Tape, Thin Foam Tape, Goldenrod Stickles 

Enjoy,

Alyson