Showing posts with label 3-D Items. Show all posts

Saturday, December 13, 2025

Tea Bag Gift Holder

 This is such a cute little gift idea. It holds three tea bags and the front closes with a small magnet. 

I added a cup image to the front as I didn't have any smaller images that fit. This way, the cup itself is lifted to open the package. There is a circle on the back for a message. 


Enjoy, 

Alyson

Thursday, August 17, 2023

Monogram Letters

 A friend of mine asked me to create some large monogram letters for her grandkids. She gave me the colours and I used my Cricut to make these. 

The green and pink letters were created using magical powers - I really love the green pattern. Since I didn't have any of those powders in purple, I ink blended a large panel and cut that. Each letter is 11 1/2" tall.

Enjoy,

Alyson

Tuesday, July 11, 2023

Fan Vase

 This fan vase has a finished bottom and can be used to gift some light items. The base could be eliminated and that would allow it to be wrapped around a wine bottle to give as a gift. 

I chose some old patterned paper and light pink cardstock for this project. Once the fan component was created, the patterned paper was wrapped around the base and the fan was added at the side. I die cut some flowers and leaves from scarlet and pink cardstock and added them at the bottom, along with a sentiment. This is such a pretty project when it is finished! 

Enjoy,

Alyson

Friday, November 11, 2022

Poinsettia Ornament

 The poinsettia below is actually a tree ornament. 

The leaves were die cut from white cardstock, inked, shaped and then brushed with clear Stickles. That's a way to make sure they keep their shape, even if the ornament is flattened for storage. I die cut the branches and stacked them a few times before also brushing them with Stickles. The gold berries were added under the flower. I placed all the pieces on a die cut circle and then die cut three additional circles to stack behind the first one. Before adding the bottom one, I added some gold metallic thread to hang the ornament. 

The ornament is pictured on the gift below as well. 


Enjoy,

Alyson

Sunday, August 22, 2021

Good Tidings Paperscape

Creating a paperscape was a first for me - it's a multi-dimensional card that contains some sort of scene. This one is approximately 6" x 9" x 2" when standing up but it folds flat and slides into an envelope that was created specifically for this card. The file is from The Dreaming Tree website and comes in an SVG format so it can be cut on most standard electronic machines. 

It took me a long time to decide on the colour scheme. I knew I wanted the background pieces to be white but I cut them from Pearl paper so they had some extra shine to them. The sky at the back was stamped with little snowflakes and embossed in white. I used some distress oxide ink to add a bit of colour around the edges. A few gems were placed on the envelope and one was used to dot the letter I in the sentiment. I did photograph some of these pictures with a small flashlight underneath - there is a space for a battery operated tea light to brighten the scene. 


Products used are Close To My Heart unless otherwise indicated: 

Paper: White Daisy Cardstock, Mint Cardstock, Lagoon Cardstock, Pearl Paper, Silver Foil, White Glitter Paper

Stamps: Polar Bear Holiday

Inks: Versamark, Shaded Lilac DO Ink (not CTMH)

Accessories: Cricut - Dreaming Tree File, White Embossing Powder, Heat Tool, Glacier Gems (Pink Fresh Studio), Ocean Breeze Gems (Pink Fresh Studio)

Enjoy,
Alyson

Friday, April 30, 2021

Mini Double Diamond Fold Birthday Card

More time to play... and another interactive card! 

This one is called a Double Diamond Fold card but I have made a different card by the same name so I am renaming it the MINI Double Diamond Fold card. A link to the blog post by Lisa Curcio is here and that also leads to her You Tube channel where there is a video to follow.

I used the beautiful plaid paper from the Daisy Meadows collection for the panels. The flower was stamped, coloured and die cut and the sentiment was stamped just below the centre of the diamond. I added a piece of white cardstock to the back of the diamond so there is a small place to write. Depending how tall the image you use (the flower in my case), this card can fit in a standard A2 envelope. I didn't want to add any bulky embellishments so I just used the Clear Shimmer Brush and some Stickles to add some sparkle to the flower. 


Products used are all Close To My Heart: 

Paper: Daisy Meadows Paper Collection, White Daisy Cardstock, Peacock Cardstock, Mint Cardstock, Canary Cardstock 

Stamps: Daisy Meadows Scrapbooking, Flowers for You

Inks: Intense Black, Peacock 

Accessories: Daisy Meadows Scrapbooking Stamp and Thin Cuts, Tri-Blend Markers, Clear Shimmer Brush, Diamond Stickles, Thin Foam Tape

Enjoy,

Alyson

Thursday, March 18, 2021

March - April New Product Blog Hop

Welcome to the New Product Blog Hop for the March/April catalog! 

There are so many awesome new products in this catalog - the bloggers along the way will show you some terrific ideas that showcase just some of those products. 

You should have arrived here from Becca Whitham’s blog. If you get lost along the way, there is a list of all participants on Melinda Everitt's blog

My favourite new product is the Daisy Meadows Scrapbooking stamp and thin cut combo. I used that along with one of the papers from the Daisy Meadows paper pack and a couple of other stamp sets to create this standing wreath card. 

The card stands on its own and it folds flat for mailing. I had so many images I wanted to use so my card is larger than 6x6 due to the images that hang over the edge. 

The images were all stamped, coloured and die cut before being added around the wreath base. The sentiment was stamped and die cut along with a coordinating background. Once all the images were in place, I used some Liquid Pearls, Stickles and the Gold Shimmer Brush to add some sparkle and shine. The sentiment is mounted on a piece of acetate that runs across the center of the wreath. 


I hope you enjoyed my project. 

The next blog to visit is Brenda Lapp’s blog. I am sure she has something wonderful to share with you! 

Products used are Close To My Heart unless otherwise indicated: 

Paper: Daisy Meadows Paper Pack, White Daisy Cardstock, Peacock Cardstock, Acetate (not CTMH) 

Stamps: Daisy Meadows Scrapbooking, Florals and Flutters, Sunny Days Ahead

Inks: Intense Black 

Accessories: Daisy Meadows Thin Cuts, Florals and Flutters Thin Cuts, Stitched Bracket Thin Cuts, Tri-Blend Markers, Gold Shimmer Brush, Goldenrod Stickles, Onyx Pearl Liquid Pearls, Sundance Shimmer Brush

Enjoy,

Alyson

Wednesday, March 10, 2021

In This Together Blog Hop

Welcome to the In This Together blog hop! 


The Makers on this blog hop will be showing different projects using products from the In This Together collection. 

You should have arrived here from Daryls Recker's blog. If you get lost, a list of all participants can be found on Melinda Everitt's blog

Both of these cards are side step cards. The first uses some of the papers, stickers and stamped images from the In This Together collection. 

The circles on the right side were cut using my Cricut. I stamped and coloured the sofa and the We Got This image and used stickers for the remaining images. I purposely kept the card simple to focus on the papers.  

Lemonade and Grape go so well together... For this card, I stamped several images from the gnome set, including some plants, a shovel, a watering can and the gnome himself. Clover cardstock was used to create the grass. The Lemonade striped paper was a perfect background for the front of the card and the heart pattern worked for the back. I brushed the flower petals with the Clear Shimmer Brush and added a few sparkles around the front. 


I hope you enjoyed my projects. 

The next stop on this hop is Gina Brandstetter's blog. I am sure she will share something awesome with you! 

Products used are all Close To My Heart: 

Paper: In This Together Paper Pack and Sticker Sheet, White Daisy Cardstock, Grape Cardstock, Clover Cardstock, Nectarine Cardstock

Stamps: In This Together, Garden Gnomes

Inks: Intense Black, Sapphire

Accessories: Art Philosophy Cricut Collection, Garden Gnomes Thin Cuts, Tri-Blend Markers, Clear Sparkles, Bitty Sparkles, Clear Shimmer Brush, In This Together Dots

Enjoy,

Alyson

Wednesday, February 10, 2021

Expanding Butterfly Card

This is the most awesome card! The front provides a glimpse of what is inside... and then there is such a pretty surprise when the card is opened. I found directions for this card here

The butterflies were stamped, coloured (yes - every single one of them!) and die cut. They were attached at the top corner to allow them to appear like they are floating inside. I stamped and die cut a few extras for the front of the card. I also stamped some flowers and leaves and coloured them in the same colour scheme. The "miss you" sentiment was stamped in both Lagoon and Peacock ink to create an ombre effect. I coloured some white flower sequins and added a Bitty Sparkle to the centre of each. 

The large letters inside were die cut using large letter dies so the coloured cardstock would show through the cut area. 


I love how this turned out! I did try and do it using hearts but I learned that the image to be used inside really needs to be at least 2.5 inches across or wider. The hearts that I tried to use were approx 1.5 inches wide and they didn't work for me at all. 

Products used are all Close To My Heart: 

Paper: White Daisy Cardstock, Lagoon Cardstock, Peacock Cardstock

Stamps: Every Little Thing Cardmaking Kit (Butterflies for You), For My Beautiful Friend

Inks: Intense Black, Lagoon, Peacock

Accessories: Block Alphabet Thin Cuts, Every Little Thing Cardmaking Kit Thin Cuts, Tri-Blend Markers, Flower Sequins, Bitty Pearls, Black Journalling Pen

Enjoy,

Alyson

Thursday, February 4, 2021

Standing Wreath Card

What better way to wish someone a happy birthday than with a standing wreath card? 

This one stands up to display a beautiful wreath with a sentiment that appears to be floating in the centre. 

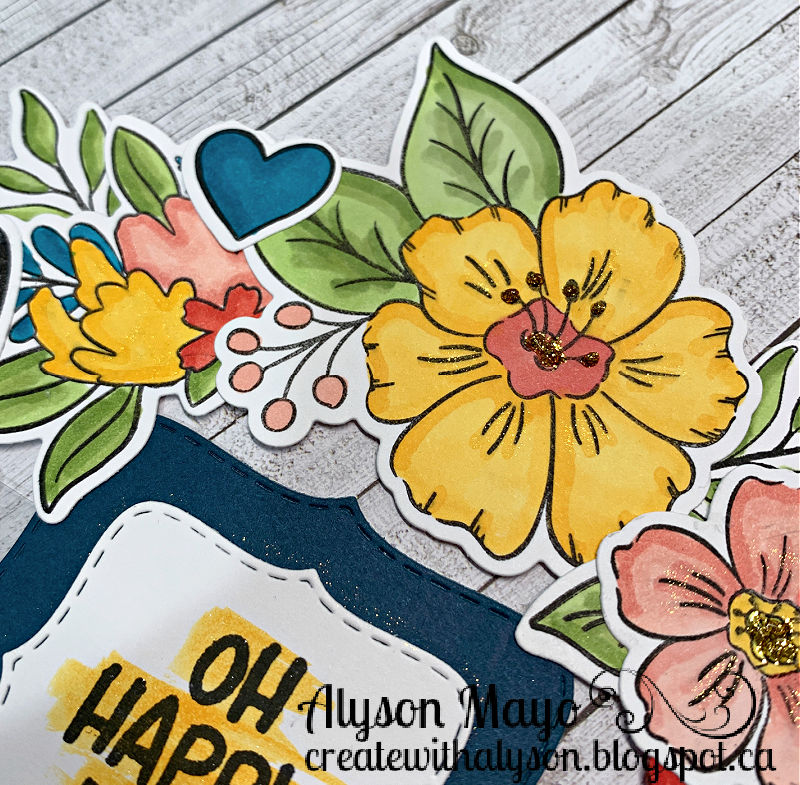
I began with a piece of white cardstock and cut the circles needed to create this wreath. I stamped and coloured lots and lots of images -and then had to go back and stamp MORE images as I didn't have enough to completely cover the front of the wreath. The base is 6" and in hindsight, I should have watched more carefully as I added pieces to the top of the circle as my card is now larger than 6" from top to bottom. Consequently, I will need to mail it in a larger envelope... 

I added shimmer to some of the flowers and the butterflies and I also used gold Stickles for some of the flower centres. Close-ups of a few sections are shown after the main image. 


Products used are Close To My Heart unless otherwise indicated: 

Paper: White Daisy Cardstock, Black Cardstock

Stamps: Sweet Bouquet, Wishing You Everything, Florals and Flutters, Birthday Sparkles 

Inks: Intense Black

Accessories: Basic Circle Thin Cuts, Stitched Circle Thin Cuts, Sweet Bouquet Thin Cuts, Wishing You Everything Thin Cuts, Florals and Flutters Thin Cuts, Tri-Blend Markers, Touch Markers (not CMTH), Acetate (not CTMH), Coluzzle Templates (not CTMH), Circle Dies (Nestabilities), Clear Shimmer Brush, Goldenrod Stickles 

Enjoy,

Alyson

Friday, November 13, 2020

Lovely Roll Up Box

I was recently searching for some interactive paper craft ideas and I came across this awesome roll up box. It isn't as hard to create as it appears but it does use quite a bit of paper. To give you an idea of the size, each inside box is 1 3/4" x 7" so there is lots of room for treats or other gifts. This would make a terrific box for Christmas but I chose to create one with a generic theme. 

One thing to note - directional patterned papers are hard to use as the patterns will be sideways when the box is closed but upright when the boxes are rolled out. It is probably better to use non-directional patterned paper for this project. 

The link to complete instructions and a video is here

I chose to use the Lovely paper pack and coordinating cardstock. Since there are six double sided papers in that pack, there are 12 patterns available. 

The top was created using a border die - it is easiest to do if the pattern is one that can be flipped to match the second cut. I had to line up the die and cut it twice to get the 7" piece. Those pieces are held together using velcro dots, therefore holding the package together. 

So... here are some photos. The picture of the inside doesn't show the heart or leaf pattern running in the correct direction as the flap is open, but it is facing the right way up! I stamped a sentiment and added a few little extras at the top of the box. 


Products used are all Close To My Heart: 

Paper: Lovely Paper Pack, White Daisy Cardstock, Ballerina Cardstock, Evergreen Cardstock, Canary Cardstock, Sage Cardstock, Blue Belle Cardstock

Stamps: Wishing You Everything

Inks: Blue Belle, Sage, Evergreen

Accessories: Wishing You Everything Thin Cuts, Fancy Borders Thin Cuts, Basic Circle Thin Cuts, Stitched Circle Thin Cuts, Hook and Loop Dots, Tri-Blend Markers, Gold Liquid Pearls

Enjoy,

Alyson

Friday, September 18, 2020

Creativity in Motion Blog Hop

Welcome to the Creativity in Motion Blog Hop! 

This campaign is so awesome - the images appear to be moving under the acetate! How cool is that? 

You should have arrived here from Wendy Kessler's blog.

If you get lost, a complete list of participants can be found on Melinda Everitt's blog

I created a lot of interactive cards with these stamps... those can be found in earlier posts. This time, I decided to create a mini album using several of the images. 

There is a mini paper pack (6x6) available with this campaign and I really wanted to use those papers - except I needed pieces that were a little longer than 6x6. Since many of the patterns in that mini paper pack are also found in the So Much Happy paper pack, I went back to that so I could cut the sizes I needed. 

The squares were all cut using the Stitched Square Thin Cuts. I didn't use foam tape anywhere in this album but simply cut away one section of the square and adhered it to the back of the acetate to provide the opening for the slider. It does make sliding the pieces a little harder, but that's ok. The white cardstock pieces were cut with the border attached to prevent the edge catching as they are inserted. I used coordinating inks to stamp the images and the sentiments. The patterned papers were folded over the squares and attached back to back to form the album. I decided to use the left side for 3x3 photos and on the back of 2 white slider pieces, I drew journaling lines and added some small stamps to decorate those pieces. On the back of the remaining 4 pieces, I added a photo mat and a 2x2 photo mount. That allows for 10 photos in total plus journaling spots in this little album. I decorated the front using one of the sentiments which I cut into pieces to stamp it in 3 sections. I tried tying up the album with embellishing thread but that didn't work - I had to resort to the white twine (which is retired) since no other ribbon coordinated with this colour scheme. 

There are lots of photos - each page plus 2 groups at the end that show the animated stamped images and the reverse sides with the photo mounts and journaling spots. 


I hope you enjoyed my project! 

The next blog on the hop is Gina Brandstetter's blog. I'm sure she will wow you with these products!

Products used are all Close To My Heart

Paper: So Much Happy paper pack (same patterns as in the mini paper pack available for this campaign), White Daisy Cardstock, Sapphire Cardstock, Clover Cardstock, Lagoon Cardstock, Mint Cardstock, Smoothie Cardstock, Peach Cardstock, Animated Acetate

Stamps: Animated Butterfly Kisses, Animated Safari Animals, Animated Sentiments, Border Tab

Inks: Sapphire, Clover, Smoothie, Candy Apple, Peach, Mint, Lagoon

Accessories: Stitched Square Thin Cuts, Border Tab Thin Cuts, White Twine, Black Journaling Pen

Enjoy,

Alyson

Sunday, August 16, 2020

Creativity in Motion - Various Animated Cards (Part 2)

Here is the second instalment of the Creativity in Motion interactive cards. My previous post explains more about how these work along with some other details. 

The first card today is a Folding Interlock Concertina card. This is a complex card to assemble... and I had to adjust the size to fit the stitched square thin cuts. The front is decorated with a beautiful stamp set called Always Loved. I also used part of that same stamp set to decorate the back of the card to create a place for a message. There is a lot happening inside so I didn't want to use that space to write anything. I used 2 animated sentiments inside the card - Hello and a heart.


The second card today is a Floating Gatefold Card - the inside has such a special treat! It appears that the images are actually floating in air. I created this with a child in mind - someone who loves animals. I used 3 animated animal stamps - a hippo, a lion and a crocodile - along with sentiments inside to complement those images. The leaves were stamped using Evergreen ink in first and second generation and inside, I added a few arrows that were coloured just for extra interest. 


The last card in this series is a just a folding card. It opens up to reveal a space to write on the last panel. I used an animated butterfly image for the front. Gold embellishments were used to decorate this card. 


I hope you have enjoyed the two days of interactive, animated cards. It was a lot of fun creating these treasures!

Products used are all Close To My Heart: 

Paper: 6x6 Bright Stack, Summer Vibes Paper Pack, White Daisy Cardstock, Candy Apple Cardstock, Fern Cardstock, Black Cardstock, Evergreen Cardstock, Pixie Cardstock, Raspberry Cardstock, Lagoon Cardstock 

Stamps: Animated Safari Animals, Animated Sentiments, Animated Butterfly Kisses, Border Tab, Always Loved, Simple Floral, This Right Here, For My Beautiful Friend 

Inks: Black, Evergreen, Raspberry, Lagoon, Pixie, Fern, Nectarine, Candy Apple 

Accessories: Stitched Square Thin Cuts, Stitched Rectangle Thin Cuts, Border Tab Thin Cuts, Simple Floral Thin Cuts, Raspberry Shimmer Brush, Lagoon Shimmer Brush, Silver Embellishing Thread, White and Gold Skinny Ribbon, Gold Glitter Gems, Thin Foam Tape, Tri-Blend Markers, Clear Sparkles, Hook and Loop Dots, Silver Embellishing Thread, Silver Glitter Gems, Animated Acetate, Gold Shimmer Brush

Enjoy,

Alyson

Saturday, August 15, 2020

Creativity in Motion - Various Animated Cards (Part 1)

Close To my Heart has just released a super fun series of animated products for National Stamping Month in September. All the products are listed under Creativity in Motion. 

I was honoured to be asked by the corporate office to create and share artwork using these products for the benefit of all consultants. I created 7 interactive cards and shared them throughout the second week of August via live Facebook videos and posts. I am now posting all of those cards here in two separate posts. Unfortunately, without a video, you can’t see the actual motion in the cards - the images under the striped acetate actually appear to be moving when the tab is slid back and forth - it is SO cool! 

The stamps that go with this campaign are designed to work with the CTMH Stitched Square and Stitched Rectangle Thin Cuts. 

The first card is a gift card holder. There are 2 movement components here - one on the top with the word Thanks and the other inside the holder (a heart). The center section is designed to hold a gift card and there is also a complete card on the back with a space to write a message. 


The second card today is a Double Z Joy Fold Card. This card has been made and remade in various formats. I used a stitched rectangle frame for the front of the card and used a Happy Birthday sentiment. I decorated the remainder of the card with a stamp and die combination of coordinating coloured flowers and leaves. 


The third card is a Box Fold card. It goes by other names but this is the name of the one I located. The card front will stand on its own but for support, I added a card base behind. The dragonfly moves a lot when the insert is slid back and forth. 


The last card today is a Double Diamond Fold card. The stitched rectangle was the perfect fit for the front of this card and I used a hippo for that slider. His arms, ears and tail move when the slider is pulled back and forth. A small sentiment was added on the inside of the card where it isn't visible when the card is opened. I also added a panel on the back on which to write a message.


Tune in again tomorrow for the second instalment of these Creativity in Motion interactive cards! 

Products used are all Close To My Heart:  

Paper: 6x6 Bright Stack, White Daisy Cardstock, Black Cardstock, Lemonade Cardstock, Carolina Cardstock, Smoothie Cardstock, Sapphire Cardstock, Clover Cardstock, Bluebird Cardstock, Pixie Cardstock, Raspberry Cardstock, White Cards and Envelopes 

Stamps: Animated Safari Animals, Animated Butterfly Kisses, Animated Sentiments, Border Tabs, Simple Florals, Celebrating You

Inks: Black, Bluebird, Caroline, Raspberry, Sapphire, Smoothie, Peach, Lemonade, Lagoon, Mint

Accessories: Stitched Square Thin Cuts, Stitched Rectangle Thin Cuts, Border Tab Thin Cuts, Simple Floral Thin Cuts, Animated Acetate, Thin Foam Tape, Gold Shimmer Brush, Goldenrod Stickles, Gold Embellishing Thread, Gold Glitter Gems, Clear Sparkles, Tri-Blend Markers, Lemonade Shimmer Brush, Black Journaling Pen, White Twine

Enjoy,

Alyson