Friday, March 31, 2023

MTTC Christmas 57 - Holiday Poinsettia Card

 Welcome to My Time to Craft - Christmas! 

This week's theme is to use a poinsettia. 

I love making poinsettias for cards. I die cut the layers for this one in white and used inks to colour the sections. They were then sprayed with water to give a mottled appearance. While the pieces dried, I die cut some gold branches and also arranged the printed vellum and red top piece on the card.The sentiment was embossed in white. I shaped the flower pieces, assembled the poinsettia and added it at the bottom left. Aside from one gold gem in the centre of the flower, no other embellishments were added. 


Come and join us at MTTCC and show us you projects using poinsettias. 

You have two weeks to link up your project. 

We can't wait to see what you create! 

Enjoy,

Alyson

Thursday, March 30, 2023

Friend - I Miss You

 This is such a soft and pretty card! 

I hot foiled the floral image, used stencils to colour it and then die cut it. The background was die cut from silver foil and I lightly inked yellow corners before adhering that piece to the card base. I also added a white stitched border. The sentiment was die cut from an ombre inked piece and also cut from silver foil and the letters were inserted back into the outlines. The second part of the sentiment was stamped and added underneath. I coloured some clear gems and added them around each of the flowers. 

Enjoy,

Alyson

Wednesday, March 29, 2023

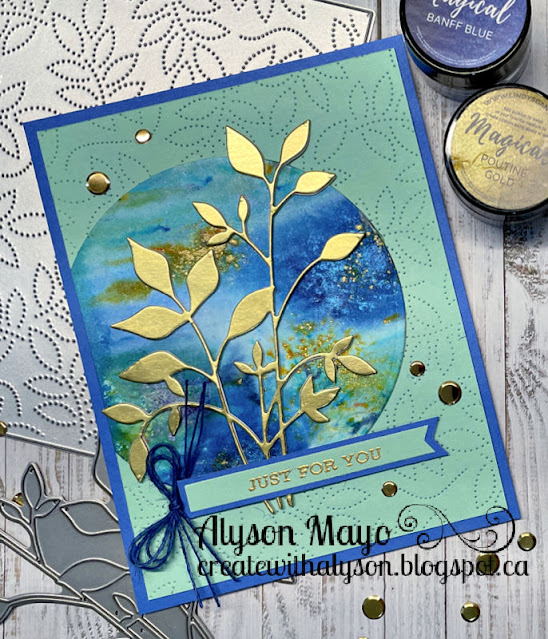
Just for You Gold Leaves

 I spent more time playing with magical powders - the backgrounds are so different and shimmery! 

For this card, I die cut a large circle from one of the backgrounds and adhered it to a stitched leaf background paper. The leaves were die cut in gold and white and I stacked the image before adhering it to the card. The sentiment was embossed in gold, added to a blue cardstock strip and placed at the bottom of the leaves. I tied a few pieces of blue twine together and placed the bow at the side. A few gold gems finished off the card. 

Enjoy,

Alyson

Tuesday, March 28, 2023

TSOT 600 - Thinking of You Bunnies

 Welcome to Try Stampin' on Tuesday Challenge 600! 

The optional theme (in addition to the sketch) is to use bunnies, chicks or lambs. I used three bunnies. 

This was my first time playing with Lindy's Magical Powders and wow! The backgrounds that those powders create are super cool and shimmery. I used red and brown powder plus a touch of gold for this background. There are other colours that appear (like the teal) as well. I stamped, coloured and die cut the little bunnies and each is holding something special. The sentiment was hot foiled in gold and added at the bottom right. A few gold gems finished off this card. 


Come and join us at TSOT and show us how you interpret the sketch shown above. 

You have two weeks to link up your project. 

We can’t wait to see what you create! 

Enjoy,

Alyson

Monday, March 27, 2023

AH 518 - Rainbow Mouse

 Welcome to Atlantic Hearts Sketch Challenge 518!

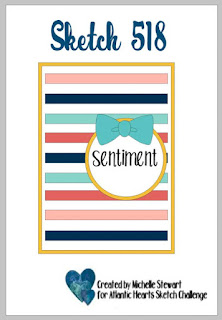
It's an interesting sketch with so many possibilities this week...

I chose to create a rainbow cloud background to represent the horizontal stripes on the sketch. The circle contains a stamped mouse image and I added a small sentiment on foam tape underneath the image. I coloured some clear sparkles and placed them around the image on the same colours of the rainbow. I matted all pieces with black cardstock to make the rainbow even more intense. 

Come and join us at Atlantic Hearts and show us how you interpret the sketch shown above. 

You have until Sunday evening to link up your project. 

We can’t wait to see what you create! 

Enjoy,

Alyson


Sunday, March 26, 2023

Another Collection of Card Sets for Gifts

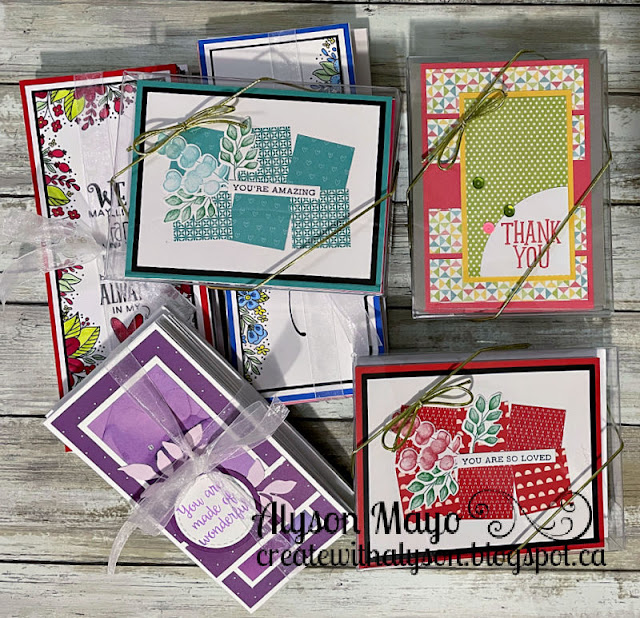
 I attend a day crop every now and then and I always have to prepare carefully ahead of time what I intend to do there. It is easiest for me to work on sets of cards that I give as gifts. 

These sets were completed during the last two day events I attended. I did much of the prep work at home (cutting, die cutting and some stamping). They make great gifts and are packaged in sets of 8-12 cards each. I always take several sets with me when I go to Toronto for medical appointments - the other patients really appreciate receiving them! 

Enjoy,

Alyson

Saturday, March 25, 2023

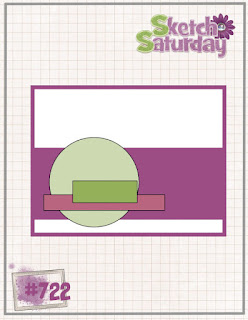
SS 722 - You're Amazing

 Welcome to Sketch Saturday Challenge 722! 

The optional element (in addition to the sketch) is to use buttons. 

I haven't used buttons on a project in ages - have just a few stored away now, so I chose not to add buttons to my card. 

I die cut a geometric shape and trimmed it to fit in the opening. The light teal cardstock was also embossed with a small dot pattern. The circle was die cut, along with the hello sentiment and I stamped and die cut an additional sentiment for the bottom. A few teal dots finished off my card. 


Come and join us at Sketch Saturday and show us how you interpret the sketch shown above. 

You have two weeks to link up your project. 

We can’t wait to see what you create!

Enjoy,

Alyson

Friday, March 24, 2023

CD 541 - Where Flowers Boom...

 Welcome to Colour Dare Challenge 541!

Greys - use shades of grey plus any two colours. Please note that aside from black, white and metallics, no other neutrals are to be used. 

I chose pink and green for my two colours. 

I stencilled the brick backgound using two shades of grey ink. The flowers were stamped, stencilled and die cut and I also die cut several leaves and branches from white cardstock. I inked the leaves with the same green ink and added white dots with a gel pen. The leaves were arranged under the floral spray and I added white Liquid Pearls to the berry branches. The sentiment was stamped and die cut and I added silver metallic thread under that piece. The card front was adhered to a grey card base and some dew drops finished off the card. 

Come and join us at Colour Dare and show us how you interpret this week's challenge. 

You have two weeks to link up your project. 

We can’t wait to see what you create! 

Enjoy,

Alyson

MTTC 504 - Springtime Wishes

Welcome to My Time to Craft Challenge 504!

The theme for this challenge is SPRING.  

Clean and simple cards usually aren't my strength but I just love this layering stencil from Gina K. Designs. It really did all the work for me! I chose three colour combos for the flowers and once the stencilling was finished, I cut the stencilled section to fit on an A2 card. I added gold and dark green borders as well. The sentiment was heat embossed on vellum and attached across the card. I only added a few clear gems to finish it off.

Come and join us at MTTC and show us how you interpret this week's challenge. 

You have two weeks to link up your project. 

We can’t wait to see what you create!

Enjoy, 

Alyson
Thursday, March 23, 2023

Reason to Smile Acetate Card

 I love working with acetate and just don't do it enough. There are so many neat things that can be done with a clear element. 

The front of this card is all acetate - the score line provides a half piece on the back that is sandwiched between two pieces of white cardstock. The floral image was stamped, stencilled and die cut and added to the acetate front. I die cut a second image and aded it to the back of the acetate to cover the adhesive. The same thing was done with the sentiment piece. A few clear dew drops were placed around the card to finish it off.

Enjoy,

Alyson

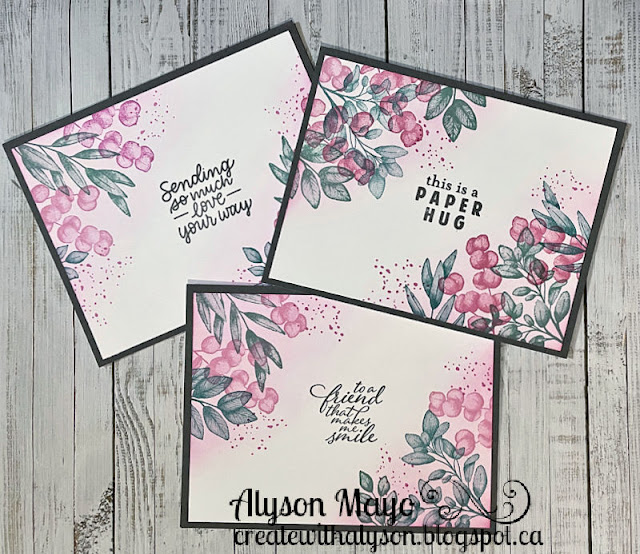
Inked Leaf Cards

 I saw a post of gorgeous cards in a Facebook group - didn't take note of who posted them but I wish I had so I could give her the credit for this design. 

The images were stamped in shades of pink and green and I lightly inked the same corners with pink ink. The sentiments were stamped in dark grey and I used the same dark grey cardstock for the mats. Easy - but oh, so pretty! 

Enjoy,

Alyson


Wednesday, March 22, 2023

Today is a Perfect Day

 I haven't participated in the 30 Minute Card Making Stash and Dash for several weeks due to other commitments... it was good to be back this week. 

The parameters for this week's card were as follows: gatefold card, inking, use a sticker and your own choice of colours. 

I embossed a vine stencil and added shades of blue ink on top. That piece was used for the front panels on my card. Since I don't own or use any stickers, I stamped, coloured and die cut some leaves. The sentiment was stamped and die cut, along with a border and I added the leaf images around the sentiment. I also stamped and coloured a leaf image for the inside as well as a sentiment. The large sentiment was attached to a belly band and I added some white and blue twine to finish off the card. 


Enjoy,

Alyson

Tuesday, March 21, 2023

Rainbow Floral Border Card

 I recently purchased this gorgeous floral border die and decided to use a rainbow approach with it. 

I cut several colours of cardstock into 1/16" strips and arranged them diagonally on a card front. The floral frame die was cut three times and stacked before it was placed on top of the rainbow strips. The sentiment pieces were also die cut and I used the negative piece to line up the letters. I also cut the word "love" from black cardstock and placed it on top of the block letters. No embellishments were added - the card is busy enough on its own! 


Enjoy, 
Alyson

Monday, March 20, 2023

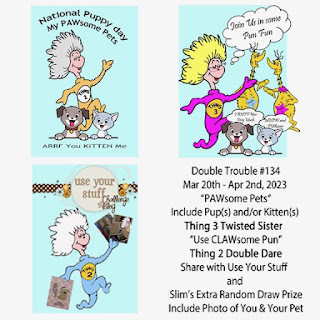
DT 134 - Punny Doggies

 Welcome to Double Trouble Challenge 134! 

This week, it's all about soft and cuddly - animals, that is! The small graphic is below - please visit the Double Trouble Challenge Blog for detailed information. 

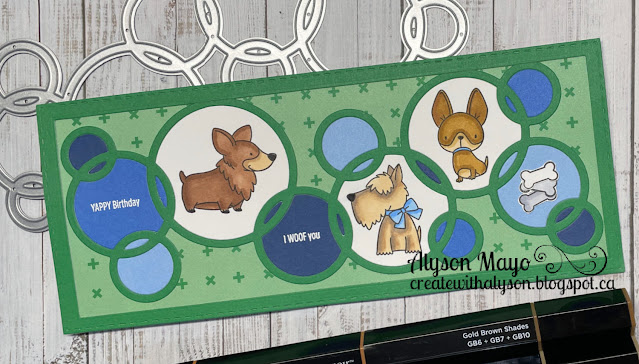
I have a few dog stamps and I wanted smaller stamps that would fit within the circles from the die cut. I die cut the circle frame in three shades of blue and also in white and pieced together the sections. I used the three white circles to stamp the doggies and colour them. The sentiments were heat embossed in white on two of the darker circles. I also stamped and fussy cut some bones to add to another circle. As an afterthought, I die cut a stitched border. In hindsight, I should have adhered that first as I realized that my circles weren't quite centred from top to bottom... such is life. 


Come and join us at Double Trouble and show us how you interpret this challenge. 

You have two weeks to link up your project. 

I am also linking up my card with the Use Your Stuff Challenge

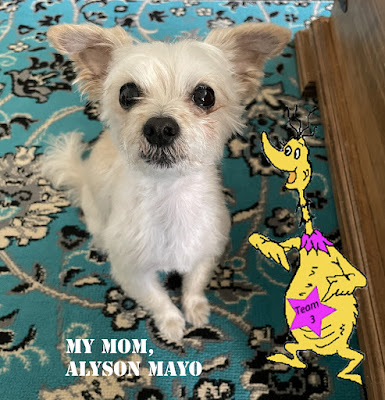
And this is a picture of my little doggie. She is a monster at 6 pounds! 

We can’t wait to see what you create! 

Enjoy,

Alyson


Sunday, March 19, 2023

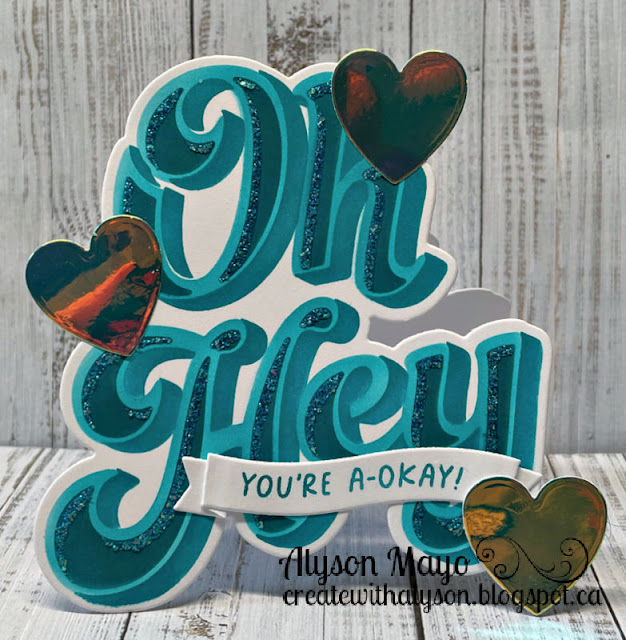
Shaped "Oh Hey" Card

 This cute idea was from a recent video by Jennifer McGuire. Shaped cards are always fun to create. 

One of the product sets I received as part of the last Crop and Create event was this one from Concord and 9th. It included a stamp, set of layering stencils and dies. The die is large enough to use for a card on its own. I used the layering stencils and four shades of turquoise inks to create the sentiment. I added clear glitter gel over the last layer and let it dry. The banner sentiment was stamped and die cut and I also die cut some holographic hearts. I added one heart at the bottom to help the image stand up straight. There is more shine and glitter on this card in real life than what shows in the photo. 


Enjoy,

Alyson


Saturday, March 18, 2023

You are So Loved

 This pretty card was inspired by one made by Debbie Reemtson. I liked the idea of the triangles coming out from the side of the card. 

I die cut triangles from yellow cardstock and smaller ones from various black and white patterned paper. The flowers and leaves were stamped, coloured and die cut. Once the triangles were arranged on the card, I stamped three small sentiments in the open spaces and then arranged the flowers around those sayings. Some clear dew drops were placed around the card to finish it off. 

Enjoy,

Alyson

Friday, March 17, 2023

Ewe Accordion Flap Card

 This card was created from a recent tutorial by Lynn Dunn. The card sides can be left open as I did or the sides can be glued closed so only the middle flap opens. 

I used some old spring papers plus two colours of cardstock for my card. Once the folds were made, I added the patterned paper and die cut a circle with a border for the front. I stamped, coloured and die cut a  ewe holding a balloon. Inside the flap, there is another ewe and a birthday message. Easy! 

Enjoy,

Alyson


MTTCC 56 - Reindeer in the Shadows


Welcome to My Time to Craft - Christmas Challenge 56!

This week, it's all about the letter R - choose something related to Christmas that begins with R and build your project around that. 

I chose reindeer. 

The base of my card was inked using three Distress Oxide inks and I created a sort of moonbeam shining down on the pair of reindeer. The ground was also lightly inked with a little more ink where the reindeer are standing. That entire background was splattered with white paint and then adhered to a black base. I die cut the two deer from both black and white cardstock and offset them slightly. The sentiment was die cut from black cardstock and adhered at the top. 


Come and join us at MTTCC and show us your Christmas projects that feature something that begins with the letter R. 

You have two weeks to link up your project. 

We can’t wait to see what you create! 

Enjoy,

Alyson

Thursday, March 16, 2023

Great Friend Rose Card

This is such a pretty and soft card and I love all the details. 

The background was die cut with a blanket stitched rectangle and I added a very detailed lace die cut on top of that. A scalloped frame was placed on top and I arranged the floral images around that piece. The sentiment was hot foiled in silver and added with foam tape. Some silver metallic thread and silver gems finished off this pretty card. 

Enjoy,

Alyson

Wednesday, March 15, 2023

Rainbow Hello

 This was a fun card to create and I love rainbows! 

The floral frame was die cut and I used several Distress Oxide inks to blend rainbow colours onto the image. That piece was adhered to black cardstock and I coloured a few gems in the same colours to fill in some of the open flowers. 

The sentiment was die cut and added to black cardstock. The small sentiment was stamped and added under the "hello". Easy! 

Enjoy,

Alyson


Tuesday, March 14, 2023

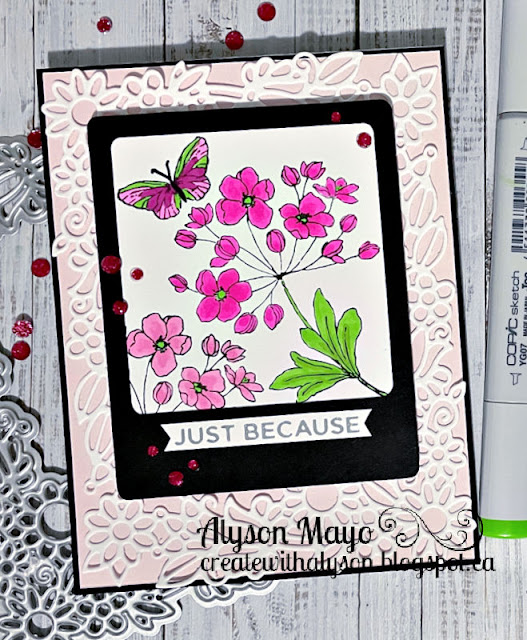
TSOT 598 - Just Because Pink Flowers

 Welcome to Try Stampin' on Tuesday Challenge 598! 

The optional theme (in addition to the sketch) is weather. 

I chose to use only the sketch. I used my Cricut to cut a black frame and then sized a piece of white cardstock to fit behind it. That piece was stamped with the flowers and butterfly and coloured. I die cut a detailed floral border and adhered that to a light pink background and then a black card base. The frame was raised with foam tape and I added a silver foiled sentiment across the bottom and a few dark pink gems to finish off the card. 

Come and join us at TSOT and show us how you interpret the sketch shown above. 

You have two weeks to link up your project. 

We can’t wait to see what you create! 

Enjoy,

Alyson

Monday, March 13, 2023

AH 516 - Just a Little Hi Tulips

 Welcome to Atlantic Hearts Sketch Challenge 516!

The sketch calls for six panels in the background - I chose to use a single hot foiled image and cut it into six sections while still maintaining the pattern. 

I stamped some tulips and coloured them before die cutting the image. I also die cut a piece of light grey cardstock to fill in the white space at the bottom. The sentiment was stamped, die cut and adhered with foam tape just under the tulips. I added some dew drops on and around the tulips to finish the card. 

Come and join us at Atlantic Hearts and show us how you interpret the sketch shown above. 

You have two weeks to link up your project. 

We can’t wait to see what you create! 

Enjoy,

Alyson

Sunday, March 12, 2023

More Magnolia Cards

These two cards are larger than what I usually make - they are 6x6 in size. I wanted to take advantage of the full size of the stamp, which is also 6x6. 

For the first card, I stamped and stencilled the image and on the final stencil layer, I added some clear glitter gel over the inked section. It created such a gorgeous shine. I die cut the large sentiment with both parts cut from glitter paper. I also added hot foiled "for you" just above the main sentiment and adhered the card front to dark blue glitter paper and then a white card base. Some silver gems finished off the card. 

The second card was stencilled the same way and had the glitter gel added on the last layer. I used hot foiled letters and coloured around the edges with a silver shimmer pen. I ink blended a piece of white cardstock before die cutting the word "friend" and I added some pink metallic thread and silver gems to finish off the second card. 

Enjoy,

Alyson

Saturday, March 11, 2023

SS 721 - You're the Reason

 Welcome to Sketch Saturday Challenge 721!

The optional theme (in addition to the sketch) is to use an embossing folder. 

I chose a woodgrain embossing folder and embossed the card front. The flowers and stems were die cut and I inked them in shades of blue and green. I also die cut two small squares and lightly inked the edges of those pieces. A strip of dark yellow cardstock was placed behind the squares and I arrange the floral spray on top. A sentiment was stamped in three shades of blue to create an ombre appearance. That was added at the bottom, along with some blue metallic thread. I placed a handful of dark blue gems around the flowers. 


Come and join us at Sketch Saturday and show us how you interpret the sketch shown above. 

You have two weeks to link up your project. 

We can’t wait to see what you create! 

Enjoy,

Alyson


Friday, March 10, 2023

CD 539 - Inlay Thinking of You Card

 Welcome to Colour Dare Challenge 539!

It's another tic-tac-toe board this week - choose any row, column or diagonal. You may use other colours but ONLY if they are on the grid. I used the bottom row (Wisteria, Lagoon and Glacier).

I have made this kind of card before but it worked so perfectly for this challenge. The inlay technique is gorgeous when it is completed but it is a LOT of work! 

I die cut the same image in each of the colours I needed. The individual pieces were placed back into a black outline. I had to cut a couple of colours a second time as some of those tiny pieces mysteriously disappeared during the process... Once that was finished, I stamped two sentiment strips and adhered them to the bottom. I added a second black outline piece on top and adhered the inlaid piece to several mats (white, Lagoon, Wisteria and finally a white card base). Some gold Stickles were added in the centres of the flowers. 

Come and join us at Colour Dare and show us how you interpret the colour grid shown above. 

You have two weeks to link up your project. 

We can’t wait to see what you create!

Enjoy,

Alyson

MTTC 503 - Pop-Up Birthday Card

 Welcome to My Time To Craft Challenge 503!

The theme for this challenge is birthday - and who doesn't need birthday cards?

I made a card like this a couple of months ago and really liked the style. It folds flat for mailing but it pops up when it is opened. I chose to use four colours plus black and white. 

The images were stamped and coloured. I die cut some images and others were fussy cut (no dies for them). I placed a balloon border across the front of the box and stamped the word BIRTHDAY using the same four colours. The background was stencilled with a turnabout confetti stencil and the images were arranged on two inside panels. A message can be written on the back of the card. 


Come and join us at MTTC and show us your birthday projects. 

You have two weeks to link up your project. 

We can’t wait to see what you create! 

Enjoy,

Alyson
Thursday, March 9, 2023

Magnolia Floral Cards

 I have been playing with the new Magnolia Pattern stamp and stencils from Pinkfresh Studio. I love that the stencils only colour some of the images and leave the rest blank. 

These ideas cane from a video done by Jennifer McGuire and the PFS website... always great ideas to be found! 

The first card was stencilled without stamping the background and I lightly stamped some butterflies and sentiments in the opening areas. The large sentiment was die cut and I stamped a smaller sentiment to go on top. 

The next two cards had the outline image stamped and coloured using the stencils. I used letters that are actually dies but I hot foiled them and then used shimmer brushes to colour around the white edges. A smaller sentiment was stamped, outlined and added to each card. I adhered the card fronts with craft foam and added gems to finish them off.


Enjoy,

Alyson
Wednesday, March 8, 2023

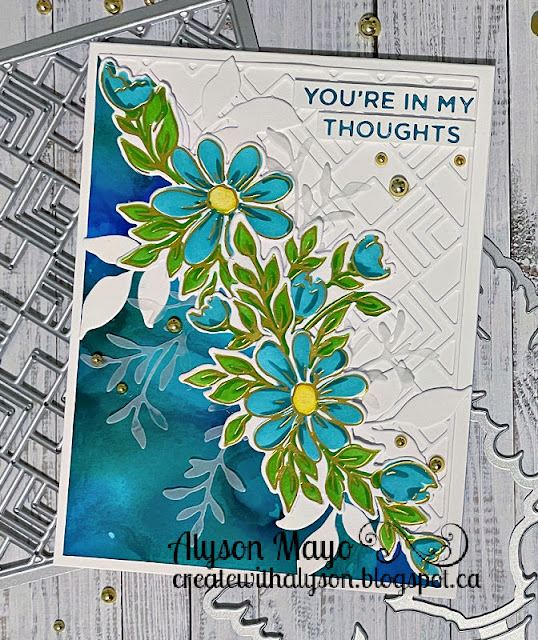
Daisy Wreath Cards

 I have had the Daisy Wreath products from Pinkfredh Studio for a long time and pulled them out to play a few days ago. 

I hot folded the wreath outline in gold and used the layering stencils to colour them in three colours. Each set was used to create a different card. 

For the first two cards, I cut the wreath apart into smaller sections. I angle cut a geometric coverplate image and the second halves were cut from an alcohol inked piece and a foiled leaf piece. The images were arranged along the angled line and I also added some white and vellum leaf images. Both sentiments were foiled and added to the cards. The last step was to add some gold gems. 


For the last card, I used the wreath as it was intended and adhered it to a stitched leaf background. The same white and vellum leaves were added around the wreath and the sentiment was placed on the right side. I used craft foam to adhere the top panel to a gold base. 

Enjoy,

Alyson