Monday, July 31, 2023

AH 536 - Merry and Bright

 Welcome to Atlantic Hearts Sketch Challenge 536!

I chose to make a Christmas card for this challenge. I die cut a lot of little floral and greenery pieces and added red and green ink to them to add more interest. They were arranged on a circle that was lightly inked with grey ink and then outlined with a gold stitched scalloped circle. The banners were cut from grey patterned paper and I added a very thin black border to each of them. The circle was arranged on the front and a small sentiment was placed off to the right side. Some gold metallic thread and gold glitter gems were added to finish off this card. 

Come and join us at Atlantic Hearts and show us how you interpret this week's challenge. 

You have until Sunday evening to link up your project. 

We can’t wait to see what you create!

Enjoy,

Alyson

Sunday, July 30, 2023

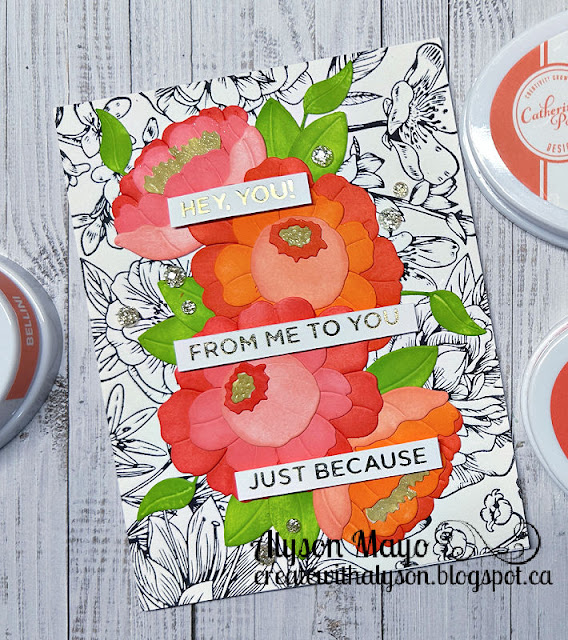
A JM Look-Alike!

 I watch a lot of videos by Jennifer McGuire... it just so happened that I had the same products she used for a recent card. I decided to try and recreate it using slightly different colours. 

She use pinks and oranges for the flowers whereas I stuck to shades of orange. I inked the floral and leaf pieces whereas she use coloured cardstock. The background was created using a press plate and the Better Press system. The sentiments are different but I just loved the design. Here is my CASEd card! 

Enjoy,

Alyson

Saturday, July 29, 2023

SS 731 - Just Because Diamonds

 Welcome to Sketch Saturday Challenge 731!

The optional theme (in addition to the sketch) is to use a food item. 

I used only the sketch.

The diamonds were hot foiled in gold and die cut. I inked five panels with shades in orange and red from lightest to darkest. They were water splattered and adhered to the back of the open diamonds. I also inked the background for the sentiment and all around the edge of the card base. The floral image was embossed in black on the centre panel. Everything was adhered to a brick patterned background and I added a thin strip of black glitter paper along the right side. The sentiment was also hot foiled and added at the lower left. Some small black flowers with coloured sparkles in the centres were added around the focal image. 

Come and join us at Sketch Saturday and show us how you interpret the sketch shown above. 

You have two weeks to link up your project. 

We can’t wait to see what you create!

Enjoy,

Alyson

Friday, July 28, 2023

CD 559 - Hello Sunshine

 Welcome to Colour Dare Challenge 559! 

Choose at least three colours from the inspiration photo below. 

I chose orange, yellow and green (also used black, white and gold). 

The background was hot foiled in gold and adhered to a green card base. The floral image was stamped in black and I used several shades of green, orange plus a dark yellow to stencil the image. The image was die cut and adhered to the foiled background and I added a foiled sentiment with some gold metallic thread on the right side. Some orange enamel dots finished off this pretty card. 

Come and join us at Colour Dare and show us how you interpret this week's challenge. 

You have two weeks to link up your project. 

We can’t wait to see what you create! 

Enjoy, 

Alyson

DT 144 - Stack of Piggies

 Welcome to Double Trouble Challenge 144!

This week, the focus is on woodgrain (and piggies, if desired). The small graphic is below - please visit the Double Trouble Challenge Blog for detailed information. 

This was an interesting card for me... I stamped the stack of piggies on white cardstock and again individually on masking paper. I fussy cut each of the masking images and placed them on top of the stamped images on the card front. I used a scoring blade to add score lines randomly across the card, working between the piggy images. With the masking paper still in place, I dragged grey and brown ink pads over the raised lines, making my own woodgrain pattern. Once the masking paper was lifted, I coloured the piggies and adhered that piece to pink cardstock with craft foam and then to a black cardstock base. The sentiments were stamped and one was added beside each piggy. Some pink glitter gems finished off this card. 

Come and join us at Double Trouble and show us how you interpret this week's challenge. 

You have two weeks to link up your project. 

I am also linking up my card with the FarmQuest Challenge (use pigs).

We can't wait to see what you create!

Enjoy,

Alyson

MTTC 513 - A Perfect Day to be Happy

 Welcome to My Time to Craft Challenge 513!

The theme for this challenge is to use shades of blue. 

I stamped a flower using three shades of blue ink and also die cut some berries from blue cardstock. The leaves were stamped in grey and also die cut from grey cardstock. I created an acetate front card and I masked and stamped the floral image in the top corner on the back panel. The sentiment was stamped at the bottom right using two shades of blue ink. The flower and leaves were arranged at the left side and I also added extra die cuts on the back to hide the adhesive. Some dew drops finished off this pretty card. 

Come and join us at MTTC and show us your blue projects! 

You have two weeks to link up your project. 

We can’t wait to see what you create! 

Enjoy,

Alyson
Thursday, July 27, 2023

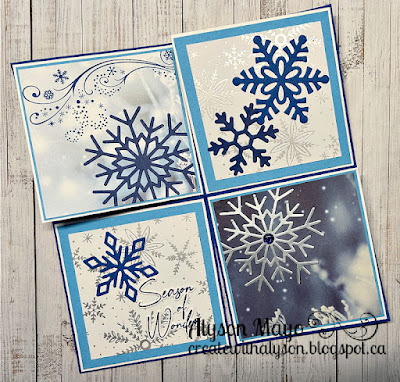
Fan Fold Christmas Card

 This unique folding card has four panels but only one shows when the card is closed. 

When the card is opened, the four panels are revealed. I learned that directional paper is much harder to use than papers with non-directional patterns. I used winter papers wth a blue colour theme along with some silver snowflake patterned paper. The snowflakes were die cut and I stamped a flourish and a sentiment on two pieces. There is a panel on the back to write a message. 

The front of the fan fold card is shown along with the opened card that shows all panels.


Enjoy,

Alyson

Wednesday, July 26, 2023

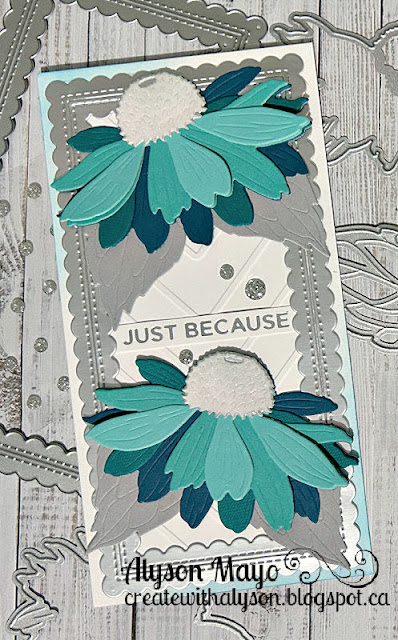
Just Because Coneflower Card

 This is yet another card that was made for the 30 Minute Cardmaking Stash and Dash. I finished in just over 30 minutes... 

The parameters this week were as follows: type of card - slimline, colour scheme - monochromatic, technique - embossing, embellishment - metal.

I embossed a piece of white cardstock and adhered that behind a silver die cut scalloped border. The card base was inked on two corners. The coneflowers were die cut from various shades of teal and assembled. They were placed on the top and bottom of the card and I added a hot foiled sentiment between them. A few silver glitter gems finished off this pretty card. 

Enjoy,

Alyson

Tuesday, July 25, 2023

Better Press Birthday Cards

 I went back to my Better Press machine after some frustrating initial attempts and this time was so much better! 

The pressed images are the backgrounds for each card plus the birthday and celebrate messages. I CASEd these cards from the Spellbinders website as I really liked the look of them. The background and the sentiment pieces were trimmed to fit on black mats and the sentiments were adhered with foam tape. I die cut a bunch of flowers and leaves from white cardstock. Those were inked and adhered to the corners of the card. A few gems (light blue or clear) were added to the cards to finish them off. 


Enjoy,

Alyson 

Monday, July 24, 2023

Sunflower Sunshine

 I have seen so many cards made with this bubble die from Memory Box... finally got it for myself. 

The background was die cut with the bubble die, which leaves a dotted impression instead of cutting all the way through. I inked that panel with light purple ink and added an array of washi tape sunflowers to the centre. The sentiment was hot foiled in gold and adhered to gold foil cardstock. The entire panel was adhered to the card base with craft foam and I added a few gold sequins around the image. 

Enjoy,

Alyson

Sunday, July 23, 2023

Berry Sweet Building Block Card

I revisited a card design that I made several years ago. It's always a fun one! 

Aside from a bit of cardstock, the papers and patterns all come from the Berry Sweet paper collection from scrapbook.com. I die cut a ton of strawberries and leaves along with a basket and some other pieces. There are three panels to the card and the inside two panels form a series of blocks. Those sections were perfect for adding letters for a short sentiment - I choose to use LOVE YOU. The die cut images were added on the front and the right side plus one berry was placed at the bottom of the sentiment panel. Easy, but oh, so cute! 


Enjoy,

Alyson

Saturday, July 22, 2023

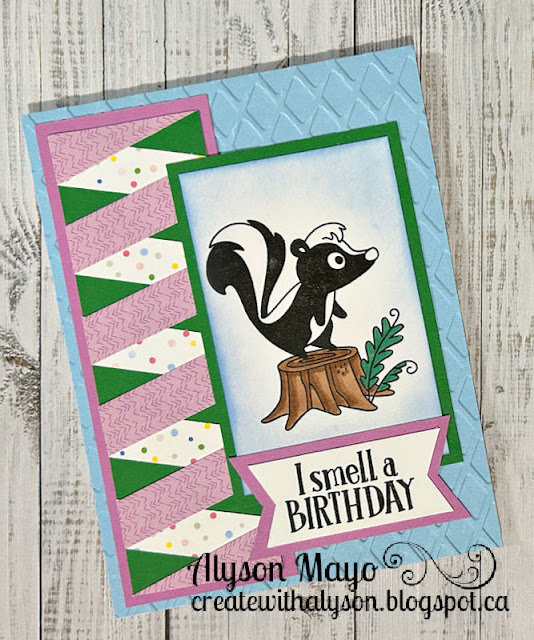
Twisted Ribbon Technique Cards

 I have seen this technique many times and it has taken me this long to find the time to try it myself. 

The side panel looks like it was made with ribbon but it's all paper. I have two cards to demonstrate this technique - one is very elegant and the other is more fun. I love the black and white card - it is just so pretty!

The twisted ribbon panels were made from cardstock and patterned papers. I speficially chose black and white for the first card and die cut some crocus stems. They were inked and added to the right side, slightly overlapping the ribbon technique piece. A simple sentiment was placed across the bottom.

The second card has the same technique panel but I embossed the background and added an image of a skunk to create a birthday card. 

Enjoy,

Alyson

Friday, July 21, 2023

MTTCC 65 - A Gaggle of Snowmen

Welcome to My Time to Craft Christmas Challenge 65! 

The theme for this challenge is "a cute Christmas". 

I love this collection of snowmen - they are just so cute! I stamped the image, coloured in the elements and die cut that piece with a stitched rectangle die. I added a piece of black cardstock as a border and stamped the sentiment at the bottom of the card base. I added some Stickles to some of the hats, scarves, etc. to finish off this card. 

Come and join us at MTTCC and show us your cute Christmas projects. 

You have two weeks to link up your project. 

We can't wait to see what you create!

Enjoy,

Alyson


Thursday, July 20, 2023

Shaped Floral Front Card

I posted a card similar to this one quite a while ago - I liked it so much that I decided to do another one in the same style but with a different colour scheme. 

The flowers and leaves were stamped and die cut. They were arranged to fit on an A2 card front with parts of the flowers holding up the front of the card. The back panel was embossed and that is visible behind the flowers. A hot foiled sentiment was added along with some clear dew drops. 

Enjoy,

Alyson

Wednesday, July 19, 2023

Sunflower Slimline Card

 This card was the result of another 30 Minute Card Making Stash Dash event. I finished just after the timer went off - but it's all for fun, right? 

The parameters for this challenge were as follows: Type of card: slimline   Colour: metallic   Technique: dovetail   Embellishment: ribbon or string

I made a slimline card using washi tape sunflower images. I die cut a stitched gold foil border and adhered that to a purple inked slimline panel. I arranged the sunflower images diagonally across the card and added the hot foiled sentiment (dovetailed the end) under one of the flowers. Some gold metallic thread was placed under one of the flowers and I added some gold glitter gems around the images. 

Enjoy,

Alyson

Tuesday, July 18, 2023

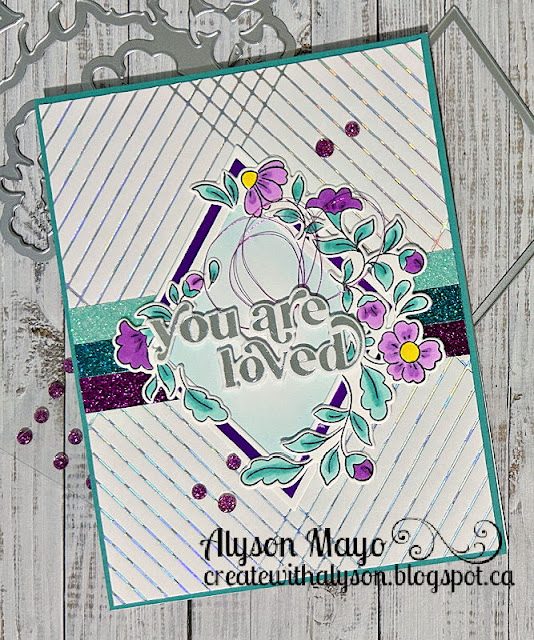
TSOT 616 - Love in Diamonds

 Welcome to Try Stampin' on Tuesday Challenge 616!

The optional theme (in addition to the sketch) is to include a summer drink. 

There is a lot of hot foiling on this card - the striped background, the purple diamond and the sentiment were all hot foiled. I added three strips of shimmer tape across the centre in the same colours as the flowers and leaves. The floral images were stamped and coloured with markers. I brushed the flower centres and the lines with shimmer brushes. I lightly inked a white diamond and added it behind the purple foiled one and that was placed in the centre of the card and with the floral pieces arranged along the edges. I added a sentiment with foam tape and metallic thread underneath. The card front was adhered to a turquoise card base and some purple glitter gems were added around the image. 

Come and join us at TSOT and show us how you interpret this week's sketch. 

You have two weeks to link up your project. 

We can’t wait to see what you create! 

Enjoy,

Alyson

Monday, July 17, 2023

AH 534 - Smile Big

Welcome to Atlantic Hearts Sketch Challenge 534!

Aide from the banner shape, I stayed very true to the sketch with my card. 

The background was reverse hot foiled using a die. I split that piece in two and adhered it to a white backgound and then to teal glitter paper. The sentiment was heat embossed in white and added to a white border piece. I die cut some leaves and flowers from holographic paper, shimmery white cardstock and teal cardstock and adhered them between the frame front and the outline. Some clear gems were added around the image to finish off this card. 

Come and join us at Atlantic Hearts and show us how you interpret the sketch shown above. 

You have until Sunday evening to link up your project. 

We can't wait to see what you create! 

Enjoy,

Alyson

Sunday, July 16, 2023

Inlaid Die Cut Card

 This pretty card has a lot happening... the white floral outline was die cut three times and stacked. The inside pieces from that die cut were saved and inked to create the flowers and leaves. Once the angled and embossed background was created, the floral outline was adhered and the inked pieces were added inside each section. A small sentiment was placed on an angle and the card front was adhered to the base with craft foam. 

Enjoy,

Alyson

Saturday, July 15, 2023

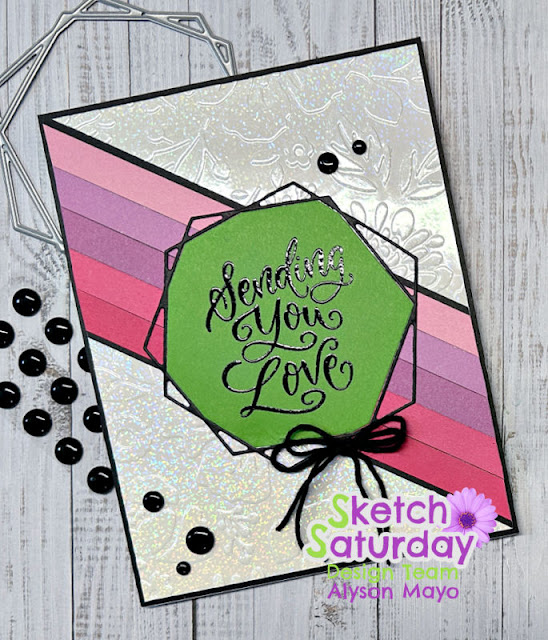
SS730 - Sending You Love

 Welcome to Sketch Saturday Challenge 730!

The optional theme (in addition to the sketch) is to feature a sentiment.

I created my card in vertical format instead of the horizontal format shown in the sketch. I began by embossing a piece of off-white shimmery cardstock. Five strips of pink and purple cardstock were adhered to black cardstock and placed across the card. The sentiment was embossed in black and die cut using a very thin circle outline die. I added a small bow at the corner of the sentiment and some black enamel dots around the card.

Come and join us at Sketch Saturday and show us how you interpret this week's sketch.

You have two weeks to link up your project. 

We can't wait to see what you create!

Enjoy,

Alyson

Friday, July 14, 2023

CD 557 - CAS Thinking of You

 Welcome to Colour Dare Challenge 557!

All three colours must be used - neutrals are free. 

I ink blended a panel using oxide inks and splattered it with water. The vine image was stamped and heat embossed in black and that piece was adhered to a black background. I used one stripe of each colour and adhered them across the centre of the card. The inked panel was added on the right side. I also embossed the sentiment at the bottom. I did not add any embellishments, leaving it clean and simple. 

Come and join us at Colour Dare and show us how you interpret this week's challenge. 

You have two weeks to link up your project. 

We can’t wait to see what you create!

Enjoy,

Alyson

DT 143 - Traditional Christmas Squares

Welcome to Double Trouble Challenge 143!

It's Christmas in July! The small graphic is below - please visit the Double Trouble Challenge blog for additional information. 

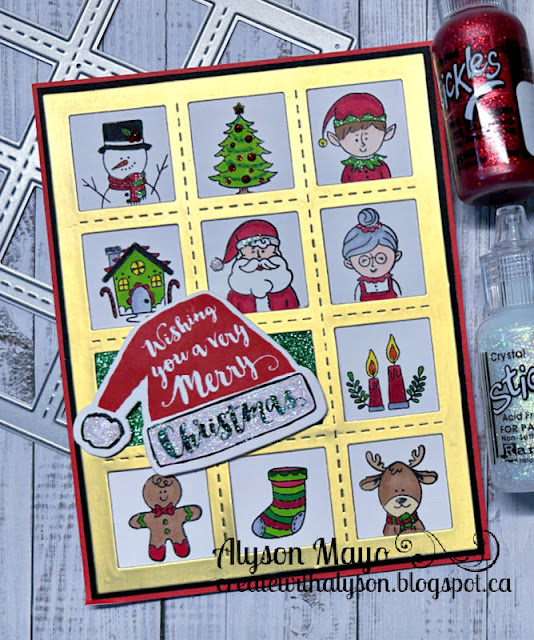
I have a lot of Christmas stamps but not a lot with a Santa hat... had to dig deep for this challenge. I chose a stamp set with lots of tiny Christmas images and stamped and coloured all of those. The large hat was stamped and die cut. Everything was arranged on a die cut panel of squares. The hat was added with foam tape and I used Stickles and a clear shimmer brush to add detail to some of the images. 


Come and join us at Double Trouble and show us how you interpret this week's challenge. 

You have two weeks to link up your project. 

I am also linking up my card with the Jingle Belles Challenge (use a Santa hat). 

We can't wait to see what you create! 

Enjoy,

Alyson

MTTC 512 - Summer Scene Cards

 Welcome to My Time To Craft Challenge 512! 

The them for this week's challenge is summer water play. 

I had to dig deep to find some products for this challenge. I have a stencil and coordinating stamp set that I used for both of these cards. 

The first card was watercolored to created the background (definitely NOT my strength!). Once that piece was dry, I stamped a sun, some palm trees and people images on the base. The sentiment was added on the right side.

The second card depicts a water scene with the images stamped in black. The sentiment was added on the right side. 

Come and join us at MTTC and show us your summer water play projects. 

You have two weeks to link up your project. 

We can't wait to see what you create!

Enjoy,

Alyson

Thursday, July 13, 2023

You Make Me Smile

 This is a pretty shaped-front card. The image was stencilled and die cut. That piece forms the entire front of the card along with a small sentiment, placed at the right side. The background was embossed and another floral die cut sits on that piece to allow a place to write a message. A few gold gems were added to the centres of the small flowers. 


Here is a second card in the same style but with a different sentiment. 

Enjoy,

Alyson

Wednesday, July 12, 2023

Coneflowers with Better Press

 This card turned out better than I anticipated...

The black background was created using the Better Press system which creates a letterpress imprint in the paper. I die cut three sets of coneflowers and inked two of them in pink and one in purple. They were assembled and I added them in the centre of the card as there was a die cut opening there for a sentiment. Three embossed birthday sentiments were placed across the flowers. This card was inspired by one made by Jennifer McGuire. 

Enjoy,

Alyson

Tuesday, July 11, 2023

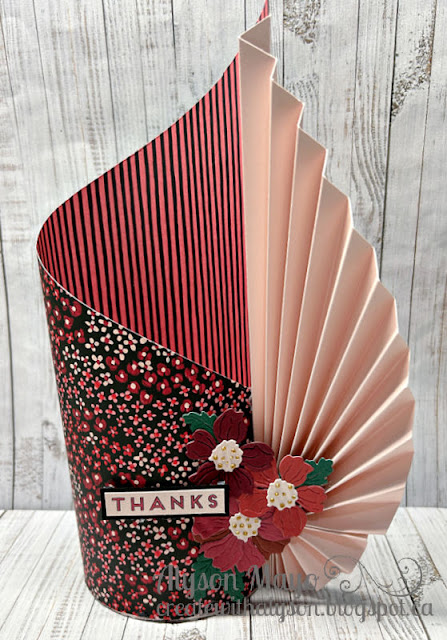
Fan Vase

 This fan vase has a finished bottom and can be used to gift some light items. The base could be eliminated and that would allow it to be wrapped around a wine bottle to give as a gift. 

I chose some old patterned paper and light pink cardstock for this project. Once the fan component was created, the patterned paper was wrapped around the base and the fan was added at the side. I die cut some flowers and leaves from scarlet and pink cardstock and added them at the bottom, along with a sentiment. This is such a pretty project when it is finished! 

Enjoy,

Alyson

Monday, July 10, 2023

Coloured Floral Card Set

 I have taken the stamped images for this set of cards to a few day crops and finally had time to finish them at the last event I attended. 

The floral images along with a sentiment were stamped on an oval die cut. I coloured the flowers according to the colour of cardstock that was placed behind each image. These weren't hard to do - just time consuming. I made a set of eight cards for a gift. 


Enjoy,

Alyson

Sunday, July 9, 2023

Better Press Cards - First Attempt

 I recently purchased the Better Press machine from Spellbinders. It creates letterpress effects and the results are gorgeous. All the info out there suggests that this is a fool-proof process - well, I'm not so sure about that. 

I have ended up with smudges on every piece that I have done - it's hard to remove the top plate and the cardstock without touching the edges. That may be an experience thing - the more often I do it, the better it may get. 
Colouring is supposedly best done with water-based products... the first card below was coloured with Zig markers, which are water-based. That is definitely not a strength for me and I learned a lot while doing it. 


The second card was coloured with alcohol ink markers. It works but it's hard to prevent fuzziness around the image that wasn't there before I started colouring. 

This is a learning experience - I will return to it and try more ideas when I have a bit of time! 

Enjoy,

Alyson