Tuesday, February 28, 2023

Blended Mountains

 I was watching a home renovation show recently and a beautiful feature wall was created with a mountain landscape. I thought I would try the same idea with inks. 

I chose three shades of the same colour and worked from bottom to top, gradually getting lighter toward the top of the card. I tore some masking paper and used that to create the hills and mountains. It surprised me just how easy this was to do! I added a sentiment to the bottom of each card and chose coordinating cardstock to border the scenes.


Enjoy,

Alyson

TSOT 596 - Hugs Card

 Welcome to Try Stampin' on Tuesday Challenge 594!

The optional theme (in addition to the sketch) is sweets. 

I didn't have anything related to sweets so I stuck with just the sketch. 

The background was die cut with a stitched coverplate die and I also die cut the flower, leaves and the circle. The circle was inked with Distress Oxide ink and the banner was adhered just under the top of the circle. The leaves were cut from vellum and adhered under the flower. The sentiment was hot foiled in gold and I added some gold Stickles to the flower and around the card. The centre of the flower was filled with Lilac Liquid Pearls. 

Come and join us at TSOT and us how you interpret this week's sketch.

You have two weeks to link up your project. 

We can’t wait to see what you create! 

Enjoy,

Alyson

Monday, February 27, 2023

AH 514 - Hello Bees

 Welcome to Atlantic Hearts Sketch Challenge 514!

The sketch is pretty straightforward so I did add some elements and I also placed the image on the left side instead of the right. 

The white background was lightly stencilled with a honeycomb stencil. I ink blended a piece in green and splattered it with water before die cutting that and a black border. The flowers and bees were stamped, coloured and die cut and added around the frame. I die cut a sentiment and also white heat embossed a smaller strip sentiment and those were placed at the bottom. The bees and the yellow flower centres were brushed with shimmer brushes and some gold gems were added around the card. 

Come and join us at Atlantic Hearts and show us how you interpret this week's sketch. 

You have until Sunday evening to link up your project. 

We can't wait to see what you create!

Enjoy,

Alyson

Sunday, February 26, 2023

Leaves in Lattice

 This card took a while to make but I love the effect! I manually cut an opening in the card front, leaving 1/4" border on three sides. I cut a pile of white strips at 1/8" each and attached them on the back to create a lattice opening. I covered all the messy work on the back with some paper strips.

The leaf images were inked with Distress Oxide inks and arranged in the lattice section. I inked another piece of cardstock and die cut the sentiment shadow from that piece. Three white sentiment pieces were stacked together and I also stamped a small sentiment for the top. I kept this card relatively clean and simple. 

Enjoy,

Alyson

Saturday, February 25, 2023

SS 720 - What's Up Giraffe Card

 Welcome to Sketch Saturday Challenge 720! 

The optional theme (in addition to the sketch) is to use an animal. 

If you saw my last post for this design team, you may recall that I ended up remaking my card as I wasn't happy with my first attempt. It was the same situation here... seems I am hainvg a hard time getting it right the first time! 

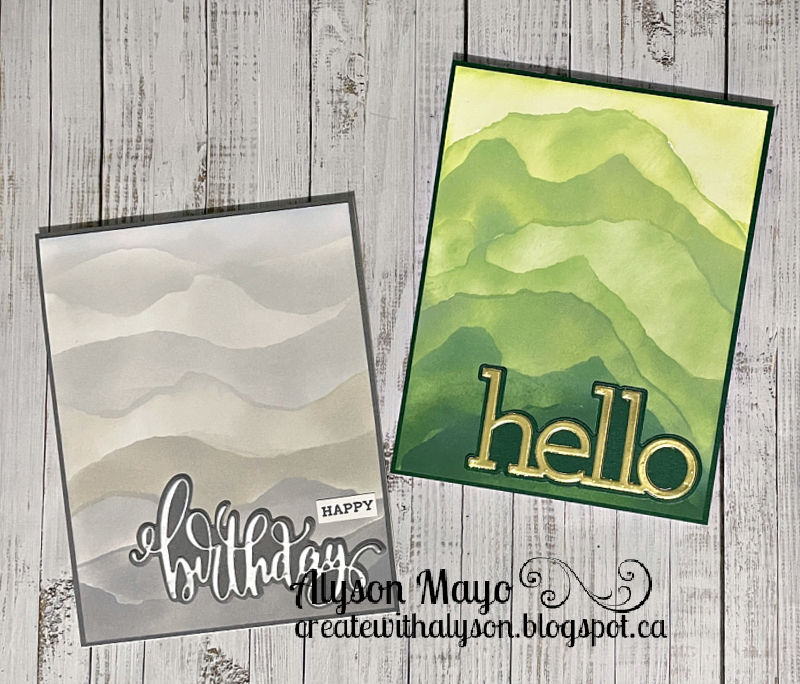
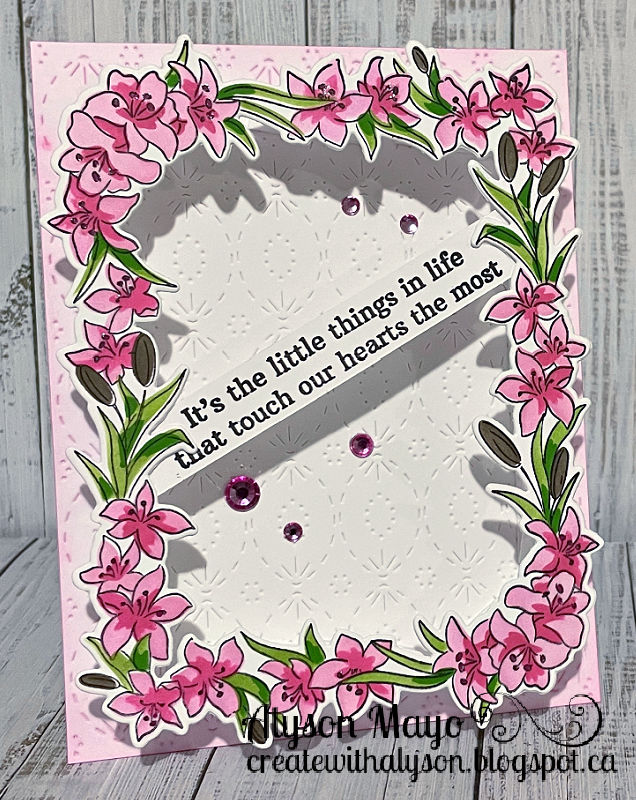
I created a background by blending turquoise distress oxide inks and then splattering that with white and turquoise sprays. That was adhered to a dark teal background and then to the white card base. I die cut a stitched square background (trimmed it) and stamped some giraffes on white cardstock to be placed behind the border. A leaf image was added along the right side. 


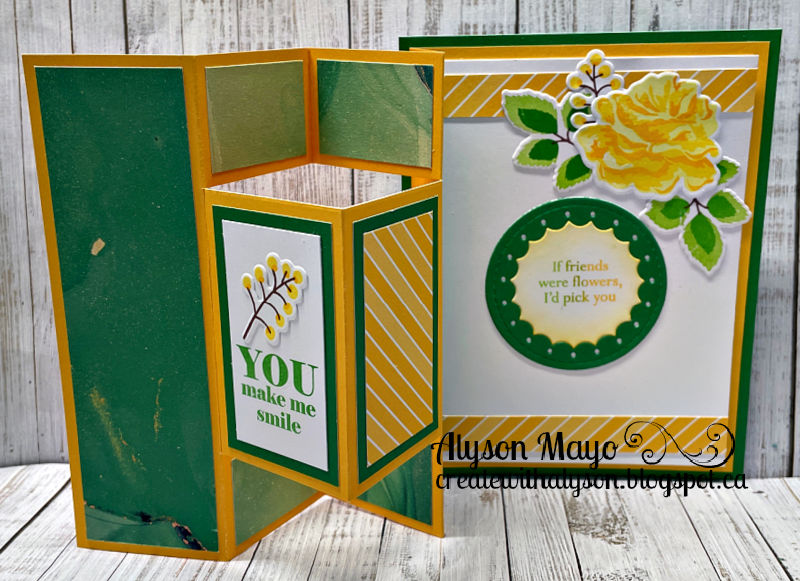
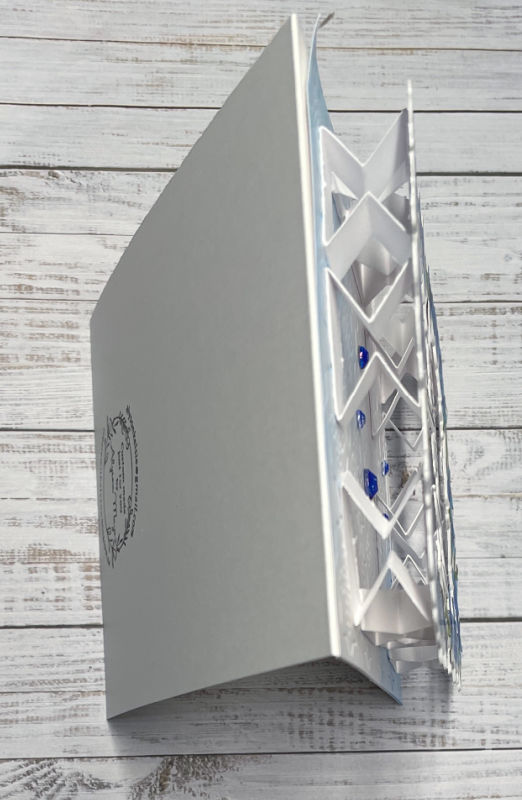
This is the original card I created for this challenge... I rotated the sketch ninety degrees and stamped three animals. They were coloured and fussy cut. I die cut three shapes to form the box and fussy cut three pieces of white cardstock for the inside panels. Those were stamped with a splatter stamp before I adhered the animals. I stamped a sentiment for the bottom and added an old flourish which I coloured in a darker shade than the background paper. 

Come and join us at Sketch Saturday and show us how you interpret the sketch shown above. 

You have two weeks to link up your project. 

We can't wait to see what you create!

Enjoy,

Alyson

Friday, February 24, 2023

CD 537 - You are Wonderful

 Welcome to Colour Dare Challenge 537!

You must use Grape plus ONE other colour shown. 

I choose Lagoon as my second colour and decided to use shades of grey for my card.

The background diagonal lines were stamped using a pull apart stamp and three shades of grey ink. I die cut a stitched rectangle frame in grey and a silver circle. Before I placed anything down, I masked around the rectangle frame and splattered the front with a Grape shimmer brush. The leaves were die cut from both the light and dark sides of Lagoon cardstock and I arranged them under the circle and on the left side of the frame. The letters were placed over the circle and I added the rest of the sentiment in two strips on the right side. Some turquoise flat gems were added and I adhere the front to a Lagoon border and a grey card base. 

Come and join us at Colour Dare and show us how you use this week's colour scheme. 

You have two weeks to link up your project. 

We can’t wait to see what you create! 

Enjoy,

Alyson

MTTC 502 - Rainbow Friend Card

 Welcome to My Time to Craft (MTTC) Challenge 502!

This is a brand new design team for me - I am so happy to join the other talented ladies on this team! 

The theme for this challenge is rainbows - one of my favourites!

I used a set of layering stencils and lots of Distress Oxide inks to create the rainbow background. Once the last layer was stencilled, I added Moondust Glitter Gel on top to add some shine. When that piece was dry, it was adhered to a black base. I die cut the word "friend" three times and stacked it. The smaller sentiment was stamped and added underneath. A few clear dew drops finished off the card. 

Come and join us at MTTC and show us how you interpret the rainbow theme. 

You have two weeks to link up your project. 

We can’t wait to see what you create!

Enjoy,

Alyson

Thursday, February 23, 2023

Floral Border Cards

 These two cards use another set of products I have had for a while and finally pulled out again. 

I stamped the floral square on white cardstock and then die cut that piece with a stitched rectangle die. The image was stencilled and added to a piece of coral cardstock and then to a white card base. I added some iridescent gems in the flower centres and around the image. 

The second card was stamped from the top and bottom of the rectangle and the images were stencilled as well. That one was added to a piece of raspberry cardstock and then a white card base. I used the same iridescent gems to finish off this card. 

Enjoy,

Alyson

Wednesday, February 22, 2023

Holographic 3-D Embossed Cards

 3-D embossing folders are so cool - the depth of embossing that they create is second to none. 

There were two different folders used for these cards. The first background was embossed with a square grid pattern and that pattern just happened to fit nicely under a white cover plate die that I have. I lined up the die cut over the squares and added a stitched rectangle around the edge. I wanted the holographic paper to take centre stage so I added only a foiled sentient and two smaller strip sentiments to the card. 

The second card - well... that crinkled look needs to be shown off! I added a stitched rectangle border and just a simple sentiment. 

Enjoy,

Alyson

Tuesday, February 21, 2023

Oh Hey - Let's Celebrate

 I have had this stencil and die set since last fall - just haven't had time to play with it! 

The sentiment was stencilled in shades of blue and for the last layer, I used silver glitter gel. Once that was dry, I die cut that piece along with some small diamonds and the sentiment banner. All of it was adhered to a stitched rectangle, then a blue mat and finally to a white card base. A few iridescent gems were added and I brushed the small diamonds with a clear shimmer brush. 

Enjoy,

Alyson

Monday, February 20, 2023

DT 132 - Birthday Fun Fold Card

 Welcome to Double Trouble Challenge 132! 

It's all about fun fold cards this week - and there are so many types of fun fold cards. The small graphic is below - please visit the Double Trouble Challenge blog for detailed information.

I made one of my favourite fun folds ever - the inside is a big surprise when the card is opened. 

I have some gorgeous washi tape sunflower images and those were perfect for this card. I based the colours around those images - purple, yellow, green and gold. The outside panels were made first and I die cut gold frames to go around the inside squares. The front was decorated with the same frame and the word Celebrate. Inside, the individual panels spell BIRTHDAY with a small Happy die cut at the top left. I added sunflower images around each of the letters as well. There is a place to write a message on the back of the card. 


Come and join us at Double Trouble and show us your fun fold cards! 

We are also parting up with the Creative Creases challenge so I am linking my card up there. 

You have two weeks to link up your project. 

We can’t wait to see what you create!

Enjoy,

Alyson

Sunday, February 19, 2023

Peace Birch Trees

 I modelled this card after one I found on Pinterest - mine is a full front card. 

I used four Distress Oxide inks to blend a blue and green background on white cardstock and then covered it with clear glitter gel. That took a while to dry. The birch tree card front was die cut four times and stacked together for dimension. I die cut the word Peace from silver paper and adhered it to a turquoise shadow before placing it on the front of the card. Once the background was dry, I trimmed that piece and adhered the trees on top. The card is so shimmery in real life! 

Enjoy,

Alyson

Saturday, February 18, 2023

Stencilled Flowers with Butterflies

 I love the colour scheme on this card - the lighter greens with deep pinks and purples work so well together. 

I stencilled the floral image and also stencilled a set of butterflies. The butterflies were die cut. The outside border and the scalloped strip were die cut from white cardstock that I coloured using the same ink pads as I used for stencilling as I wanted them to match exactly. I added two butterflies and used Stickles to highlight a few sections on the flower and the butterflies. The darkest sections of the flower were also brushed with a clear shimmer brush. I haven't added a sentiment - will do that when I send the card. 


Enjoy,

Alyson

Friday, February 17, 2023

Split Panel Cards

 For lack of a better description, I am calling these cards split panel cards. This card style was inspired by Bibi Cameron - I loved what she did and wanted to try the idea myself. 

The card base was cut into 1/2" strips about 2/3 of the way up the card front. Those pieces were then reattached in a split formation with two cross pieces used to hold everything together. I chose three related sentiments and stamped them onto the bottom three cross pieces. For the first card, I used a floral image from Pink and Main and the second card has tulips that were stamped with a layering stamp set from Altenew. I added shimmer to the flowers for both cards and that can be seen in the close up photos. 


Enjoy,

Alyson

Thursday, February 16, 2023

Purple Flower Shaker Card

 This stamp and stencil combo from Pinkfresh Studio is one of my favourites - the large floral image is so pretty. I decided to turn this one into a shaker card. 

The image was stamped and stencilled and I die cut a green frame for the shaker. I did glue down a few of the sequins inside so everything wouldn't fall to the bottom when the card is displayed. The sentiment was hot foiled in silver. Easy!

Enjoy,

Alyson

Wednesday, February 15, 2023

Friend Pop-Up Fun Fold Card

This is an easy fun fold card with a bold and bright colour scheme. 

I chose green and yellow patterned papers along with coordinating cardstock. The images were stamped (layered stamping) and I also ombre stamped the two inside sentiments. The flower was placed at the top so it would be partly visible when the card is closed. There is a separate card that opens on the right side and there is another sentiment inside that section, along with a floral cluster at the bottom. The card folds flat for mailing. 


Enjoy,

Alyson

Tuesday, February 14, 2023

TSOT 594 - Furry Friends Card

 Welcome to Try Stampin' on Tuesday Challenge 594!

There is a choice this week - use the sketch, the theme or both. 

I chose to do both. 

Pet sympathy cards are among the most difficult cards for me to create - I always hate when someone loses a pet and I don't have something ready. 

I die cut a yellow background wth a stitched die and added a grey frame around the outside. The image was stamped, coloured and dic cut with an oval shape. I added the pink border along the left side (I rotated the sketch ninety degrees). I cut the sentiment into smaller sections and placed it at the top in a series of pieces. No embellishments were added as I wanted to keep this clean and simple. 

Come and join us at Try Stampin' on Tuesday and show us how you interpret this week's challenge. 

You have two weeks to link up your project. 

We can't wait to see what you create! 

Enjoy,

Alyson

Monday, February 13, 2023

AH 512 - Stacked Piggies Card

 Welcome to Atlantic Hearts Sketch Challenge 512! 

The sketch shows a torn paper edge - I chose to use a scalloped die for that section. The piggies were stamped, coloured and fussy cut. I arranged them on the cross piece and placed the sentiment underneath. Two stamped flowers and three acrylic flowers were added, each with a coloured sparkle in the centre. 

Come and join us at Atlantic Hearts and show us how you interpret the sketch shown above. 

You have until Sunday evening to link up your project. 

We can't wait to see what you create! 

Enjoy,

Alyson

Sunday, February 12, 2023

Just Because in Kraft

 This pretty card was CASEd from one I saw on Pinterest. Kraft and white work so well together - I have to remember to use Kraft paper more often! 

The edge of the card front was die cut with a stitched border and I did the same with a piece of Kraft cardstock. The Kraft paper was adhered behind the white border and I added a piece of the same paper on the right side of the card. 

The flowers were die cut and I trimmed the top layer of each before adhering two of them together. I die cut the stems as well and cut off the branches so each would be a single stem. Those were arranged on the front and I added a piece of twine where the stems came together. The sentiment was die cut and added at the bottom left. The flower centres were filled with coordinating Stickles. 

Enjoy,

Alyson

Saturday, February 11, 2023

SS 719 - Just Because

 Welcome to Sketch Saturday Challenge 719!

The sketch is shown in vertical orientation this week - as long as we can see the sketch in your project, you can flip or rotate the sketch as desired. 

The optional theme (in addition to the sketch) is to use an old stamp. 

I chose an older floral stamp that I really like. I stamped the floral images and the bow, coloured them and die cut each of them. I also die cut a large circle and the white section inside was inked with Uncharted Mariner Oxide ink. The background was embossed and die cut at the bottom before being added to a pink background and then to the white card base. I added a few silver gems and used a clear shimmer brush on parts of the images. 

Come and join us at Sketch Saturday and show us how you interpret this week's sketch. 

You have two weeks to link up your project. 

We can’t wait to see what you create! 

Enjoy,

Alyson

Friday, February 10, 2023

CD 535 - CAS Crocus Stem Friendship Card

 Welcome to Colour Dare Challenge 535! 

We have a blue palette this week - use all three colours. Neutrals and metallics are free to use. 

I had another card made for this challenge but I wasn't happy with it - so I made a second one. The first card is shown underneath. 

I die cut a detailed background three times and stacked the pieces together before adhering it to a piece of light silver glitter paper. The crocus stems were die cut and I inked the bases of each piece before assembling them. They were added to the left side and I stamped and die cut a sentiment for the lower right. Everything was adhered to a white card base.

This is the first card that I made for this challenge... I stencilled leaves in Sapphire ink onto a piece of Periwinkle cardstock. The second layering stencil adds detail to the leaves so I used a shimmery glitter paste for that step. Once the front was dry, I layered it onto Glacier cardstock and finally onto a Sapphire base. The sentiment was die cut from Sapphire and Glacier carstock and I added ink around the edge of a Periwinkle hexagon. Some metallic thread was added under the sentiment and I also added a few silver glitter gems around the card. 

Come and join us at Colour Dare and show us how you interpret this week's challenge. 

You have two weeks to link up your project. 

We can’t wait to see what you create! 

Enjoy, 

Alyson

Thursday, February 9, 2023

Dangling Hearts Card

 This very sweet card was based on one I found on Pinterest. The original one had hand drawn hearts but I chose to stamp the hearts instead. 

I die cut a stitched rectangle for the card front and stamped two sizes of hearts in three lines. They were attached with a fine tip black marker. The last line was shortened and it appears a bird has lifted a heart off the line - how cute is that? 

A sentiment was stamped at the bottom and a small heart was added as well. The card front was adhered to a red border with craft foam and then to a white card base. 

Enjoy,

Alyson

Wednesday, February 8, 2023

Sending Hugs Fold Down Card

 This fabulous card was designed using information from a recent project by Yasmin Diaz. The card folds flat into an A2 size for mailing. 

I used a white base and also die cut a stitched card front. That piece was cut into sections to fit the front and back panels. I silver foiled some butterflies and sentiments and die cut them. The floral spray was stamped, stencilled and die cut and I cut two extra pieces to reinforce the image. Three butterflies were adhered to the panel behind the flowers and I attached the flowers and two more butterflies to the front. The sentiment was added at the bottom. Some iridescent gems were added on the side panels to finish off the card. 

Enjoy,

Alyson

Stencilled Arch Cards

 These two cards were fun to create - lots of elements on each! 

Both cards started with an embossed background (done with a hot foil plate). I used the coordinating stencils to add colour - yellow and oranges for the first card. That piece was trimmed and lined with a scalloped stitched frame that was raised on the card base. I die cut a leaf image from gold glitter paper and added the large word YOU across the centre. A smaller "love" die was adhered across the sentiment. A few gold get finished off the card.

The second card started out much the same except I inked it in a rainbow colour scheme. Each layer of the stencil was inked a little darker. I used the same leaf image and the same letters but stamped a small sentiment to go across the centre. 

Enjoy,

Alyson

Tuesday, February 7, 2023

Lily Frame Cards

 The Lily Frame stamp, stencil and die set from Pinkfresh Studio is so pretty - I stencilled the flowers in two colour combos for these cards. 

The background for each card was die cut with a piercing die (two different patterns) and lightly inked with the same ink as the flowers. I used a neat technique to make the frames stand up but they fold flat for mailing. There is a photo to show the dimension behind the frame. The sentiments were added across the frame and I added a few coloured gems to finish off each card. 


Enjoy,

Alyson