Tuesday, March 31, 2020

Double Point Fold Cards x2

My latest endeavour has been to try these Double Point Fold Cards. They are surprisingly very easy to create. However, I made a big mistake on my fist attempt (the purple one) and random stamped the entire front section, leaving no room for anything underneath... We learn from our mistakes, right? 

These cards open under the front diamond and then if you want to adhere them to a card base, you can do that as well - and I did. I stamped this adorable cat on the front diamond panel and then coloured it. I used the Build-a-Plaid stamp set to create some borders at the top and bottom. That panel is attached just under a small sentiment that is adhered with foam tape. Under the diamond, there is a birthday message and inside the card is a larger message. I did some random stamping on this card, having a better understanding of the importance of location! 


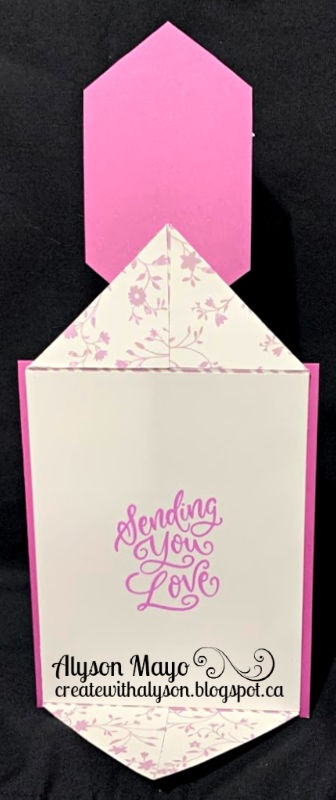
This was my first attempt - still pretty but the sides were left blank as was the inside of the card. Those elements can be added at a later date when I know who will receive this card. I did use some decorative dies to create patterns on the diamond front. 


The tutorial I used is located here if you want to try these cards. 

Products used are Close To My Heart unless otherwise indicated: 

Paper: Mix-In Paper Pack, These Are My People Paper Pack, White Daisy Cardstock, French Vanilla Cardstock, Sage Cardstock, Thistle Cardstock, Green Apple Cardstock, Neenah Solar White Cardstock
Stamps: Strokes of an Artist, Birthday Greetings, Happy Birthday, You Make Me Happy, Build-a-Plaid, Sending Prayers, Love These People, Boutique Cardmaking, Short and Sweet 
Inks: Intense Black, Black, Green Apple, Thistle, Sage
Accessories: Cricut Basic Shapes Cartridge, Basic Circle Thin Cuts, Stitched Circle Thin Cuts, Basic Oval Thin Cuts, Stitched Oval Thin Cuts, Decorative Border Thin Cuts, Tri-Blend Markers, Clear Shimmer Brush, Holly Jolly Dots, FoamTape 

Enjoy,
Alyson


TSOT 451 - Friend Doily

Welcome to this week's Try Stampin' on Tuesday sketch!
The additional component (not exclusive of the sketch) is to use designer patterned paper. 


I went way back in my paper stash to find one of my favourite retired paper packs - Blossom. The colours and patterns on these papers are ones that I often return seek out as I love them so much. 

This is a 6x6 card - larger than what I usually create, but it worked best for this sketch. I didn't stray from the sketch at all as I really liked the way it was set up. 

The base is Lagoon cardstock, followed by Sorbet and another layer of Lagoon. I adhered the patterned papers to a Pear cardstock base and then attached the silver doily. I used a sentiment from the Gina K. Designs Wreath Builder stamp set for the centre of the doily and embossed it, also in Lagoon. A silver ribbon was wrapped around the card twice and tied just off to the side of the doily. I added a couple of orange dots and also brushed the flowers with the Clear Shimmer Brush.


Come and join us at TSOT and show us how you interpret the sketch shown above. 
You have two weeks to link up your project. 
We can’t wait to see what you create!

Products used are Close To My Heart unless otherwise indicated: 

Paper: Blossom Paper Pack, Lagoon Cardsock, Sorbet Cardstock, Pear Cardstock, Glacier Cardstock, Silver Doily (misc.)
Stamps: Wreath Builder (Gina K. Designs)
Inks: Lagoon Pigment Ink
Accessories: Clear Detail Embossing Powder, Heat Tool, Orange Gems, Silver Ribbon (misc.), Basic Circle Thin Cuts, Stitched Circle Thin Cuts, Clear Shimmer Brush

Enjoy,
Alyson

Monday, March 30, 2020

AH 362 - Happy Birthday - Stem Die


Welcome to Atlantic Hearts Sketch Challenge #362!


The sketch is very simple this week, allowing for a fair bit of interpretation. I chose to use the base of the sketch although I placed my sentiment further to the left and the embellishments had to be moved as well as they didn't fit where they were shown on the sketch. 

I used some foil patterned paper for the background and I die cut a set of 3 squares with a long stem in the centre of the dies. That was centered on white cardstock and I punched a decorative border along the side (rather than tearing the paper as shown in the sketch). The sentiment was stamped and mounted on coordinating foil. Three white sequins were added above the sentiment. 


Come and join us at Atlantic Hearts and show us how you interpret the sketch shown above. 
You have until Sunday evening to link up your project. 
We can’t wait to see what you create! 

Products used are as follows: 

Paper: White Daisy Cardstock (CTMH), Bluebird Cardstock (CTMH), Noble Peacock Designer Paper and Foil Paper (SU), Neenah Solar White Cardstock 
Stamps: Sending and Wishing (SSS)
Inks: Bluebird (CTMH)
Accessories: Border Punch (misc.), Stem Tryptic Die (Memory Box), White Sequins (CTMH)

Enjoy,
Alyson

Double Trouble #53 - Herringbone Patterned Cards

Welcome to Double Trouble's "Some Thing, Any Thing and Every Thing" Challenge! 

I am honoured to be accepted to this fabulous design team! They provide the most interesting and unique challenges out there - and each challenge has multiple components. You don't have to participate in each part but it makes it that much more fun! 

This week, being that it is the third Monday of the month, the challenge is open - it's Some Thing, Any Thing and Every Thing! Basically, anything goes, so come and have some fun with us! For those of you who are looking for a little more detail or instructions, see the elements listed below. 

THING 1: Trouble Maker 
says, "This is a One-Week Free-for-All Challenge so have a little fun creating with 'Some Thing', 'Any Thing' and 'Every Thing'."


THING 3: Twisted Sister
says, "Trouble Maker is always accusing me of things I didn't do. Now she has a bone to pick! What does she want, a background check? Well, I'll show her. Let's create a background using scraps, leftovers, bits, and pieces... i.e. patterned paper or washi tape.”


THING 2: Double Dare 
says, "I dare you to multiply the fun by linking your project with any previous partner(s) listed below. You will qualify for extra chances in our Random Draw. Make sure you read their guidelines carefully and observe their dates. We don't want you to get into trouble with them." 

Please see the list of partner challenges on the Double Trouble post


I created three cards using the same technique - a herringbone pattern. Each piece was individually placed on a card base that was covered with adhesive. The strips are 1/4" wide. The only exception is the rose gold card, for which the glitter strips are 1/16" wide. It took some time to create the backgrounds but I wanted them to be the focal point on each card so I just added a sentiment with ribbon or bow on each. 


Come and join us at Double Trouble and show us how you interpret the challenge above! 
We so look forward to seeing your creations. 
Be sure to double check dates for other challenges as they can vary (for Thing 2: Double Dare).

In addition to the above challenge, Double Trouble is also hosting a special, fun challenge this week - National Goof Off and Chip and Dip Day


This is totally optional and all for fun - check out the fun here! 

I created a cracker village... 


We look forward to your participation! 

Products used are Close To My Heart unless otherwise indicated:

Paper: Spring Fling (Echo Park), Greenhouse (Kaisercraft), White Daisy Cardstock, Pixie Cardstock, Glacier Cardstock, Lagoon Cardstock, Sage Cardstock, Green Glitter Paper, White Cards and Envelopes, Neenah Solar White Cardstock 
Stamps: Sentiments and Stitches
Inks: Sage, Lagoon, Pixie
Accessories: Basic Oval Thin Cuts, Stitched Oval Thin Cuts, Stitched Circle Thin Cuts, Basic Circle Tags Thin Cuts, Rose Gold Tape, White Ribbon, Turquoise Ribbon (unknown)

Enjoy,
Alyson

Sunday, March 29, 2020

Peony Hello - Partial Tri-Fold Card

My quest to try some fancy fold card designs led me to this design. The blog link is here if you want instructions to recreate this card. 

I chose to use a Black cardstock base and Mint cardstock as the secondary colour. The flowers and greenery were stamped on White Daisy cardstock using Intense Black (for colouring purposes) and coloured using the Tri-Blend markers. Select parts of the flowers were brushed with the Clear Shimmer Brush although that doesn't show in the photos. Some of the floral images were stamped in black to create a background. This stamp set does come with a set of coordinating dies so that made it easier to cut the pieces that I wanted to use. I added a few pieces of greenery under the last section. The two smaller sections were stamped - one with the sentiment and a few pieces of greenery and the other with random images from the stamp set. 

The hello die was cut and adhered to the front of the card. This card really is not difficult to create - it just takes some thought as to the related images you want to use for decoration. 


Products used are Close To My Heart unless otherwise indicated: 

Paper: White Daisy Cardstock, Black Cardstock, Mint Cardstock
Stamps: Budding Peony, Craft with Heart 
Inks: Intense Black, Black
Accessories: Budding Peony Thin Cuts, Hello Die (PPP), Tri-Blend Markers, Clear Shimmer Brush

Enjoy,
Alyson

Lucky to Know You - with Alcohol Inks

I have had a fair amount of time to play around with some products that are still very new to me - alcohol inks are one of those products. 

I created this background a few weeks ago and finally decided what to do with it! It had never occurred to me to dry emboss an alcohol ink background... but that's what I did. I love that the design is subtle yet it can still be seen. I cut the sentiment three times from white cardstock and glued them together to create some height. A few acrylic hearts were adhered and the base was set on a piece of White Daisy cardstock and then a piece of Candy Apple cardstock - easy! 


Products used are Close To My Heart unless otherwise indicated: 

Paper: White Daisy Cardstock, Candy Apple Cardstock, Yupo Paper (Ranger) 
Stamps: none
Inks: Alcohol Inks (Ranger)
Accessories: Lucky to Know You Die (SSS), Stitched Circles Embossing Folder, White Acrylic Hearts 

Enjoy,
Alyson


Saturday, March 28, 2020

Clean and Simple Sympathy Cards

A lovely friend of mine is in need of sympathy cards - and preferably ones that can easily go in the mail. Since we can't visit, I mailed these out to her. Somewhere while perusing card ideas, I saw a set of these beautiful clean and simple cards - and I cannot find that post. I don't recall if it was on Pinterest or Facebook... I wold love to give credit to the original artist but I can’t find the post to see who made them. 

These cards are stamped on a white piece of cardstock - I used a multiple step stamp set from Altenew called Painted Poppy. Using my stamp press, creating the flowers didn't take a whole lot of time as once the images were on the press, it was just a matter of changing out the cardstock for each piece and inking the images in various colours. 

I then stamped the sentiments - I used 4 different ones, so there are 2 of each in the collection. I drew a thin black line around each of the card fronts - 1/2" from the outside, leaving an open area around each sentiment. The card fronts were mounted on black cardstock and then on a white card base. No additional embellishments were added. 


Products used are Close To My Heart unless otherwise indicated: 

Paper: White Daisy Cardstock, Black Cardstock, White Daisy Cards and Envelopes
Stamps: Painted Poppy (Altenew), Card Chatter - Sympathy, Happy to be Friends, Big Hug
Inks: Canary, Saffron, Peach, Smoothie, Ballerina, Pixie, Raspberry, Candy Apple, Ruby, Lilac, Pansy, Carolina, Bluebird, Glacier, Lagoon, Fern, New England Ivy, Black
Accessories: Black Journaling Pen

Enjoy,
Alyson


Friday, March 27, 2020

CD 387 - Bring on the Red!

Welcome to Colour Dare Challenge #387!


This week, the focus is on the colour red - any shades of red are fine but only black and white may be used with the shades of red - no other colours are permitted. 

I pulled out my red glitter paper and used that for the base of my card. A stitched rectangle frame was die cut for both the outline of the card and the outline of the sentiment. I adhered a laser die cut on top of the glitter paper and the sentiment piece on top of that. The sentiment was stamped with Versamark and embossed using Red Tinsel Embossing Powder. A few sequins were added and this card came together pretty quickly! 


Come and join us at Colour Dare and show us how you use shades of red in your creation.
You have two weeks to link up your project. 
We can’t wait to see what you create! 

Products used are Close To My Heart unless otherwise indicated: 

Paper: White Daisy Cardstock, Black Cardstock, Red Glitter Paper, Delightfully Detailed Laser Cut Shapes (SU), Neenah Solar White Cardstock 
Stamps: Free as a Bird (SU)
Inks: Versamark
Accessories: Red Tinsel Embossing Powder, Heat Tool, Red Sequins, Stitched Rectangle Thin Cuts 

Enjoy,
Alyson

Thursday, March 26, 2020

Layered Birthday Flower

Pink and black usually aren't my go to colours but I found the most gorgeous card made by one of the SU Artisan team members, Emma Goddard. The link to her card is here. I loved the style of the card and decided to CASE it but use different colours. 

I started with a white base and added a black rectangle followed by striped patterned paper set on an angle. The flower was die cut from a Kaisercraft layered flower die, but I used only the outline and bottom piece (didn't add the middle). I cut the flower base from patterned paper to give it more interest. The leaves were cut using overlaying dies - one as a base and the other as the outline. I flipped some of them backwards so they all weren't pointing the same direction. The sentiment was stamped and then die cut on stitched frame and I added some silver embellishing thread and a ribbon. Love how this turned out! 


Products used are Close To My Heart unless otherwise indicated:

Paper: These Are My People Paper Pack, White Daisy Cardstock, Black Cardstock, Charcoal Cardstock, Raspberry Cardstock, Neenah Solar White Cardstock 
Stamps: Happy Birthday
Inks: Black
Accessories: Layered Rose Dies (Kaisercraft), Stitched Label Dies (SU), Silver Embellishing Thread,  White Sheer Ribbon (misc.)

Enjoy,
Alyson


Wednesday, March 25, 2020

A Little Note...

I have been doing a lot of crafting while stuck at home and unable to participate in my normal activities... that's not always a bad thing as I enjoy spending time in my craft room. I hope you are finding time to be creative as well - or pursue whatever hobby interests you. 

This flower stamp is one I purchased not long ago - love the flowers and the fact that it is long enough to place across a standard card with just a little bit extra. I used that idea and created a card where the top section is cut away. The flowers cover the cut edge and rest over the top of the card.

I stamped everything using Intense Black ink and then coloured the flowers and leaves. I also inked a light blue background behind the flowers. That can be seen in the lower photos but it doesn't show well in the top photo. Parts of each flower were brushed with the Clear Shimmer Brush and I coloured some tiny sparkles to place in the centres of the flowers. 


Products used are Close To My Heart unless otherwise indicated:

Paper: White Daisy Cardtock
Stamps: Peony Cluster (Sweet and Sassy Stamps), Sentiment Collection (Penny Black) 
Inks: Intense Black, Blue Distress Inks (Ranger)
Accessories: Tri-Blend Markers, Clear Shimmer Brush, Bitty Sparkles, Sharpie Marker 

Enjoy,
Alyson

Monday, March 23, 2020

H2H - Life is a Zoo


Welcome to this week's Heart 2 Heart challenge! 

The theme this week is paper tearing. Close To My Heart's papers have a white core so there are a lot of options with this technique.

I chose to use the non-white side for my torn papers... considering what I chose to do, I didn't want the white showing. 

I created a scene simply using a variety of cardstock colours, torn and layered on top of each other. I started with Espresso (dark brown), travelled through shades of green and ended with a medium blue (Bluebird). Each piece of cardstock was torn and adhered at the bottom. I stamped four of the animals from the current Operation Smile stamp set, coloured them, cut them out and then placed them between the torn edges. I went back and added glue dots to secure the torn paper edges. The sentiment is part of a larger sentiment but I only wanted the section that read "Life is a Zoo". A few tiny images were stamped on each colour section as well. 


Come and join us at Heart 2 Heart and show us your paper tearing technique. 
You have until the end of March to enter this or any of the March challenges. 
We can’t wait to see what you create! 

Products used are Close To My Heart unless otherwise indicated: 

Paper: White Daisy Cardstock, Espresso Cardstock, Toffee Cardstock, Almond Cardstock, New England Ivy Cardstock, Evergreen Cardstock, Clover Cardstock, Julep Cardstock, Glacier Cardstock, Carolina Cardstock, Bluebird Cardstock, Neenah Solar White Cardstock 
Stamps: You Make Me Happy, Quote Bubbles (Dylusions) 
Inks: Intense Black, New England Ivy, Espresso, Bluebird
Accessories: Tri-Blend Markers

Enjoy,
Alyson

Saturday, March 21, 2020

Hugs - Stamping on Coloured Cardstock

Happy day! 
I hope it's happy with all the stuff happening in our world today...

I recently watched a video by Jennifer McGuire that demonstrated how to stamp on dark coloured cardstock. This has always been an issue for me - inks simply don't show up well on the darker cardstock colours. 

Skeptical doesn't begin to describe how I felt as I watched the video... thinking, "This works for HER but I will never get the same result." Much to my surprise, this technique really does work! 

It starts with a three step stamp - one that also has an outline stamp as one of the three images. There are other ways to do this but the effect will be different.

I started with the main filled stamp image - and stamped that with white pigment ink. Without heating it, the detail stamp was stamped directly over the white, in the cardstock colour - in this case, Peacock. The image was then heat set. The outline was stamped using Versamark and embossed with silver embossing powder. The white ink kind of takes on a lighter shade of the cardstock - how neat is that? 

My first attempt wasn't successful as I didn't heat set the pigment ink well enough and ended up with embossing powder all over the image... it worked better the second time. I cut around the flower and made a centre panel to use as a guide to place the leaves. That centre panel was raised using four layers of scrap cardstock and a sentiment was die cut for the bottom. I love the way this looks and can’t wait to try it with other stamps and cardstock! 


Products used are Close To My Heart unless otherwise indicated: 

Paper: Peacock Cardstock, Silver Foil, Neenah Solar White Cardstock
Stamps: To a Wild Rose (SU)
Inks: Peacock, White Pigment Ink, Versamark 
Accessories: Silver Embossing Powder, Heat Tool, Hugs Die (Calligraphy pop)

Enjoy,
Alyson


Friday, March 20, 2020

Peek Through Cards

Many of us have extra time at home as we are supposed to be self-isolating. I don't know about you, but this is a gift for me - am LOVING the extra creative time! 

I just love watching Jennifer McGuire's videos and trying new ideas. These cards are based on a recent video that she posted. 

The cards are peek-though cards - when they are closed, the images appear through the front of the card. When the card is opened, those images are actually attached to the inside of the card. My explanation isn't the best but these cards are so neat in real life! You do need a coordinating set of dies to create these types of cards. 

I used a floral stamp for the first card - and made several errors along the way. I was able to hide those errors - luckily - and not have to completely redo the card. The flowers are sitting on the inside of the card but peek though the front. Both the flowers and leaves were coloured with the Tri-Blend markers. A few sequins were added along with some orange gems. 


This view shows the card standing. 


This is the inside. 


I wanted to do something different for the second card so I pulled out a ewe stamp set - love these images! I splattered two colours of shimmer on the front of the card - Red and Raspberry. In addition to the ewes, I also stamped some little hearts and coloured them. A stitched border was added around the front of the card. I think this is so sweet... I just adore those little ewes. 


This view shows the card standing.


This is the inside. 


Products used are Close To My Heart unless otherwise indicated: 

Paper: White Daisy Cardstock, Ruby Cardstock, Neenah Solar White Cardstock 
Stamps: Celebrate Today Card Kit, Sentiment Collection (PB), Ewe are the Best (MFT)
Inks: Intense Black, Black, Evergreen
Accessories: Stitched Rectangle Thin Cuts, Celebrate Today Card Kit Thin Cuts, Ewe are the Best Dies (MFT), Yellow Sequins, Orange Gems, Red Shimmer Brush, Raspberry Shimmer Brush, Tri-Blend Markers

Enjoy,
Alyson

Knowing You - Fun Fold Card

Good morning! 

I recently found a terrific tutorial for making the card below. There is a link to that blog post further down... It is very easy to do! 

I chose to use the Budding Peony stamp and die combination to create my card. Using dies for this really does make it easier, although you certainly could fussy cut images if you wanted to do so. 

I stamped all the images and coloured them first - then die cut each of them. The card base is Bluebird Cardstock and the patterned papers are Bluebird or Carolina patterns to go with the cardstock. The base of the card was cut and assembled and then it was time to decorate. I wanted a place to write a message so that is on the far side inside the card. The peonies and leaves were placed throughout the card and the shadow lines on the flowers were brushed with the Clear Shimmer Brush. I stamped two sentiments - one for the outside and one for the inside. Each was mounted on a piece of Bluebird cardstock after being cut with stitched dies. The area to write was stamped in second generation with the Splash of Colour stamp, just to add more interest. 


This card fits inside a standard card envelope - perfect for mailing. 

The link to the tutorial is HERE. Enjoy - this card is fun and easy to create! 

Products used are Close To My Heart unless otherwise indicated: 

Paper: These are My People Paper Pack, Craft On Paper Pack, White Daisy Cardstock, Bluebird Cardstock
Stamps: Budding Peony, Splash of Colour, Sentiment Collection (Penny Black)
Inks: Intense Black, Bluebird
Accessories: Stitched Square Dies (GMD), Stitched Nested Label Dies (SU), Budding Peony Thin Cuts, Tri-Blend Markers, Sharpie Marker (not CMTH), Clear Shimmer Brush

Enjoy,
Alyson

Thursday, March 19, 2020

Bee Kind

It's time to participate in the Double Trouble challenge! 

There are always three components to these challenges - here they are: 


Thing 1 - Include one spring item made using punches, dies, cutting machines or fussy cutting. 


Thing 3 - Put some sweetness in your project - include a bee, honey 
or honeycombs 


Thing 2 - Enter your project into the "Bitten by the Bug" challenge blog 
(except fussy cutting can’t be used here)


I created a card that meets all three "Things" requirements.

I began by using texture paste coloured with a Saffron re-inker to create the colour I wanted. That was spread across a honeycomb stencil and left to dry. Two pieces of patterned paper were added to the card front and then I cut the bee and the sentiment from free Cricut files and assembled them on top of the card. The yellow sections were brushed with the Gold Shimmer Brush. The card front was mounted on a stitched rectangle die cut. 


I am entering my card in the following challenges: 

Products used are Close To My Heart unless otherwise indicated: 

Paper: Hawthorn Paper Pack, La Vie en Rose Paper Pack, White Daisy Cardstock, Black Cardstock, Neenah Solar White Cardstock 
Stamps: none
Inks: none
Accessories: Bee Files (Cricut), Honeycomb Stencil (Memory Box), Stitched Rectangle Dies (GMD), Saffron Re-inker, Opaque Matte Texture Paste, Texture Tools, Gold Shimmer Brush

Enjoy,
Alyson