Friday, January 31, 2020

CD 379 - Medallion Friendship

Welcome to this week's Colour Dare challenge! 


It's all about Valentine's this week - at least it is based on the image that is shown as the inspiration photo. That doesn't mean your project must be Valentine related - just use the colours that are shown. All neutrals are free this week as well.

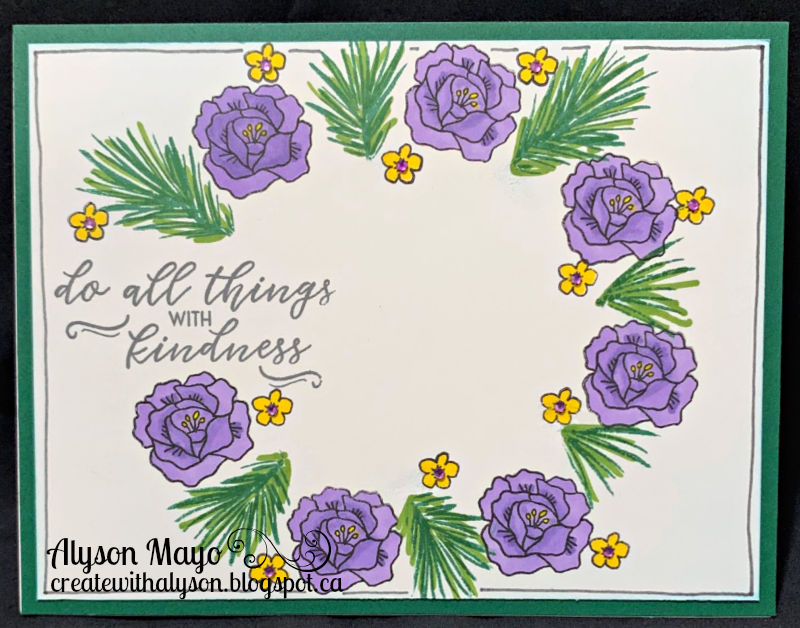
I chose a sketch from Scrapbooks and Cards - Card Maps #2. I liked the idea of medallions (which I haven't used forever...) 

I started with an ombre pink base and lined it with two striped pieces and scalloped borders. The medallions were created from both cardstock and patterned paper. Some leaves were die cut and buttons were added on top of the medallions. The sentiment is certainly not just for Valentine's Day but is usable for so many occasions. 


Come and join us at Colour Dare and show us how you interpret the photo shown above. 
You have two weeks to link up your project. 
We can’t wait to see what you create! 

Products used are Close To My Heart unless otherwise indicated: 

Paper: Celebrate Today Paper Pack, Heart Happy Paper Pack, Craft On Paper Pack, White Daisy Cardstock, Raspberry Cardstock, Carolina Cardstock, Lemonade Cardstock, Julep Cardstock, Neenah Solar White Cardstock
Stamps: A Thousand Thanks 
Inks: Raspberry, Carolina
Accessories: Scalloped Border Thin Cuts, Stitched Flower Thin Cuts, Budding Peony Thin Cuts, Various Buttons, White Twine, Crystal Blue Waxy Flax, Blush Waxy Flax

Enjoy,
Alyson


Monday, January 27, 2020

H2H - Bluebird Colour Challenge

Welcome to this week's Heart 2 Heart challenge! 


It's a colour challenge this week - and that colour is Bluebird. It is a gorgeous shade of blue and one of my favourite colours in the Close To My Heart colour palette. 

I found a stunning card on Pinterest that used a background stamp that I recently purchased. Unfortunately, there was no watermark on the card so I can’t give credit to the artist... 

I stamped the background stamp using Black Pigment Ink and then embossed it using Clear Detail embossing powder. I lined around each of the flowers and stems using a light grey marker and then applied a blending pen to that to soften the colour even more. I then coloured the flowers using one marker (three shades). A chalk marker was used to add the dots. Then sentiment was stamped in black and added to the front along with some bitty pearls on the dots. I'm so happy with how this turned out! 


Come and join us at Heart 2 Heart and show us how you use the Bluebird colour in your project. 
You have until the end of January to link up your project. 
We can’t wait to see what you create! 

Products used are Close To My Heart unless otherwise indicated: 

Paper: White Daisy Cardstock, Black Cardstock
Stamps: Flora Background (SSS), Wordfetti
Inks: Black, Black Pigment Ink
Accessories: Clear Detail Embossing Powder, Heat Tool, Tri-Blend Markers (Ice Grey, True Blue, Blender), Chalk Marker, Bitty Pearls 

Enjoy,
Alyson

Wednesday, January 22, 2020

So Very Thankful...

I am really enjoying playing with alcohol inks, although I am just learning and am a beginner at this. The piece used on this card is one that was done using the inks, alcohol and a hairdryer. 

I used a card pattern from Make It From Your Heart Vol. 4 to create my card. I had to do some searching for cardstock that would match the ink design - had some old cardstock in my stash that fit very well. 

I stamped the image using Intense Black ink and then coloured it using a variety of markers. I brushed the flowers with the Clear Shimmer Brush. I intended to cut the sentiment using stitched rectangle dies but it was too large - I took the outline cut and trimmed the pieces in half and then attached them over the white stitched section. That made the sentiment a reasonable size. 

The alcohol inks I used were turquoise, pink and a silver mixative. The purple colour on that piece resulted from the turquoise and pink inks mixing together. 


Products used are Close To My Heart unless otherwise indicated: 

Paper: White Daisy Cardstock, Lagoon Cardstock, Silver Foil Paper, Yupo Paper (not CTMH), Turquoise (light and dark) cardstock (not CTMH), Turquoise Foil Paper (not CTMH)
Stamps: Spruced Up Cardmaking Workshop, Peachy (Kaisercraft)
Inks: Intense Black, Alcohol Inks (Ranger)
Accessories: Stitched Rectangle Thin Cuts, Spruced Up Cardmaking Workshop Thin Cuts, Markers (various), Clear Shimmer Brush, Bitty Sparkles, Thin Foam Tape 

Enjoy,
Alyson


Tuesday, January 21, 2020

TSOT #441 - Happy Birthday Shaker

Welcome to Try Stampin' on Tuesday's weekly challenge!


I love this sketch - there are so many possibilities here! I chose to follow the sketch pretty carefully except I changed the centre shape from a square to a circle. 

I started with some old patterned paper and found complementary pieces in a striped pattern and a solid colour. That made up the base of my card. The shaker was created separately with coordinating sequins placed inside the window. The shaker top already has Happy Birthday welded into it. I used a piecing tool and created faux stitching marks along the circle. Some silver foil paper was added along with a few coordinating sequins. 


Come and join us at TSOT and show us how you interpret the sketch shown above. 
You have two weeks to link up your project. 
We can’t wait to see what you create! 

Products used are Close To My Heart unless otherwise indicated: 

Paper: Calypso Paper Pack, Oh What Fun Paper Pack, Lagoon Cardstock, Silver Foil Paper, Neenah Solar White Cardstock
Stamps: none
Inks: none
Accessories: Shaker Window and Confetti Thin Cuts, Happy Birthday Shaker Window Thin Cut, Shaker Foam and Acetate, Silver Loose Sequins, Yellow, Pink and Turquoise Sequins (misc.), Piercing Tool 

Enjoy,
Alyson


Monday, January 20, 2020

AH 352 - Mini Sunburst


Welcome to Atlantic Hearts Sketch Challenge #352!
For the next 2 weeks, Atlantic Hearts is pairing up with the Double Trouble challenge so check out the details below. 


The sketch this week looks like a partial sunburst pattern. I stayed very true to the sketch for my card. 

The papers I chose are from the Kaisercraft Greenhouse collection. I used three patterns - one for the base and two others for the sunburst. I happened to have the sticker collection as well, although stickers are something I rarely use. One of the succulent/cacti stickers fit my papers perfectly, as did the sentiment. I also added 2 butterflies and drew lines at the ends of them to show their trail.


Double Trouble Challenge Info

Thing 1 - create something that makes you smile...
                Well, friendship and butterflies both make me smile :) 

Thing 2 - include a comfort food (didn't add to my card)

Thing 3 - link up with AH sketch 352 and/or 353. 
                Since I am a design team member for Atlantic Hearts, this is my project for Sketch    
                Challenge #352.


Come and join us at Atlantic Hearts and show us how you interpret the sketch shown above.
You have until Sunday evening to link up your project. 
We can’t wait to see what you create! 

Products used are Close To My Heart unless otherwise indicated: 

Paper: Kaisercraft Greenhouse Collection plus Stickers, Juniper Cardstock, Smoothie Cardstock, Neenah Solar White Cardstock
Stamps: none
Inks: none
Accessories: Thin Foam Tape, Black Journaling Pen

Enjoy,
Alyson


Friday, January 17, 2020

CD 377 - Winter Bird Birthday

Welcome to Colour Dare Challenge #377!


This week, the colour palette is taken from the Close To My Heart paper pack called Spruced Up. Gold has been added to the grid but it is a good match with these papers. 

I used every colour on the grid so there are multiple Tic Tac Toes... 

Spruced Up is very much a winter paper pack and I decided to stay with that idea for my card. I have some masculine birthdays coming up in January and February so this was perfect. 

I used the woodgrain paper as my base but I sponged the three shades of green on parts of the background. I also spattered the background with the Julep Shimmer Brush and then added groups of dots in various colours. The branches and bird were stamped and cut using the coordinating die set. I added a shade of Fern to the branches using a marker for more interest. The sentiment was stamped and cut with nesting label dies. The bird was also brushed with the Gold Shimmer Brush. 


Come and join us at Colour Dare and show us how you use the colour grid shown above. You only need to use one row or one column although the extra colours can certainly used. 
You have two weeks to link up your project. 
We can’t wait to see what you create! 

Products used are Close To My Heart unless otherwise indicated: 

Paper: Spruced Up Paper Pack, French Vanilla Cardstock, Sangria Cardstock, New England Ivy Cardstock
Stamps: Spruced Up Cardmaking, Framed
Inks: Espresso, Fern, Julep, New England Ivy, Sangria 
Accessories: Gold Shimmer Brush, Stitched Nested Label Dies (SU), Spruced Up Cardmaking Thin Cuts, Tri-Blend Marker, Gold Embellishing Thread, Julep Shimmer Brush, Stitched Rectangle Thin Cuts 

Enjoy,
Alyson


Wednesday, January 15, 2020

New Product Blog Hop


Welcome to the New Product Blog Hop. 
For this blog hop, Close To My Heart Consultants are featuring new and exciting products contained in the Jan/Feb catalog. 

You should have arrived here from Katy Taylor's blog.
If you get lost, a complete list of participants can be found on Melinda Everitt's blog

I didn't want to focus on any one paper pack or stamp set (as much as I love all the papers and so many of the stamps) so I decided to combine a few stamp sets to create some different cards. 

For the first card, I used the Spruced Up Cardmaking stamp set, Spruced Up Cardmaking Workshop stamp set and Life is a Journey. 
I started by tracing a large circle lightly in pencil. The sentiment was stamped first, off to the left. Then I used the single flower from Spruced Up Cardmaking Workshop and the branches from the Spruced Up Cardmaking stamp. I had to ink just a small section of each of the branch parts as they are large stamps. I didn't want to use die cuts for this so it was important to stamp ONLY the sections that I wanted. I worked my way around the wreath - Intense Black for flowers as they would be coloured, and Evergreen for the branches. I added a lighter marker shade over the branches to give them some additional interest and the flowers were coloured using one of the Tri-Blend markers. I added the smallest flower in various places around the wreath and then sponged the edges with Carolina ink. I outlined the base piece using the Pewter 0.3 Journaling Pen before adding it to the Evergreen background. Some bitty sparkles were coloured and added to the small flowers. I brushed parts of the larger flowers with the Clear Shimmer Brush as well. 


For my second card, I really wanted to use the Angel Hugs stamp... and decided to combine it with the Floral Borders stamp. I stamped and fussy cut the open floral border and then cut up some Fern cardstock into a grass shape. I added a few shades of green to the "grass" with markers. The main image was stamped and die cut. The background was lightly sponged with the same ink colour (Carolina) and then the image was added behind the flowers and grass. I masked the sentiment to stamp it in two colours.


I hope you enjoyed my cards!

The next blog on this hop is Gina Brandstetter's blog
I am sure she has something amazing to share with you! 

Products used are all Close To My Heart 

Paper: White Daisy Cardstock, Evergreen Cardstock, Carolina Cardstock, Fern Cardstock
Stamps: Spruced Up Cardmaking, Spruced Up Cardmaking Workshop, Life is a Journey, Angel Hugs, Floral Borders
Inks: Intense Black, Charcoal, Evergreen, Black, Carolina, Bluebird
Accessories: Angel Hugs Thin Cuts, Tri-Blend Markers, Bitty Sparkles, Clear Shimmer Brush, Pewter 0.3 Journaling Pen, Black 0.1 Journaling Pen, Black 0.3 Journaling Pen 

Enjoy,
Alyson


Technique Blog Hop - Terrific Treats

Welcome to the Technique Blog Hop.


The theme this month is "Terrific Treats".

You should have arrived here from Melissa Robinson's blog

A treat doesn't have to be an edible one - so I decided to create a miniature box that contains 12 tags for various occasions.

I used the Celebrate Today paper pack as well as the Mix-In paper pack. That gave me a wide selection of papers for the tags. Four tag styles were selected - all from CTMH's Cricut collections. They were all sized to be the same height and width. The base of each is cut from cardstock and then a top layer was cut from patterned paper. Each group of 3 tags has a different design and for some of them, the sentiment is the same. For others, based on the space I had available, the sentiments are different.

The container was also Cricut cut and then wrapped with a zip strip and gold shimmer trim. Three flowers were stamped, coloured and die cut to place on the front. This makes such a sweet gift.


The next location on this blog hop is Michelle Loncar's blog.
I am sure she has something terrific to share with you.

Products used are all Close To My Heart:

Paper: Celebrate Today Paper Pack, Mix-In Paper Pack, White Daisy Cardstock, Raspberry Cardstock, Tangerine Cardstock, Bluebird Cardstock, Evergreen Cardstock, Vellum
Stamps: Life is a Journey, Spruced Up Cardmaking, Spruced Up Cardmaking Workshop, Say it All
Inks: Intense Black, Black, Lagoon, Evergreen, Raspberry, Black Staz-On
Accessories: Art Philosophy Cricut Cartridge, Artiste Cricut Cartridge, Spruced Up Cardmaking Thin Cuts, Spruced Up Cardmaking Workshop Thin Cuts, White and Gold Skinny Ribbon, Gold Shimmer Trim, Tri-Blend Markers, Clear Shimmer Brush, Raspberry Shimmer Brush, Lagoon Shimmer Brush, Goldenrod Stickles, Waterfall Stickles

Enjoy,
Alyson


Tuesday, January 14, 2020

Flora Background Stamp and Colouring on Coloured Cardstock

I recently purchased this awesome background stamp solely due to the video that is linked below. 

Yana Smakula creates fabulous artwork and I watched this a while ago. I didn't have the same stamp so I tried it with a different stamp. The effects are terrific with the same stamp that she used - although my colouring skills aren't very good...

It was so much fun to create these two cards - stamping and then colouring on coloured cardstock gives a really neat appearance in the end. 

I chose to stamp on Mint and Pixie cardstock for my bases. The sentiments were embossed on vellum using silver embossing powder. A few glitter gems were randomly placed on the cards and the bases of the flowers were brushed with the Clear Shimmer Brush. Each was mounted on the card base using foam tape. 


Products used are Close To My Heart unless otherwise indicated: 

Paper: Mint Cardstock, Lagoon Cardstock, Pixie Cardstock, Raspberry Cardstock, Vellum
Stamps: Flora Background (SSS), Handmade Essentials (scrapbook.com), Rooted in Nature (misc.)
Inks: Versamark
Accessories: Silver Embossing Powder, Heat Tool, Silver Glitter Gems, Touch Markers (not CTMH), Tri-Blend Markers, Clear Shimmer Brush, Foam Tape

Enjoy,
Alyson

Monday, January 13, 2020

H2H - Vase of Flowers

Welcome to this week's Heart 2 Heart challenge! 


The title of this challenge is "Cutting it Close". That means that any sort of cutting is part of this challenge. It can be Cricut cuts, the use of dies or fussy cutting. 

I chose to use a stamp set with coordinating dies so my focus was on die cuts. 

The stamp set used is the Spruced Up Cardmaking Kit stamp - There is a large bouquet of flowers, a single flower, a vase and a banner plus a few other smaller images. I used 3 of those images with the coordinating Thin Cuts (dies) for my card. 

This took me an unusually LONG time to create due to several mistakes. I stamped and coloured the flowers 6 different times - and not one of them looked decent. I finally settled on orange as the focal colour for them and that worked. I also did the vase at least 5 times - just couldn't find the right colour for it. 

The papers are from the Mix-In paper pack and the rectangles are actually stitched thin cuts although the stitching is very hard to see on glitter paper. I brushed the outside edges of the flowers with the Gold Shimmer Brush and the added some Stickles to the centres of the flowers. 


Come and join us at Heart 2 Heart and show us how you use cuts on your project. 
You have until the end of January to link up your project. 
We can’t wait to see what you create! 

Products used are Close To My Heart unless otherwise indicated: 

Paper: Mix-In Paper Pack, White Daisy Cardstock, Lemonade Cardstock, Julep Glitter Paper, Neenah Solar White Cardstock
Stamps: Spruced Up Cardmaking Stamp 
Inks: Intense Black, Black, Julep
Accessories: Spruced Up Cardmaking Kit Thin Cuts, Stitched Rectangle Thin Cuts, Gold Glitter Gems, Gold Skinny Ribbon, Gold Shimmer Brush, Goldenrod Stickles, Spectrum Noir Tri-Blend Markers, Foam Tape 

Enjoy,
Alyson


Thursday, January 9, 2020

Triangle Fold Card - Valentine

I love a triangle fold card - so easy to create but it can have a big impact. 

A retired set of Mix-In papers was perfect to create a few Valentine's Day cards. The shades of pink and white were exactly what I was after and I used two patterned papers for the front of the card. 

The card opens up with triangles on two sides - the photos don't show that, however. The photos  show the front of the card with the triangle sections folded down and wrapped with a belly band, along with the inside and a close up of the shimmer on the shaker. You could use any shape for the front of the band but I really like shakers and it fit perfectly for this purpose. 

I stamped the inside of the shaker with Strokes of an Artist and then the sentiments were stamped using a darker shade of pink. I also cut tiny hearts from pink glitter paper in addition to using sequins inside the shaker. 

The inside of the card was stamped with a sentiment and I added some small heart stamps around the outside of the white cardstock. Some of those little hearts were coloured and brushed with the Clear Shimmer Brush. The outside of the shaker was also brushed with the Clear Shimmer Brush. 


Here's to a fabulous Valentine's Day! 

Products used are Close To My Heart unless otherwise indicated: 

Paper: Mix-In Paper Pack, White Daisy Cardstock, Pixie Cardstock, Raspberry Cardstock, Pink Glitter Paper 
Stamps: Strokes of an Artist, Adore You, To My Bestie, Card Chatter - Love 
Inks: Ballerina, Pixie, Raspberry
Accessories: Shaker Window Thin Cuts, Stitched Rectangle Thin Cuts, Loose Silver Sequins, Pink Sequins (not CTMH), Shaker Foam and Acetate, Sharpie Markers (not CTMH), Clear Shimmer Brush

Enjoy,
Alyson

Tuesday, January 7, 2020

TSOT 439 - Winter Thanks

Welcome to Try Stampin' on Tuesday Challenge #439!


This week, we have a sketch as usual and the optional theme is "Thank You". 

I chose to create a card using winter-based papers that I just adore! They are from the "Let it Snow" collection from Kaisercraft. The colours are gorgeous and the images on the papers are just so amazing. 

I chose to use one of the papers with a wood grain pattern for my background. The back side of that paper has the silver trees on it, which is what I used for the smaller piece on my card. I stamped a few snowflakes around the top of the trees. The black border is a stitched border although that is hard to see in the photo. I used black cardstock and another piece of patterned paper for the banner pieces. The sentiment was stamped in three lines using two colours and I filled in the large word "THANKS" using a Sharpie marker as it is very small. 


Come and join us at Try Stampin on Tuesday and show us how you interpret the 
sketch shown above. 
The optional theme can be used but not in place of the sketch.
You have two weeks to link up your project. 
We can’t wait to see what you create! 

Products used are Close To My Heart unless otherwise indicated: 

Paper: Let It Snow Paper Collection (Kaisercraft), Black Cardstock, Glacier Cardstock, Lagoon Cardstock, Neenah Solar White Cardstock 
Stamps: Falling Flakes, Snow Flurries, All the Thanks 
Inks: Glacier, Lagoon, Black 
Accessories: Stitched Rectangle Thin Cuts, Silver Glitter Gems, Sharpie Marker (not CTMH)

Enjoy,
Alyson

Monday, January 6, 2020

AH 350 - Birthday Half Wreath


Welcome to Atlantic Hearts Challenge #350!


This is designated as a horizontal sketch and I stayed very true to the sketch for my project. 

I created a wreath using a template I made on Design Space. It's the same idea as the Gina K Designs template, just smaller in size. I love how it keeps all the images evenly spaced. I used 4 images on the wreath and then added enamel dots that were coloured using an alcohol marker. I fussy cut around the outside and the inside of the wreath. 

The background is Mink cardstock with a piece of patterned paper from the new Spruce It Up paper pack on top. I used one of the PML cards and a zip strip for my long banners. The sentiment was stamped using two inks, outlined and mounted on New England Ivy cardstock. 


Come and join us at  Atlantic Hearts and show us how you interpret the sketch shown above. 
You have until Sunday evening to link up your project. 
We can't wait to see what you create! 

Products used are Close To My Heart unless otherwise indicated: 

Paper: Spruce It Up Paper Pack, French Vanilla Cardstock, Mink Cardstock, Spruce It Up PML Cards
Stamps: Card Captions, Wreath Builder and Autumn Wreath Builder (Gina K Designs) 
Inks: New England Ivy, Fern, Julep
Accessories: Cricut Basic Shapes, Julep Shimmer Brush, Red Enamel Gems, Touch Marker (not CTMH), Julep Glitter Gems, Pewter 0.3 Journaling Pen

Enjoy, 
Alyson

Friday, January 3, 2020

CD 375 - Colouring on Coloured Cardstock

Welcome to back to Colour Dare after a brief holiday break. 


This week's challenge is all about the blues... the colour blue, that is! We welcome your projects that use blue and any neutrals. 

I recently watched an awesome video regarding stamping on coloured cardstock and then colouring the background. Whatever cardstock colour is the base, that colour will show through. It works especially well with floral stamps. 

I had a hard time finding a stamp that might work with this technique and finally settled on Hello Lovely from Concord and 9th. There has to be dead space between the images to be coloured black - otherwise this technique doesn't work very well. 

I began with a piece of Carolina (blue) cardstock. I stamped the image and embossed it in white. Using a few black markers, I coloured all the empty spaces. After that, I went back with a couple of different shades of blue and coloured the leaves. The last step was to complete the flowers - the base colour of Carolina was left untouched. I just highlighted the base of each flower and tried to blend in the colours as best as I was able. 

The sentiment was stamped on vellum using Sapphire pigment ink and embossed. The vellum was wrapped around the card to keep it in place. I added a few bitty pearls and some white dots on top of some of the stamped splatters. 


Come and join us at Colour Dare and show us your project done in blue.
You have two weeks to link up your project. 
We can’t wait to see what you create!

Products used are Close To My Heart unless otherwise indicated: 

Paper: White Daisy Cardstock, Carolina Cardstock, Vellum, Neenah Solar White Cardstock
Stamps: Hello Lovely (Concord and 9h), Kind Soul (W plus 9)
Inks: Sapphire Pigment Ink, Versamark 
Accessories: Clear Detail Embossing Powder, White Detail Embossing Powder, Heat Tool, Black and White Dots, Bitty White Pearls, Tri-Blend Markers, Touch Markers (not CTMH), Sharpie Markers (not CTMH)

Enjoy,
Alyson


Wednesday, January 1, 2020

January SOTM Blog Hop


Welcome to the January Stamp of the Month Blog Hop. This month, we are featuring the stamp set "Everyday Magic", which has six large sentiments and some smaller doodles and other symbols. 


You should have arrived here from Brenda Lapp's blog.
If you get lost, a complete list of participants can be found on Melinda Everitt's blog

Although I love the Spruced Up paper pack, I wanted to try something different and the Celebrate Today papers were more appropriate for what I had in mind. 

I wanted to create an open shaker card - one where the window is visible from both sides of the card. I spent some time on Design Space and welded together a frame with a flower from the Complete Creativity collection. I had to cut everything once as usual and then again as a mirror image so the pieces would fit exactly against each other when looking though the shaker. I had to do some fine trimming along the edge of the Cricut cut rectangle to make it fit exactly inside the card front and the card back - and there is a very specific order in which this has to be done (and I messed it up...) I didn't cut the rectangles in the paper with my Cricut - I did that manually. In hindsight, it would have been better to do all of it on the Cricut - I know for next time. 

The sequins are placed between the panels of acetate so you can see through the card. There are three photos below - the front view, an angled view and a view of the reverse of the card front. 


I hope you enjoyed my project. 

The next stop on this blog hop is Haley Dyer's blog

I'm sure she has an amazing project for you! 

Products used are Close To My Heart unless otherwise indicated: 

Paper: Celebrate Today Paper Pack, White Daisy Cardstock, Mint Cardstock, Lagoon Cardstock, Pixie Cardstock, Silver Foil Paper, Acetate (not CTMH)
Stamps: Everyday Magic
Inks: Pixie, Lagoon
Accessories: Complete Creativity Cricut Collection, Cricut Basic Shapes (not CTMH), Silver Loose Sequins, Foam Tape 

Enjoy,
Alyson