Monday, September 30, 2024

DT 176 - Just PIGcause I Care

 Welcome to Double Trouble Challenge 176!

It's a Something, Anything, Everything challenge this week - only open for one week! The small graphic is below - please visit the Double Trouble Challenge Blog for detailed information. 

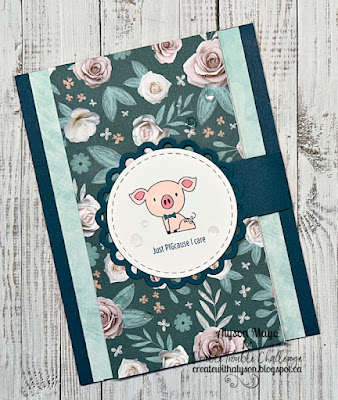
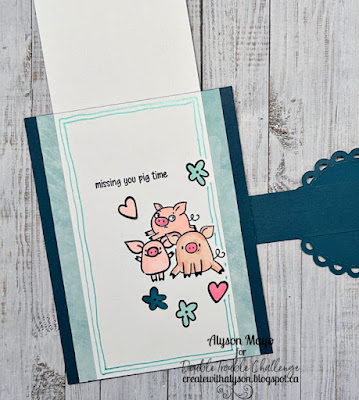
I only have small pig stamps so I had to choose something that would work with them. I went back to one of my favourite fun fold card styles. 

The circle on the front opens to the right and there is a thin panel under the front flap of the card. I stamped a trio of pigs and a second message there. Further inside there is another panel to write a message. I chose an old CTMH paper pack just because I loved the colours. Aside from the coloured pig images, I only added some clear sequins to the front. 


Come and join us at Double Trouble and show us how you interpret this challenge. 

You have just ONE week to link up your project. 

I am also linking up my card with the Creative Creases challenge (fun folds).

We can't wait to see what you create!

Enjoy, 

Alyson


Sunday, September 29, 2024

Sweet Pea Cards

 These four super cute sweet pea cards were designed by my friend, Monica Hayward, for a 6x6 One Sheet Wonder class.

I chose an alcohol inked patterned paper and assembled the cards as per her instructions. I'm not a big fussy cutter but all of the vines and pea images had to be fussy cut! I drew a border around each card and added some iridescent gems to each. Easy but cute! 


Enjoy, 

Alyson

Saturday, September 28, 2024

Half Star Illusion Card

 I found this card style on YouTube - it's called a half star illusion card since the front looks kind of like a star and the ribbon border appears to have been thread around the star. 

I chose patterned papers from Graphic 45 for my card. I used a sheer ribbon across the centre and I pulled the holly, berries and branch images from the patterned papers for the additional elements. They were adhered on acetate so they appear to be floating above and below the centre section. This card folds flat to 5x7 for mailing and there is a panel on the back to write a message. 


Enjoy, 

Alyson

Friday, September 27, 2024

MTTCC 96 - Christmas Wishes


Welcome to My Time to Craft Christmas Challenge 96!

The theme for this challenge is Christmas tree(s). 

I used a stamp and stencil set that I recently received as part of an online event. I stamped the tree using three shades of green ink and then used the stencil to ink the open sections with two shades of red. I added a clear glitter paste on top of the red stencilled sections. The sentiment pieces were stamped and die cut and I also die cut four extra pieces for each and stacked them. 

The background was die cut from gold foil cardstock using a cover plate and I brayered a lighter gold colour over top. It's hard to see in the photo but the thin lines are actually gold and the background is a bit lighter. I added the tree to the background and placed some green metallic thread under the sentiment pieces. I used glittery Pops of Colour on the background where the pattern came to points. 

Come and join us at MTTCC and show us how you interpret this challenge.

You have two weeks to link up your project. 

We can't wait to see what you create!

Enjoy, 

Alyson

Thursday, September 26, 2024

Triple Panel Dove Card

 This is a simple card to make - just three panels - but I love how the inside panel opens the opposite way to what is expected. 

I lightly blended blue ink on the inside white panel and created the dove scene on that piece. A frame was die cut through the front panels so the dove would be visible from the front. A few leaf and berry images were added at the bottom of the frame. Inside the card, there is a second dove with some greenery and berries at the bottom.


Enjoy, 

Alyson

Wednesday, September 25, 2024

Angled Noel Card

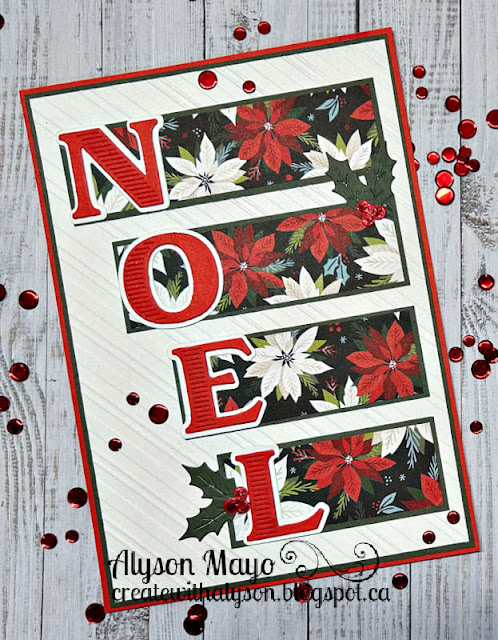
 This is another idea I found on Pinterest. I liked the look of the large letters for the sentiment. 

The background was embossed using a striped embossing folder and I measured and cut four strips of cardstock and patterned paper. The size was based on the die cut letters. They were arranged along the side on an angle. I added a couple of holly leave and berries and some red sequins. The letters were brushed with a shimmer brush - the second photo captures a bit of that.


Enjoy, 

Alyson

Tuesday, September 24, 2024

Blue Poinsettias

 This is another postage collage poinsettia card. The background was die cut and I stencilled the poinsettia images in blue. I added some dots along the leaves using a white gel pen. Some postage images were stamped around the card and I die cut a banner sentiment from white cardstock and embossed it in silver. That was placed across the front and I added a piece of silver and white twine along the "string" and adhered it on the back. A blue mat layer was added and I used a blue marker to draw a straight border around the edge. 

Enjoy, 

Alyson


Monday, September 23, 2024

AH 596 - Holiday Pinecones

Welcome to Atlantic Hearts Sketch Challenge 596!

The sketch has a lot happening - don't let the patterns mislead you. There are layers but it's not as complicated as it appears. 

I chose to make a Christmas card. I used some papers from my stash and I ink distressed the edges of all of them, which I don't do very often these days. The papers were laid out according to the sketch and I die cut some pinecones and greenery from white cardstock and inked them. Once they were assembled, I placed them under the sentiment on the left side. The sentiment panel was raised using foam tape and I added some gold metallic thread and gold gems around that piece. 

Come and join us at Atlantic Hearts and show us how you interpret this challenge. 

You have until Sunday evening to link up your project. 

We can't wait to see what you create!

Enjoy, 

Alyson
Sunday, September 22, 2024

Kraft Poinsettias

 I don't often use Kraft cardstock but decided to try stencilling on that rather than on white. 

I die cut the postage base piece and stencilled the poinsettia images. I had to use darker inks for the images to show well against the Kraft background. Some postage images were stamped around the card and I drew in the leaf veins with a gold pen and then splattered the entire front with gold paint. A small embossed sentiment was added and I adhered the front to three mat layers. 

Enjoy, 

Alyson

Saturday, September 21, 2024

SS 760 - Blue Birthday

 Welcome to Sketch Saturday Challenge 760!

The optional theme (in addition to the sketch) is "one for the boys". 

Masculine cards are always difficult for me. I chose shades of blue and gold for this one. 

The background was created using Magical Powders (dark blue and gold) and set aside to dry. I chose a light blue cardstock and a light turquoise as well as gold foil and gold glitter paper. The leaves were die cut from gold foil and arranged on the hexagon and I cut the light blue cardstock and gold glitter paper into the angled shape as per the sketch. The sentiment was stamped directly on the blue cardstock. I used light turquoise cardstock for the first mat and a dark blue cardstock for the card base. A few gold sequins were placed around the image and sentiment to finish off this card. 

Come and join us at Sketch Saturday and show us how you interpret the sketch. 

You have two weeks to link up your project. 

We can't wait to see what you create!

Enjoy, 

Alyson
Friday, September 20, 2024

CD 619 - Trio of Smiles

 Welcome to Colour Dare Challenge 619!

The graphic is below - you must use at least three of the four colours. 

I chose to use Bluebird, Jade and Honey Butter. 

The background was embossed on black cardstock and I used white pigment ink and a brayer to enhance the pattern by adding white on top. The white gradually changed to more of a grey colour. 

The words were die cut from coloured cardstock, black cardstock and then vellum and assembled. The smaller sentiments were stamped and die cut and added with foam tape under each of the larger words. I purposely offset the layers, lining them up at the bottom right. Clear Stickles were added to the centres of the tiles on the background. 

Come and join us at Colour Dare and show us how you interpret this challenge. 

You have two weeks to link up your project. 

We can't wait to see what you create!

Enjoy, 

Alyson

CIU 313 - Autumn Leaves

 Welcome to Challenge 313 at Cut It Up!

The theme for this challenge is to use the colours of fall. 

I ran a stylus down the dark lines on the woodgrain paper and dragged a brown ink pad over the that piece, adding colour to the sides as well. The leaf and branch images were all die cut from white cardstock and I inked them and then splattered some of them with water. As they were drying, I embossed the sentiment on vellum and placed that piece across the centre. The leaves and branches were adhered in each corner with a single image at the top right. The woodgrain front was adhered to a Kraft card base and I added some gold gems around the sentiment. 

Come and join us at Cut It Up and show us how you interpret this challenge. 

You have two weeks to link up your project. 

We can't wait to see what you create!

Enjoy, 

Alyson

MTTC 543 - Yellow Floral Birthday

 Welcome to My Time to Craft Challenge 543!

The theme for this challenge is spring.

Where I live, spring is a long way off, but one of our design team members lives in Australia and she chose this theme. 

I decided to use yellow as it is very much a spring colour. 

The floral images were stamped in opposite corners of the card front and coloured with Copic markers. I spattered gold paint on the entire front and added a heat embossed sentiment strip across the centre. I matted the card front onto two layers - one black and one yellow - before adhering it to the card base. 

Come and join us at MTTC and show us your spring projects. 

You have two weeks to link up your project. 

We can't wait to see what you create!

Enjoy, 

Alyson

Thursday, September 19, 2024

Split Christmas Tree

 This card is based on an idea I found on Pinterest. 

The original poster used a simple shape - a heart. I decided to do this using a Christmas tree, which turned out to be considerably more difficult than I expected. 

This is hard to explain - I used a stitched rectangle die, a tree die and some printer paper with several strips of cardstock. I had to die cut some things twice to make it work, but the strips of cardstock are reversed on the right side tree image. Cute, but not the easiest idea, for sure! 

Enjoy, 

Alyson

Wednesday, September 18, 2024

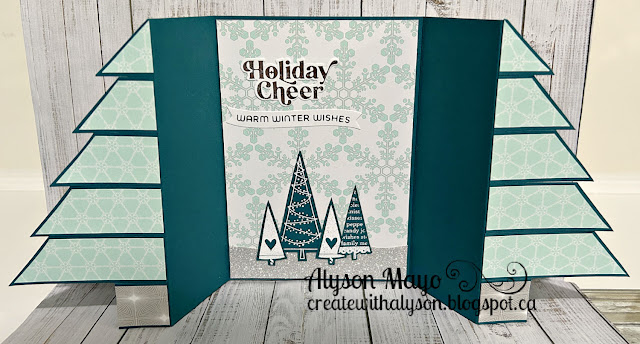
Christmas Tree Gatefold Card

 I saw a picture of this type of card and figured out the measurements to make it. 

The card folds flat to form a tree shape. Once opened, the tree section splits and there is a basic scene inside. I used snowflake paper that I have had for ages and I embossed some trees in white on dark teal cardstock and placed them on a piece of silver glitter paper. Two hot foiled sentiments were added above the trees. There is a panel on the back to write a message. 


Enjoy, 

Alyson

Tuesday, September 17, 2024

Christmas Cards x4

 This set of cards was very easy to make! I chose four related patterned papers and cut each one the same. Once the pieces were all cut, I arranged them so each card had all four patterns in a different orientation. I adhered the patterned papers to a dark blue layer and then to the base cardstock. I simply stamped the same sentiment for each, coloured the word Christmas, and added the sentiments to the centre. Easy! 

Enjoy, 

Alyson

Monday, September 16, 2024

DT 175 plus TSOT 655 - Hopping By Froggies

 Welcome to Double Trouble Challenge 175 plus Try a Sketch on Tuesday Challenge 655!

The theme for the challenge at Double Trouble is to use punches or dies. I used several dies for my card. Double Trouble is pairing up with TSOT for this challenge. Details can be found on the Double Trouble website and the TSOT sketch is shown below. 


I started by creating the orange background. I used various shades of orange and adhered the pieces vertically to a piece of printer paper and then cut that to fit an A2 card front. I arranged the hexagons and die cut those openings. A piece of yellow cardstock was placed underneath and I die cut the hexagons again, using a slightly smaller one for each opening to create a border. 

The frogs were die cut, inked and assembled. They were arranged in the openings, facing all directions. I added a sentiment at the bottom right. 

Come and join us at both Double Trouble and TSOT and show us how you interpret this challenge.

You have two weeks to link up your project. 

We can’t wait to see what you create!

Enjoy, 

Alyson

Sunday, September 15, 2024

Poppy Card Set

 This is another set of cards that I completed at a recent crop. 

I die cut the kraft backgrounds and set them onto coloured cardstock. The floral and leaf images were die cut from the same coloured cardstock and adhered at the bottom. I die cut six different sentiments in the same colours, one for each card. 


Enjoy, 

Alyson

Saturday, September 14, 2024

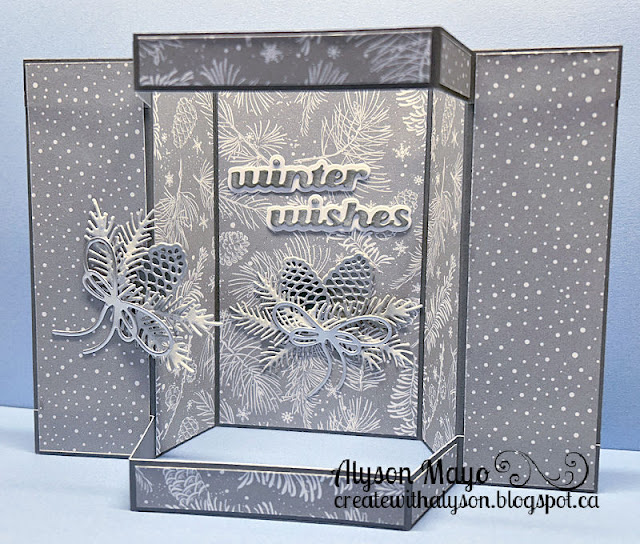
Reverse Bay Window Card

 This card is based on one I saw on Instagram and I figured out the measurements on my own. 

The finished card stands up for display and there is a panel on the back for a message. I chose a winter theme and I die cut all the images and sentiments from white cardstock and inked them. The front of the pinecone pieces were inked with a silver ink pad although that is hard to see in the picture. I added a silver bow to each of the clusters as they were missing something without it. The card folds flat for mailing with one pinecone cluster showing on the front.

Christmas card count is currently at 148... about 80 more to go! 

Enjoy, 

Alyson

Friday, September 13, 2024

MTTCC 95 - Christmas Circle Collage

Welcome to My Time to Craft Christmas Challenge 95!

The theme for this challenge is Christmas stockings. 

I love this open circle die and I chose to cut it in white and decorate each of the circles. I placed a variety of red and green patterned papers behind a few of the openings and stamped and coloured additional images, one of which is a stocking. I added Stickles to some of the images for shine and used green Stickles between each of the openings. I also used fine tip markers to draw dots around a few of the images.

Come and join us at MTTCC and show us how you interpret this challenge. 

You have two weeks to link up your project. 

We can't wait to see what you create!

Enjoy, 

Alyson

Thursday, September 12, 2024

Card Sets - Stencilled and Coloured

 I spent a day at a 12 hour crop and completed 40 cards - yes 40 cards!

32 of them (4 sets of 8 each) were ink blended. I actually had a blister on my thumb from doing so much of that. I used four layering stencils and created 8 cards in different colour schemes with each stencil set. I stamped the same eight sentiments and placed a different one on each card in a set. 

I also completed a set of eight cards that were stamped and coloured. Those are not shown below. 

Lots of work - all to be given to cancer patients who appreciate them so very much!

Enjoy, 

Alyson

Wednesday, September 11, 2024

Silhouette Trio

 This card was inspired by one made a while ago by Chris Lothian.

The three panels were ink blended and I sprayed water on an acrylic block and pressed it into a corner of each piece to lighten the colour. I used a script stamp to stamp the text in black and then embossed the silhouette images over top. The pieces were arranged on the front and a sentiment and three coordinating hearts were stamped at the bottom. A black marker was used to doodle a line around the edge. 

Enjoy, 

Alyson

Tuesday, September 10, 2024

Holiday Cheer Fun Fold Card

 This is a card design I have made before but I wanted to use some Gina K Designs images to make a Christmas card. 

I foiled the images and used stencils to colour them. I adhered the large flower with the stems on the front and added a hot foiled sentiment with some metallic thread and gold gems. That was all set on a die cut background with a floral pattern. 

In the first open panel, there are three smaller sentiments with another stem image. 

Further inside the card, there is a panel on which a message can be written. 

Enjoy, 

Alyson

Monday, September 9, 2024

AH 594 - Jolly Holiday Snowflakes

Welcome to Atlantic Hearts Sketch Challenge 594!

There is much that can be done with this sketch - it is posted below. 

I chose shades of turquoise to make a Christmas card. The centre panel has white snowflakes and I chose a darker shade of turquoise for the cross piece. I also added thin strips of the same cardstock along both sides of the centre panel. The sentiment was die cut from white shimmer cardstock plus both light and dark turquoise cardstock and pieced together. I brushed the lightest part of the letters with a clear shimmer brush. I die cut some small snowflakes and added them around the sentiment and used Stickles on the centres of those snowflakes as well as on the others on the background paper. 

Come and join us at Atlantic Hearts and show us how you interpret this sketch. 

You have until Sunday evening to link up your project. 

We can't wait to see what you create!

Enjoy, 

Alyson

Sunday, September 8, 2024

Hugs Mandala Card

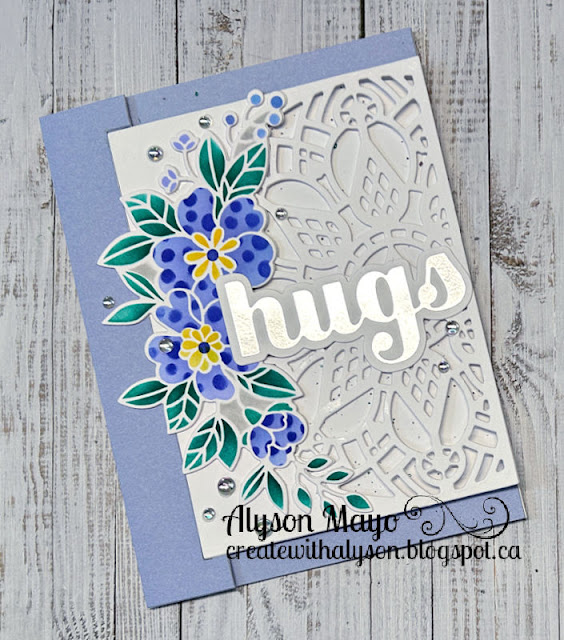
 My friend, Dena, recently posted a card using this mandala die and I had to find that die! I love it! 

The design of this card is similar to the one Dena made but I changed up a few elements. I used another GKD set to created the floral sprays found throughout the card. The mandala front was inlaid into the side of the card and the floral image and a large sentiment was placed on the top. 

Under the sentiment when the card is opened, there is another sentiment on an ink splattered panel. 

When the card is completely open, there is a third decorated panel and a place to write a message. 

Enjoy,

Alyson

Saturday, September 7, 2024

SS 759 - Birthday in Blue

 Welcome to Sketch Saturday Challenge 759!

The optional theme (in addition to the sketch) is to feature a sentiment. 
Since this is a pretty straightforward sketch, adding a large sentiment worked perfectly. I die cut two panels from blue cardstock and arranged them on a white card front. The sentiment was die cut three times and the letters were stacked. I used the die cut outline to place the letters evenly. The balloons wouldn't fit at the bottom (location of the flourish on the sketch), so I moved them to the top. The white card front was adhered to a dark blue card base. 

Come and join us at Sketch Saturday and show us how you interpret this sketch. 

You have two weeks to link up your project. 

We can't wait to see what you create!

Enjoy, 

Alyson