Tuesday, April 30, 2024

Z-Fold Bee Card

 This card is the result of the 30 Minute Cardmaking Stash and Dash. 

The parameters for this challenge were as follows: type of card: any fun fold, colour: yellow, embellishment: ribbon/twine and technique: die cutting. 

I stamped, coloured and die cut all the flowers and bees and arranged them on a Z-fold card. I brushed the wings of the bees with a clear shimmer brush and added the images to white panels that were outlined with a black marker. A sentiment was added at the bottom of the front piece and some gold metallic thread was placed underneath. 

Enjoy,

Alyson

Monday, April 29, 2024

DT 165 - Hello Sunshine Slimline

 Welcome to Double Trouble Challenge 165!

The small graphic is below - please visit the Double Trouble Challenge Blog for detailed information. 


The sketch from Atlantic Hearts is what drove my card design. I chose several colours from the Cinco de Mayo image and used those for the flowers and leaves. I inked a background and then die cut a wonky burlap piece from that. I backed it with white cardstock so I could slip the purple flower underneath. The white layer and the black base were both die cut using stitched slimline dies. As an afterthought, I splattered the card with black paint as the open white sections were very stark. A black sentiment was placed on the inked section and I added some iridescent gems around the flowers. 

Come and join us at Double Trouble and show us how you interpret this week's challenge. 

This is a ONE week challenge.

I am also linking up my card with Atlantic Hearts as I am a design team member there. 

We can't wait to see what you create!

Enjoy,

Alyson

Sunday, April 28, 2024

Birthday Corner Box Card

 I saw a tutorial on this type of card from Rachel Tessman - it isn't difficult to make at all. 

I chose a colour scheme of browns with pinks and greens. Since CTMH cardstock has a lighter shade of the colour on the reverse side, I took advantage of that and embossed three pieces on the darker side so they would stand out more. The top sentiment was embossed on dark brown cardstock and there is a smaller embossed sentiment on the card base behind that piece. 

The vase was stamped and die cut and I cut all the floral images and arranged them inside the vase. A piece of white cardstock was lightly inked in yellow and the vase was adhered to that piece. There is a panel on the back to write a message. The card folds flat and will fit in an A2 size envelope. 

Enjoy,

Alyson

Saturday, April 27, 2024

Drawn Lines Butterfly Card

 I found a card like this on social media but there was no watermark... the lines on the original card were created using a stamp but I figured I could do the same thing with thin markers. 

The lines were drawn at various lengths on white cardstock. I stamped a sentiment and cut around it so only the black section was visible. The butterfly was hot foiled in gold and coloured from the back with Copic markers. Two leaf sprigs were placed under the sentiment and the butterfly was added on top. I adhered the card front to a white base using craft foam and three coordinating enamel dots were placed under the sentiment. 

Enjoy,

Alyson


Friday, April 26, 2024

MTTCC 85 - Frosty Hello

Welcome to My Time to Craft Christmas Challenge 85!

The theme for this challenge is to create a winter scene. 

I find scenes are easiest to manage on a slimline format. I inked a background with three shades of blue Distress Oxide ink and masked a sun in the corner. That was splattered with white paint. The "snow" was torn from a piece of white glitter paper and I stamped, coloured and die cut the snowmen and added them along the snowbank. The sentiment was placed at the top to finish off this cute card. 

Come and join us at MTTCC and show us your winter scenes. 

You have two weeks to link up your project. 

We can't wait to see what you create!

Enjoy, 

Alyson
Thursday, April 25, 2024

Birthday Card with Joseph's Coat Technique

The Joseph's Coat technique has been around for ages - it creates such a cool effect that I had to revisit it after many years. 

I ink blended the background using four Distress Oxide inks and made sure it was completely dry. I stamped a variety of solid images on that piece using Versamark ink and embossed them with clear embossing powder. Once the background was filled with images, I used black ink with a foam applicator to apply a thick layer of ink on top. I wiped away the excess ink which left the beautiful multi-coloured background. 

I used the same inks to blend a background on the card base so it followed the same colours as the card front. I also blended another piece of cardstock and embossed the birthday sentiment in black before die cutting it. That was adhered to a black circle. Some gold metallic thread was arranged under the circle and the cards front was adhered to the base with craft foam. 

Enjoy, 

Alyson

Art Journal - Title Page

 I purposely waited to do the title page for my art journal because I wanted to use the sentiment that is shown here. I struggle with my self-confidence and erase the doubt is a phrase I often say to myself.

The background was painted using a mixture of three ink colours and water. The beautiful flowers on the left side are from 49 and Market's fabric tape and I used some acetate images and rub-ons around the page. Simple overall - I need to practice more with just letting it happen!

Enjoy,

Alyson
Wednesday, April 24, 2024

Celebrate Winged Gatefold Card

 This was a fun card to make - I had to play with the measurements to make it fit into a standard A2 envelope. It is 51/2" tall but 4" wide, so there is a bit of extra space. 

The flowers and leaves were all die cut and assembled. On each piece of white cardstock, I used a silver marker to draw a border. The flowers and leaves were adhered in groups. The side panels behind the front panels were stencilled to add some interest. A sentiment was stamped on the inside panel and since I had some extra images, I added a flower in the corner of that piece. I used a white gel pen to add details to the flowers. 

The first photo shows the card standing up - the sides fold in together so only the panel with Celebrate shows when it is flat. The second photo shows the card opened up. 


Enjoy,

Alyson

Tuesday, April 23, 2024

Hot Foiled Peonies

 I recently bought this gorgeous peony press plate. Instead of pressing the details of the flowers, it presses colour onto the background. I used the plate in my hot foil machine instead. 

I made a few backgrounds and chose a gold holographic background and a gold dot background for these two cards. 

Colouring is not my strength but I do enjoy it... I coloured the first card in shades of blue for the flowers. A hot foil sentiment was added and the card front was adhered to a dark blue mat.

The second card took me WAY out of my comfort zone as I used inks and a water brush to watercolour the images. It's not great - my watercoloring skills most definitely need work. I added a hot foiled sentiment and a black background to that card. 

Enjoy,

Alyson 

Monday, April 22, 2024

AH 574 - Just Because

Welcome to Atlantic Hearts Challenge 574!

This is a very simple sketch and I stayed true to that for my card. 

The purple background was toner foiled (at the top of the photo, it picked up some of the shine). The banner piece and a border were die cut from dark purple cardstock and I also embossed the sentiment on the same cardstock. Some white twine was added under the circle and a few iridescent sequins were placed as per the sketch. Easy!

Come and join us at Atlantic Hearts and show us how you interpret this week's sketch. 

You have until Sunday evening to link up your project. 

We can't wait to see what you create!

Enjoy,

Alyson

Sunday, April 21, 2024

Blue Christmas Cards

 I waited for almost 5 months for this press plate to arrive at my local scrapbook store... although it is designed to be used with the Better Press system, I chose to hot foil the image with a holographic blue foil. 

The first image is the original foiled image - such a pretty blue background with white trees. The second card is the reverse foiled image so the background is white and the trees are blue. Both cards shimmer beautifully in the light. I added only a silver sentiment to each and I did place a blue mat behind the white background. Easy, but oh, so pretty! 


Enjoy,

Alyson

Saturday, April 20, 2024

SS 749 - Hello Sunshine

 Welcome to Sketch Saturday Challenge 749!

The optional theme (in addition to the sketch) is a trio of something. 

I couldn't make the trio work so I used only the sketch. The purple background was embossed with a small dot embossing folder and I added a piece of light turquoise patterned paper on a diagonal. Two slim frames were cut and I also placed two glitter strips along the bottom so they fit under the frames. The flowers were stamped, stencilled and die cut to represent the half circle and I added five clear gens to the left. Light turquoise gems were also placed on each flower and a die cut sentiment was adhered near the top. 

Come and join us at Sketch Saturday and show us how you interpret this week's challenge.

You have two weeks to link up your project. 

We can't wait to see what you create!

Enjoy,

Alyson

Friday, April 19, 2024

CD 597 - Vellum Inked Background Just Because

 Welcome to Colour Dare Challenge 597!

The grid is below - I used Sundance, Rosy and Limeaid for my card. 

These are not go-to colours for me and I tried a few things before I was able to make something work. I scribbled three markers on vellum and splattered that with rubbing alcohol to allow the colours to blend a bit. That piece dried very quickly and it was adhered to a card base and a black frame was placed around the outside. The image and sentiment were both die cut from black cardstock and adhered - nothing else was added. 

Come and join us at Colour Dare and show us how you interpret this week's challenge. 

You have two weeks to link up your project. 

We can't wait to see what you create!

Enjoy, 

Alyson

Cut It Up 302 - Birthday Balloons

 Welcome to Cut It Up Challenge 302! 

The theme for this challenge is "starts with B". 

My card has two B items - birthday and balloons. 

The background was die cut with a stitched maze die. I added the balloons and brushed them with a clear shimmer brush to add some shine. The sentiment piece and the card base were inked with a dark teal ink and the sentiment was die cut along with a white border. That was adhered at the bottom and I added some turquoise sequins around the balloons. Easy!

Come and join us at Cut It Up and show us how you interpret this week's challenge. 

You have two weeks to link up your project. 

We can't wait to see what you create!

Enjoy,

Alyson

MTTC 532 - Dogwood Hello

 Welcome to My Time to Craft Challenge 542!

The theme for this challenge is everything dies. 

Everything on my card was die cut - everything! I used a Jennifer McGuire design for my card. The back of the card has the same opening around the edges as the front so it is completely see-through. The floral image was cut from white cardstock and inked before adding it to the vellum front. I also used a die cut coloured cardstock piece behind the flowers. I added a silver sentiment and put some Stickles on the centres of the flowers. 

Come and join us at MTTC and show us how you interpret this week's challenge. 

You have two weeks to link up your project. 

We can't wait to see what you create!

Enjoy,

Alyson

Thursday, April 18, 2024

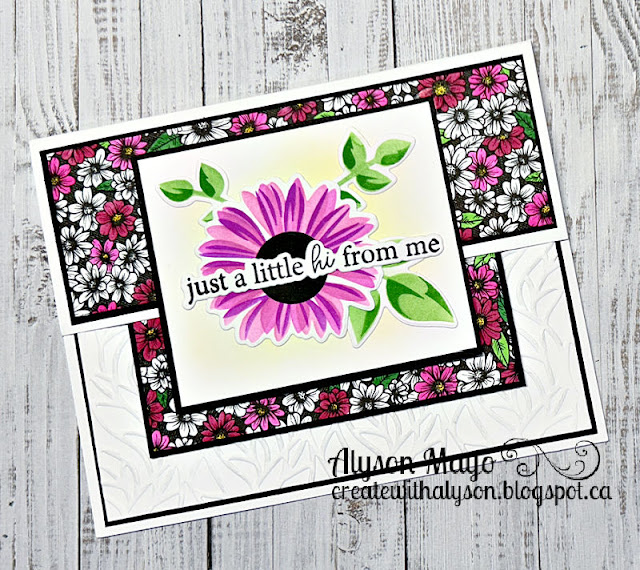
Daisy Double Flip Card

 I saw a card like this on FB and figured out the measurements myself. I considered adding a horizontal card base to the back but it became rather bulky so this card can be leaned against something for display. 
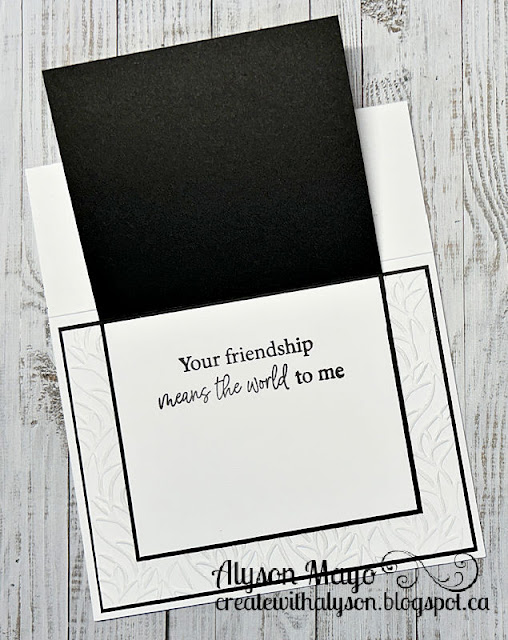
The card opens to reveal two "hidden" sections. I blended some yellow ink on the front panel and decorated it with a stencilled daisy as the background paper also has flowers on it. I added a sentiment across the front. The next panel is the patterned paper panel and I selectively coloured the flowers and leaves to add some interest. Inside that panel is a stamped greeting plus a place to write a message. Everything was set on an embossed piece of cardstock which was adhered to the base of the card. 


Enjoy,

Alyson

Wednesday, April 17, 2024

Daisy Hello Card Set

 This set of eight cards was created for a lady at my church who wanted cards with thinking of you related sentiments. These cards don't look like that BUT there is a catch. Inside the box, there is a small envelope with sixteen embossed sentiments so she can choose what to add under the hello sentiment on each card.

The design is the same for each card but I used eight colours so each card is unique. The woodgrain centre was embossed and inked in grey as that matched all the colours. 

Enjoy,

Alyson

Tuesday, April 16, 2024

TSOT 645 - Wise Owl

 Welcome to Try a Sketch on Tuesday Challenge 645!

This is such a versatile sketch with so many possibilities. I love to work with florals but this time, I went a different route. 

The background paper was paired with a light woodgrain piece that was die cut with a circle die. The owl was all die cut from white cardstock and inked before it was assembled. I added some details using coloured pencils and a white gel pen. I also die cut and coloured a branch for the owl to rest. The sentiment was embossed in white and I used a white gel pen to add dots in the sky. I don't often ink the edges of my designs but I did ink this one using a dark grey ink. 

Come and join us at Try a Sketch on Tuesday and show us how you interpret this week's sketch. 

You have three weeks to link up your project as the due date is extended one week to accommodate the fifth Tuesday in the month. 

We can't wait to see what you create! 

Enjoy,

Alyson

Monday, April 15, 2024

DT 164 - CAS Purple Flowers

 Welcome to Double Trouble Challenge 164! 

It's all about clean and simple (CAS) this week - the small graphic is below. Please visit the Double Trouble Challenge Blog for detailed information. 

The second element of this challenge (optional) is to use a colour other than white. CAS typically has a lot of "white space". I chose a very light shade of lilac cardstock for my card front. I stamped the corner of a floral image and then stencilled the flowers and leaves using shaded of purple and green. A small sentiment was stamped to the left of the flowers and the card front was adhered to black cardstock. I tried it on white but it didn't look right since there was no white on the stamped piece. No embellishments or anything else was added to this card. 

Come and join us at Double Trouble and show us how you interpret this challenge. 

You have two weeks to link up your project. 

I am also linking up my card with the Crafter's Cafe challenge (CAS card). 

We can't wait to see what you create! 

Enjoy,

Alyson

Sunday, April 14, 2024

Sending Smiles Embossed Tulips

 The tulips on this card were embossed and then stencilled. The embossing folder is a 3D folder, so the depth of the flowers is quite remarkable. I chose shades of pink and purple and added a die cut sentiment at the bottom. The embossing folder and stencils are very large - large enough for a slimline card or in this case, a 5x7 card, which was cut down quite a bit. I look forward to playing more with this group of products (the co-ordinating dies just arrived as well!) 

Enjoy,

Alyson

Saturday, April 13, 2024

Pink Flowers Birthday

 This card was created for the 30 minute Cardmaking Stash and Dash event. 

The parameters for this challenge were as follows: Type of card: A2, Colours: pink and brown, Embellishment: something sparkly and Technique: stamping. 

I stamped the floral image, stencilled it with shades of pink and green and die cut it. The background was embossed with a woodgrain folder on a piece of burlap patterned paper and I dragged a brown ink pad over the piece to add more interest. The flowers were adhered to the woodgrain background and I added two hot foiled sentiments with foam tape. 

Enjoy,

Alyson

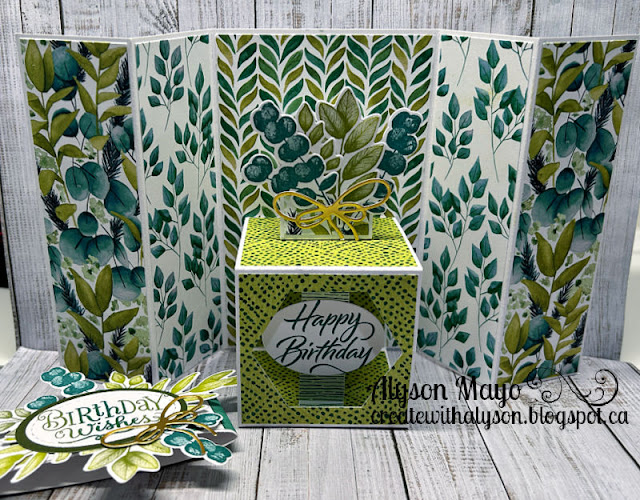
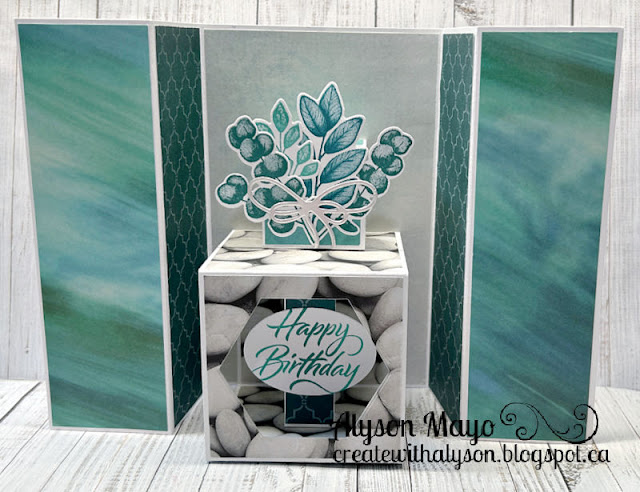
Birthday Gatefold with a Box Fun Fold Card

 I love to try new fun fold designs and this was a neat one! 

The base of the card is a gatefold design but there is a definite surprise inside with a box that pops out with a smaller box on top. 

 The inside has a larger box on the bottom with a cut out and a sentiment inside. There is a smaller box on the top that has some branches attached (they extend beyond the top of the card but that's ok as it still fits into a 5 x 7 envelope). I also die cut some bows - one for the inside and one for the band. 


This was my first attempt. When I was selecting the papers I wanted, I didn't consider the belly band - consequently the colours of the branches aren't clearly visible against the very busy background paper. I changed that when I did the card above - lesson learned!


Enjoy, 
Alyson


Friday, April 12, 2024

MTTCC 84 - Blue Poinsettia

Welcome to My Time to Craft Christmas Challenge 84!

The theme for this challenge is to use non-traditional colours for Christmas. 

I love blue for Christmas so I stamped, stencilled and die cut a gorgeous dark blue poinsettia. The striped background was also die cut and I added a piece of holographic paper underneath. That's very difficult to photograph because the light changes the colours! The poinsettia and some stamped pine branches were added and I used a white gel pen to add little dots on the flower. The sentiment was hot foiled and I placed some silver metallic thread under it before adhering it with foam tape. Clear Stickles were added to the centre of the flower. 

Come and join us at MTTCC and show us your non-traditional holiday projects. 

You have two weeks to link up your project. 

We can't wait to see what you create!

Enjoy,

Alyson

Thursday, April 11, 2024

Rainbow Circle Birthday

 I saw this idea in a FB group and loved it - had to try it myself. 

I die cut the stitched rectangle and stamped a birthday sentiment at the bottom. The circles were die cut and I used three colours of Distress Oxide ink to blend a rainbow background on each. The images were embossed in black and the circles were arranged on the card front with foam tape. The rectangle was adhered to the card base with craft foam. Easy, but so effective! 

Enjoy, 

Alyson

Wednesday, April 10, 2024

Grey Tulip Sympathy Card

 I don't make sympathy cards ahead of time - they definitely are not my favourite type of card to make. This one was CASEd from a card design on the Honey Bee Stamps site. I love the neutral colour scheme. 

The flowers were all die cut from white cardstock and the leaves from black cardstock. I used a light grey ink to blend colour onto parts of the tulips before assembling them. Before arranging them on the card, I used a thin black marker to draw two rectangles around the edge. The flowers were arranged on the front and I added a stamped sentiment in the top corner. I used a white gel pen to add some detail to the centres of the largest flowers and placed a few black gems around the flowers. 

Enjoy,

Alyson

Tuesday, April 9, 2024

Congratulations Window Card

 This card was made for a man who is retiring from his job of 40 years! That's a long time to work at one job! His hobby is gardening so I decided to use that theme. 

I created a widow scene by stencilling clouds and then adding garden elements - a sun, a fence, grass, flowers and a squirrel. All of that was set behind a die cut window frame. I added a base and the word congratulations. The background was embossed on grey cardstock and I added a blue mat and a grey mat before adhering all of it to the white card base. An additional sentiment was placed under the window. 

Enjoy,

Alyson

Monday, April 8, 2024

AH 572 - Birthday Wishes Fuchsias

 Welcome to Atlantic Hearts Sketch Challenge 572!

This is such a fun sketch. I masked an oval and lightly inked it in purple before placing a second stencil on top and using a darker purple ink to create a pattern. I had stamped and stencilled some fuchsia images a while ago and I arranged them at the top of the oval and added a gold die cut bow. A gold hot foiled sentiment was placed across the oval and I added a few clear gems around the card. The card front was adhered to a dark purple card base. 

Come and join us at Atlantic Hearts and show us how you interpret this week's challenge. 

You have until Sunday evening to link up your project. 

We can't wait to see what you create!

Enjoy,

Alyson

Sunday, April 7, 2024

DD April Challenge - Reason to Smile

 Welcome to the April challenge at Dragonfly Dreams 

The theme for this challenge is to use a die.

I used several dies - the floral image, the vellum leaves, the sentiment and the background. 

The stitched background was die cut and lightly inked. I stamped, stencilled and die cut the large floral image and cut it into smaller sections. The vellum leaves were added under the flowers and I also stamped and die cut the sentiment and placed it across the flowers. A few clear gems were added on the flowers to finish off this pretty card. 

Come and join us at Dragonfly Dreams and show us how you interpret this challenge. 

You have until the end of the month to link up your project. 

We can't wait to see what you create!

Enjoy, 

Alyson

Saturday, April 6, 2024

SS 748 - Daisy Birthday Wishes

 Welcome to Sketch Saturday Challenge 748! 

The optional theme (in addition to the sketch) is to use food or drink images. 

I used only the sketch for my card. The background is a reverse hot foiled image in gold and I added a die cut over that with a lightly inked white cardstock piece underneath. The daisies were stamped, die cut and arranged according to the sketch. I added a hot foiled sentiment under the bottom flower and placed a few green gems around the flowers. The card front was adhered to a light green card base. 

Come and join us at Sketch Saturday and show us how you interpret this challenge. 

You have two weeks to link up your project. 

We can't wait to see what you create!

Enjoy,

Alyson