Friday, June 30, 2023

DT 142 - Tis the Season

 Welcome to Double Trouble Challenge 142! 

The small graphic is below - please visit the Double Trouble Challenge Blog for more information. 

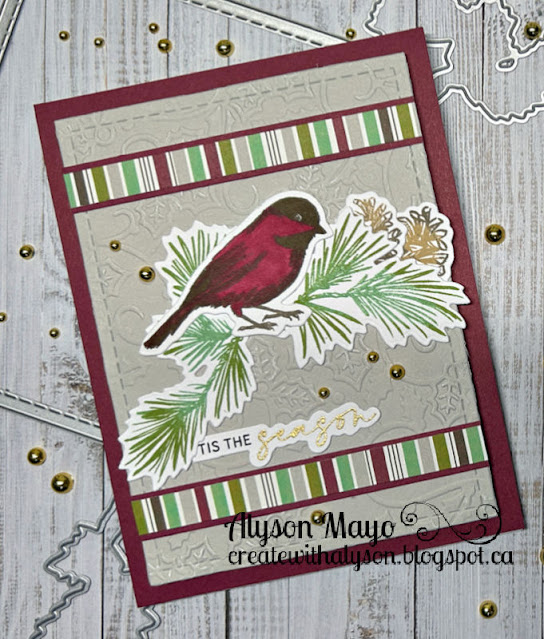
I pulled out some old products for my card. The images were stamped and the bird was coloured. I embossed a holly pattern on grey cardstock and added two stripes - one at the top and one at the bottom. The bird and the branches were arranged in the centre and I tucked the edge of the sentiment under one of the pine branches. Some gold gems finished off this card. 

Come and join us at Double Trouble and show us how you interpret this challenge. 

You have two weeks to link up your project.

I am also linking up my card with the Jingle Belles Challenge

We can’t wait to see what you create! 

Enjoy,

Alyson

CD 555 - Joy to the World

 Welcome to Colour Dare Challenge 555!

Choose at least three of the four colours on the grid - neutrals and metallic are free to use. 

This colour palette reminded me of Christmas so I went with that idea. I used Sage, Candy Apple and Scarlet cardstock. The brick background was embossed with a brick embossing folder that was inked with grey ink first. That was die cut and I adhered that piece to a die cut green border and then to a grey card base. The flowers were die cut and I used a stylus and a bone folder to shape them. I also added ink on the edges of each piece. They were arranged on the background and I added some gold ribbon and red metallic thread under the flowers. A hot foiled sentiment was added with foam tape and a few gold gems were placed around the card. 

Come and join us at Colour Dare and show show you interpret this week's challenge. 

You have two weeks to link up your project. 

We can’t wait to see what you create! 

Enjoy,

Alyson

MTTC511 - The World is Yours

 Welcome to My Time to Craft Challenge 511!

The theme for this challenge is summer camping. 

This was a struggle for me - I don't have a lot of products with this theme but I did find an outdoor stamp set that worked fairly well. Personally, camping for me means totally roughing it - a canoe, a tent, freeze-dried food, portaging, etc. However, I did use a "cottage" for my scene for lack of a better stamp! 

The scene was stamped and die cut, along with a larger hexagon to use as a border. I used some blue woodgrain paper for the background and added a green strip with twine tied around it. A small sentiment was added at the bottom of the card. 


Come and join us at MTTC and show us your summer camping themed projects. 

You have two weeks to link up your project. 

We can't wait to see what you create! 

Enjoy,

Alyson
Thursday, June 29, 2023

Hello Friend Butterfly

 I saw this card on Facebook and wanted to create it myself. I wish I had saved the name of the artist but the screenshot didn't include that... 

I inked a panel of white cardstock and then embossed it with a brick embossing folder. The floral image was stamped - and in hindsight, I should have done that before embossing! The holes were die cut and I added a butterfly at the top of that section. The sentiment was stamped at the bottom and I placed a piece of black ore cardstock between the sections. The butterfly was also die cut from that same cardstock, giving it a nice shimmer. I added some iridescent gems around the card to finish it off. 

Enjoy,

Alyson

Wednesday, June 28, 2023

Let's Stamp Together - Spellbinders Cards

 I subscribed to Let's Stamp Together from Scrapbook and Cards - it is a bi-monthly subscription that contains a stamp, die and stencil combo and there is a formal class taught by an instructor. This month's class was a collection of items from Spellbinders.

The stencil has a sort of floral look - it was used on three of the four cards. There are a bunch of little flower and leaf dies plus a kaleidoscope die that gives a neat layered effect. This was a lot of fun - can't wait for the next package in July! 


Enjoy,

Alyson

Tuesday, June 27, 2023

CAS Butterfly Card

 This pretty card was CASEd from one I saw on Pinterest. 

The four panels were cut into squares and the opposite ends were rounded with a corner rounder. The second part of the sentiment was stamped using a coordinating ink pad and I placed the squares at the top and added the butterfly in the centre. The word "sending" was die cut and added above the stamped sentiment. The entire card front was adhered to a card base with thin craft foam. 

Enjoy,

Alyson

Monday, June 26, 2023

So Very Thankful

 I recently watched a video by Gina from Gina K. Designs and she demonstrated this cool technique. 

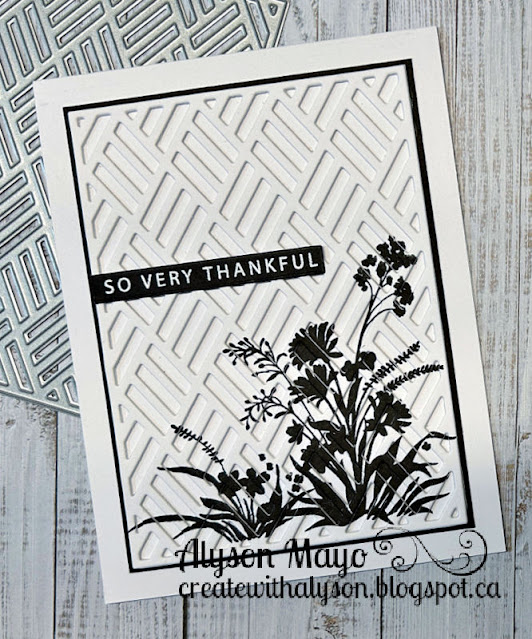
The base of the card was stamped with a silhouette image in black and that same image was stamped in the same place on a second piece of white cardstock. The second piece was die cut using a cover plate. I die cut two additional pieces and stacked them together to add depth. Those were placed on the original stamped image and lined up so parts of the image appear to be in the background. I added a black mat and then adhered all of that to a white card base. The sentiment was heat embossed in white and added at the side. 

Enjoy,

Alyson

Sunday, June 25, 2023

Butterfly Pop-Up Wave Card

 I have seen a few cards in this style lately and wanted to try one myself. 

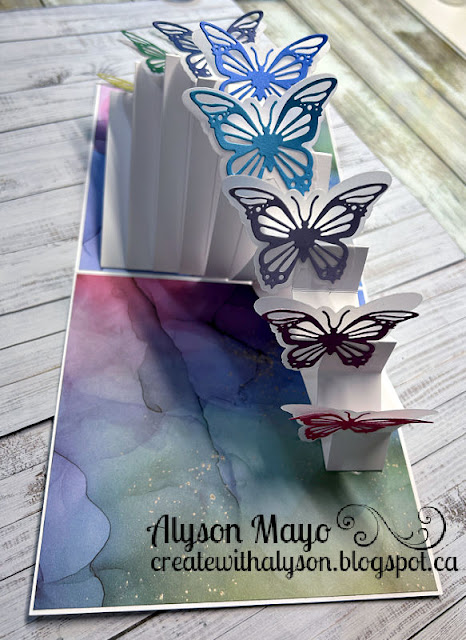
The inside has such a wonderful surprise... a pop-up feature with butterflies. 

The patterned papers are from a paper pad with alcohol inked backgrounds. I choose a sheet with several colours on it to allow for a (kind of) rainbow effect inside the card. The butterflies were die cut in various colours with the solid layer being die cut from vellum. They were arranged on the inside panels to create a wave effect. I didn't add much to the front of this card - just a couple of butterflies and some tiny holographic butterflies from my stash. 


Enjoy,

Alyson

Saturday, June 24, 2023

Coloured Floral Panel Card Set

 This is the second post for some recent cards sets that I have completed. 

This set was fun to make. The backgrounds were die cut from eight colours of cardstock and I heat embossed four different sentiments in white on black cardstock to place across the centre of each card. The floral panels were stamped and coloured in coordinating colours to the cardstock. No embellishments were added as there is already a lot going on with this design. 

Enjoy,

Alyson

Friday, June 23, 2023

DT 141 - Hello Slimline Card

 Welcome to Double Trouble Challenge 141! 

The small graphic is below - please visit the Double Trouble Challenge Blog for more information. 

I love florals so I decided to create a slimline card with a floral image. 

The white background was created by adhering strips of white cardstock on an angle - that just added more dimension and interest to the background. The floral images were stamped and die cut. I placed one image at either end of the card and covered the centre with a hot foiled sentiment. I used the same colour cardstock as the inks to create two borders and some silver gems were added. The darkest parts of the flowers were brushed with a clear shimmer brush. 

Come and join us at Double Trouble and show us how you interpret this challenge. 

This is a one week challenge - you have until June 29 to link up your project. 

I am also linking up my card with the Beautiful Blossoms challenge (anything goes with florals).

We can’t wait to see what you create! 

Enjoy,

Alyson

MTTCC 63 - Christmas Extended Cube Card

 Welcome to My Time to Craft Christmas Challenge 63!

The theme for this challenge is to use blue and silver. 

I love that colour scheme and decided to use it on what I call an extended cube card. I chose papers with a winter scene and embossed silver branches. I used a middle shade of blue cardstock for the base and a dark shade of blue cardstock for the layers. The sentiment and the image were embossed in dark blue and coloured with markers. They were adhered to the centre of the card. The back of this card is also finished and there is a place to write a message there. I didn't add any additional embellishments as the card folds flat to 8" x 8" and I didn't want any additional bulk to it. 

Come and join us at MTTCC and show us your blue and silver holiday projects. 

You have two weeks to link up your project. 

We can’t wait to see what you create!

Enjoy,

Alyson

Thursday, June 22, 2023

Happy Heart Slimline

 This card was the result of another 30 Minute Card Making Stash and Dash. Did I finish in 30 minutes... no! But it was still fun! 

The parameters for this challenge were as follows: 

Type of card - slimline, Colours - crafter's choice, Technique - smooshing, Element - a tag 

I started by using some watercolour markers to draw on my glass mat and then I spritzed that with water. I dragged a piece of watercolour cardstock across that a few times and let it dry. I die cut lots of flowers and leaves as well as tag shaker pieces. The flowers and leaves were inked and assembled and I stamped a sentiment in the centre of the shaker before adding sequins to that piece. Everything was arranged on the background and I added a dark blue border to the card. Some blue twine was tied to the top of the shaker and I added gold Stickles to the centres of the flowers. 

Enjoy,

Alyson

Wednesday, June 21, 2023

Buckle Card

 This cute card was posted by Joanne Pollock - and she provided the base cutting instructions as well! 

I used a retired CTMH paper pack for the patterned papers. The label was stamped and coloured using some of the same colours in the papers. I added two die cut leaves behind the sentiment piece which was also lightly inked around the edges. Some small flower embellishments were added and I brushed the veins of the leaves and the sentiment with a clear shimmer brush to finish off the card. There is a place inside the flap to write a message. 

Enjoy,

Alyson

Tuesday, June 20, 2023

TSOT 612 - Circle Cluster with Butterfly

 Welcome to Try Stampin' on Tuesday Challenge 612!

It's an either/or challenge this week - use the inspiration photo, the sketch or both. 

I chose to use the sketch. 

The background was embossed with a 3D embossing folder and adhered to silver foil and then a dark blue card base. The circles and the sentiment were hot foiled in silver and I created some blue and turquoise backgrounds using magical powders. Those pieces were adhered behind the circles and I arranged them in a cluster. A butterfly was die cut from vellum and blue cardstock and placed on top of the circles. Turquoise gems were added to the body of the butterfly and I added some silver gems around the card. 

Come and join us at TSOT and show us how you interpret this week's challenge. 

You have two weeks to link up your project. 

We can’t wait to see what you create!

Enjoy,

Alyson

Monday, June 19, 2023

AH 530 - Pink and Black Hello

 Welcome to Atlantic Hearts Sketch Challenge 530! 

This sketch has a lot of possibilities... I chose to use black and white patterned papers for the panels and add a bold coloured image. 

The floral spray was stamped and coloured. Once the panels were in place, I added the long sentiment and then the flowers. A few dark pink enamel dots were placed around the flowers and I brushed parts of the flowers and leaves with coloured shimmer brushes. 

Come and join us at Atlantic Hearts and show us how you interpret the sketch shown above. 

You have until Sunday evening to link up your project. 

We can’t wait to see what you create!

Enjoy,

Alyson

Sunday, June 18, 2023

CAS Cards

 Every now and then, I like to play around with inks and stamps and make clean and simple cards. It's usually not my style but it's always fun to play. 

These two cards were created by masking the front and inking a background. The masks were removed and the images were stamped in black. Both were adhered to a black mat and coordinating coloured cardstock mat to bring out the colours. I added a few clear gems to finish off the cards. Easy! 


Enjoy,

Alyson


Saturday, June 17, 2023

SS 728 - Heart Smiles

 Welcome to Sketch Saturday Challenge 728! 

The optional theme (in addition to the sketch) is to use three colours, not including black and white.

I did use three colours for my card - turquoise, purple and yellow. 

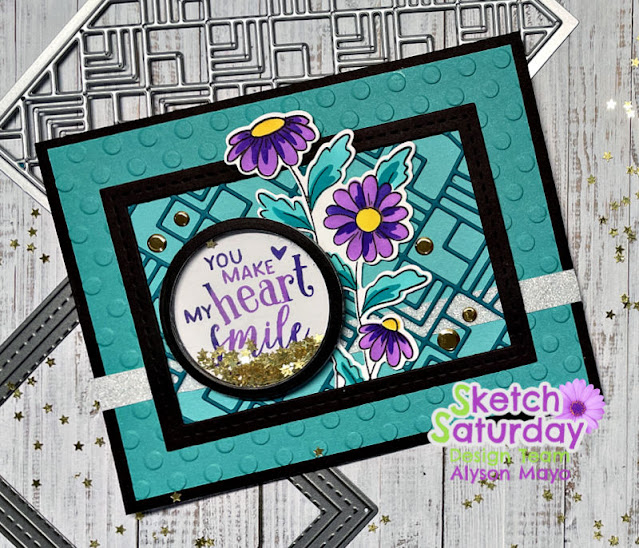
The background was die cut and adhered to a stitched black frame. The outline of that turquoise piece was embossed with a dot pattern. I placed a strip of white shimmer trim across the card and added a floral stem under a small shaker. The sentiment was stamped inside the shaker using two shades of purple ink and I added some gold star confetti there. Some gold gems finished off this card. 


Come and join us at Sketch Saturday and show us how you interpret this week's sketch. 

You have two weeks to link up your project. 

We can’t wait to see what you create!

Enjoy,

Alyson


Friday, June 16, 2023

CD 553 - Hello There

 Welcome to Colour Dare Challenge 553!

This week, there are very specific colours to use with one option. 

I chose to pair dark teal with red and brown. 

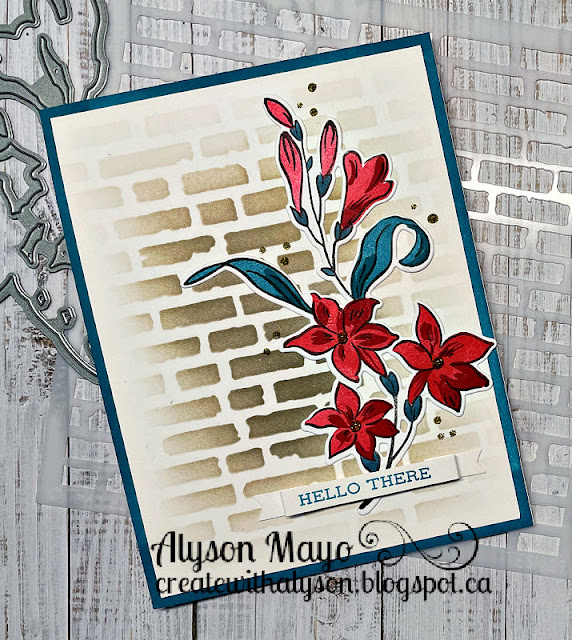
The background was stencilled in two shades of brown, gradually getting lighter toward the edges. The floral image was stamped using a set of layering stamps and then die cut. That was added to the brick front and I created a small banner for the sentiment. I didn't have any coordinating cardstock for the background so I used the same ink pad as I did for the stamping and dragged it around a piece of cardstock to create a matching background. Some gold Stickles were added around the image and in the centres of the flowers. 

Come and join us at Colour Dare and show us how you interpret this week's challenge. 

You have two weeks to link up your project. 

We can’t wait to see what you create! 

Enjoy,

Alyson

MTTC 510 - Among the Pines

 Welcome to My Time to Craft Challenge 510!

The theme for this challenge is travel. 

I don't have a lot of stamps or dies related to travel but I decided to pull out one of my favourite outdoor stamps of pine trees. I love how it looks like the viewer is looking into the sky from within a forest. When I do travel, I love to spend time in the woods roughing it, so this is a perfect travel scenario for me! 

The background was inked with several Distress Oxide inks. The tree stamp was embossed in black and I cut the front down slightly to adhere it to a black background with craft foam. The sentiment piece was also ink blended and embossed in black. I added a few dots with a white gel pen to finish off this card. 

Come and join us at MTTC and show us your travel-themed projects. 

You have two weeks to link up your project. 

We can't wait to see what you create!

Enjoy,

Alyson

Thursday, June 15, 2023

Stitched Floral Border Card

 A friend of mine recently sent me a floral border stitching die... that is what I used for this card. 

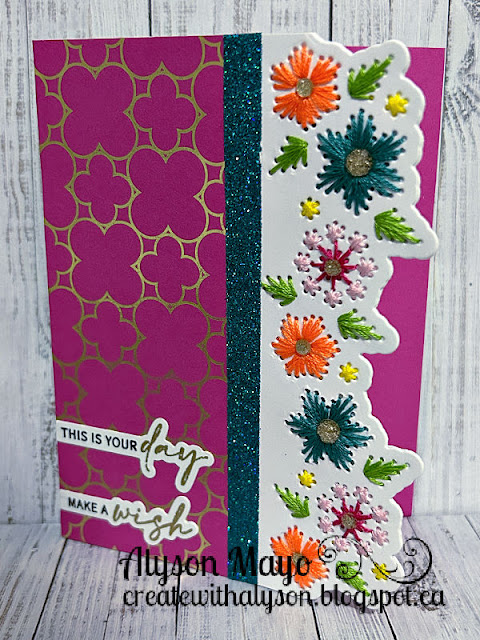
The stitching took me a LONG time. I die cut a second piece of white cardstock to adhere behind the stitched panel (and realized after that fact that I could have just die cut that into the card base). The front panel was adhered to the card base and I added gold patterned pink cardstock to the left side along with a glitter border. Another piece of pink cardstock was placed along the right inside panel of the card so it would show on the front . 

Enjoy,

Alyson

Wednesday, June 14, 2023

Teal Embossed Front Friend Card

 I saw this idea on Pinterest and wanted to try it myself. 

I chose five shades of turquoise cardstock and adhered them together with temporary tape before embossing the front. Those pieces were then adhered to a black card base, leaving a small space between each section but lining them up so the embossed image would continue across the card. The sentiment was die cut three times and I attached the pieces together before adhering them to the bottom of the card. Some white enamel gems finished off this card. 

Enjoy,

Alyson

Tuesday, June 13, 2023

Be Kind Rainbow Card

 I love the sentiment on this card and I love rainbows so this is a great match! 

I cut strips of cardstock and placed them in rainbow order on white cardstock. I die cut that piece with a stitched rectangle and adhered it to a card base with craft foam. The sentiment was embossed in white on vellum and added to the front. A few clear sparkles were added around the sentiment to finish it off. 

Enjoy,

Alyson

Monday, June 12, 2023

Floral Swag Card Set

This is the third of three posts about card sets that I recently created. 

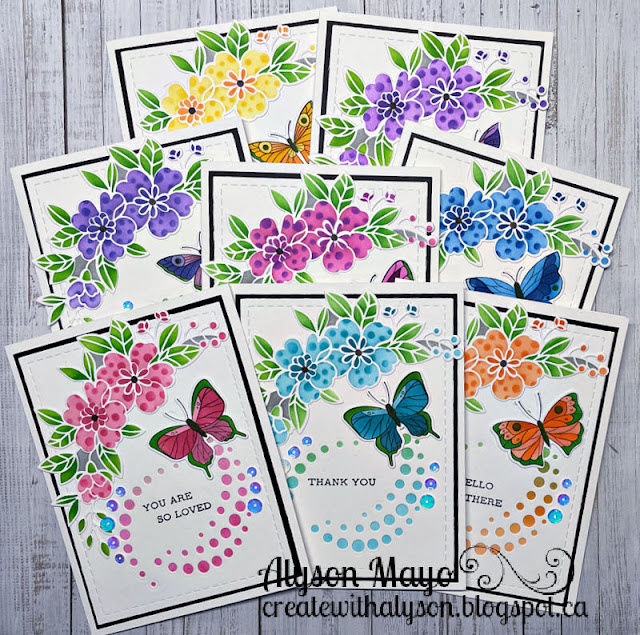
I made sixteen of these cards (two of each colour scheme to make two sets of eight cards each). These were based on a design by Gina from Gina K. Designs and I love it! The floral swag was die cut and stencilled, with a second stencil on top to add dots to the flowers. I inked a second panel using the same colours to go behind the front die cut piece with the holes. I also stamped and stencilled butterflies in eight different colour schemes to match each floral design. The front panel was adhered to the inked background, then to black cardstock and finally to a white card base. The butterfly was placed at the top of the dots and I added some iridescent sequins around the partial dotted die cut circles. Love how these turned out! 


Enjoy,

Alyson 

Sunday, June 11, 2023

Inked Panel Dandelion Card

 I saw an idea like this on Pinterest and wanted to try it myself. 

The inked panel was masked on a die cut rectangle white cardstock piece and I used several Distress Oxide inks to create a sort of rainbow from the bottom up. The masking paper was removed and I heat embossed a silhouette image and sentiment in black. I added some twine around the bottom and tied a bow on the left side. That entire piece was adhered to a black border with craft foam and then to a white card base. No embellishments were added - the card was busy enough! 

Enjoy,

Alyson

Saturday, June 10, 2023

Hand Stitched Card Set

 I have created a few sets of cards recently - the others will be shown in future posts. 

This set was created using a Concord and 9th set called Threads of Kindness. I stencilled the panels first and then die cut them. The die cut puts holes in the images for stitching purposes. I don't mind hand stitching - but making sixteen of these cards took me a LONG time! I took them to various day crops and finally finished the two sets of eight cards each at the last event. I adhered the stitched panels to coordinating cardstock and added some clear sparkles to each card. There are four kindess-related sentiments, each white embossed and added to the front with foam tape. 


Enjoy,

Alyson


Friday, June 9, 2023

DT 140 - You're My Person

 Welcome to Double Trouble Challenge 140! 

The small graphic is below - please visit the Double Trouble Challenge Blog for detailed information. 


Flip flops were a struggle for me - I don't have any stamp or die images. I ended up going to my Cricut to find an image of flip flops. They were cut and I used a striped background paper that had the same colours as the graphic. The flip flops were adhered to a die cut circle and I added a scalloped border and shimmer trim underneath. I found a small flower image that I liked but it was a solid stamp so I stamped it in a very light grey and coloured over it. That was fussy cut and added just under the sentiment. Some coral hearts finished off this card. 

Come and join us at Double Trouble and show us your colour-inspired projects. 

I am also adding my card to the Colour Dare design team line-up as they are our partner challenge. 

You have two weeks to link up your project. 

We can't wait to see what you create! 

Enjoy,

Alyson

MTTCC 62 - Believe Deer


Welcome to My Time to Craft Christmas Challenge 62!

The theme for this challenge is to use deer, elk or moose. 

I have had this set of deer dies for a while but it is SO much work to piece in all the tiny dots... I decided to use that for this challenge. 

The deer images were cut from white and several shades of blue cardstock. Piecing in all the tiny dots took forever but I like the effect. The flowers for the antlers were die cut from silver foil and I added dark blue Liquid Pearls to half of them and light blue Stickles to the other half. The background was die cut in grey and adhered to a blue background. The sentiment was heat embossed in white and placed so it appears to be hanging from the deer's antler. I brushed the centre of the deer's head, the ears and the saddle with a clear shimmer brush to add some shine. 

Come and join us at MTTCC and show us how you interpret this week's challenge. 

You have two weeks to link up your project. 

We can't wait to see what you create!

Enjoy,

Alyson

Thursday, June 8, 2023

Concertina Tag Card

 This was a fun but very time consuming card to create! Much of the time was spent die cutting and inking the flowers and greenery. 

I used old SU papers for the patterned papers. This card has a defined spine to allow for the tags inside and it is held together with a ribbon. The floral images are all from a Spellbinders die set and I die cut them in various shades of teal and green. They were inked and arranged on several panels. The sentiments (two of them) were stamped using two shades of ink and die cut. Inside the card, there are three tags - one is large enough to hold a gift card. The tags could be used to add photos to make this a mini-memory book as well. 


Enjoy, 

Alyson


Wednesday, June 7, 2023

Inside Easel Cards

I saw this type of card on Facebook but didn't record who the artist was... the concept is unique. The front of the card is finished and inside, a piece of acetate forms an easel card so it appears the images are floating. 

I created one in blue and one in pink. The pink one further down was my first attempt as I was trying to figure out the best size and angle for the acetate. 

For each of these cards, I stamped and stencilled the flowers. They were die cut and I added Stickles to the flower base and/or lines. I also stencilled the backgrounds from light to dark and added a layer of glitter gel on top. The sentiments were stamped in an ombre format using two colours of ink. Once everything was dry, I added the flowers to the acetate and adhered that piece behind the glittery background. The sentiment was added with foam tape to the inside bottom panel to hold the acetate in place. On the front, I added a sentiment and some clear gems. I love how these cards turned out! 


Enjoy,

Alyson