Monday, November 15, 2021

Double Trouble 97 and TSOT 533 - Polar Bear Peek-a-Boo Card

Welcome to two challenges - Double Trouble 97 and Try Stampin' on Tuesday 533!

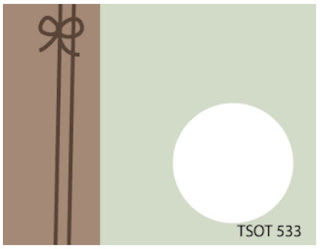
TSOT is pairing with Double Trouble for challenge 97 - providing a sketch. 

Here is the sketch for Try Stampin' on Tuesday

The small graphic for Double Trouble is below - please visit the Double Trouble challenge blog for detailed information. 

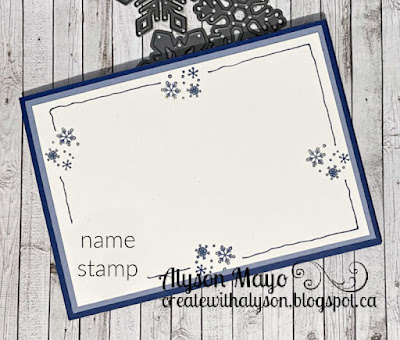
I created a peek-a-boo card for these challenges. This card slides over to reveal a second image in the circle. There is a place to write a message on the back. 

I chose retired CTMH papers for this card as I wanted a winter colour scheme. The polar bear images were stamped and coloured and the same circle die was used to cut out those images as well as the circles in the card. I added some snowflakes and a sentiment on the front and there is also a sentiment stamped on the inside layer. A panel of Sapphire glitter paper was added at the side with two thin strips of ribbon. Some gold gems were added to the centres of the snowflakes and I added a Sapphire glitter outline circle around each of the openings. 


Come and join us at Double Trouble and TSOT and show us how you interpret the challenges above. 

TSOT 533 doesn't open until Tuesday so please be aware of that if you are completing both challenges.

I am also linking up my card with the Creative Creases Challenge (fun fold - anything goes). 
We can't wait to see what you create! 

Products are Close To My Heart unless otherwise indicated:

Paper: Serenity Paper Pack, Cardstock: French Vanilla, Sapphire, Blue Belle, Glitter Paper: Sapphire, Blue Belle, White

Stamps: Polar Bear Holiday

Inks: Sapphire

Accessories: Basic Circle Thin Cuts, Winter Flurries Thin Cuts, Snowflake Thin Cuts, Circle Dies (Nestabilities), Tri-Blend Markers, Sharpie Markers, Gold and White Skinny Ribbon, Clear Shimmer Brush 

Enjoy,

Alyson

Sunday, November 14, 2021

More Slimline Miss Your Smile Cards

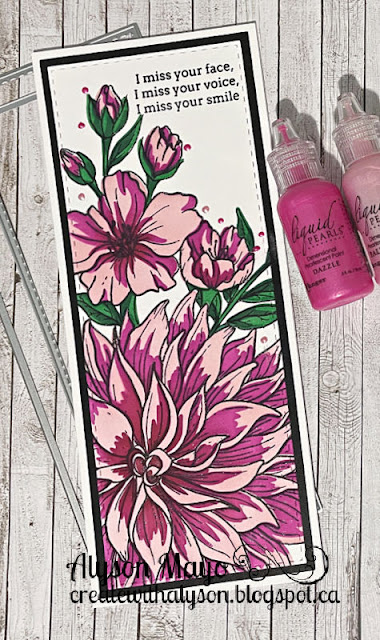
The Miss Your Smile collection from Pink Fresh Studio is one of my favourites - there are layering stencils and a stamp that work together. 

The first card was stamped and I chose to colour the images instead of using the stencils. I really like shades of blue for flowers and I used a mid-range shade of blue. The sentiment was stamped with a similar colour of ink and I die cut the front panel and the card base with stitched dies. Some Silver Liquid Pearls were added around the image and the lines of the flowers were brushed with a clear shimmer brush. 

The second card was created using the layering stencils. The top stencil was inked with darker colour in the centre to add a little more interest. The front panel was die cut with a stitched rectangle die and I added two shades of Liquid Pearls around the image. The lines of the flowers were brushed with a clear shimmer brush. 

Products used are as follows: 

Paper: White Daisy Cardstock, Black Cardstock, Slimline Cards and Envelopes (CTMH)

Stamps: Miss Your Smile plus stencils (Pink Fresh Studio)

Inks: Intense Black (Hero Arts), Bluebird, Black, Pixie, Wild Berry, Sangria, Clover, Evergreen (all CTMH)

Accessories: Stitched Slimline Dies (Pink and Main), Clear Shimmer Brush, Liquid Pearls - Silver, Ballerina, Dazzle, Tri-Blend Markers, Copic Markers, Touch Markers 

Enjoy,

Alyson

Saturday, November 13, 2021

V-Fold Tag Card

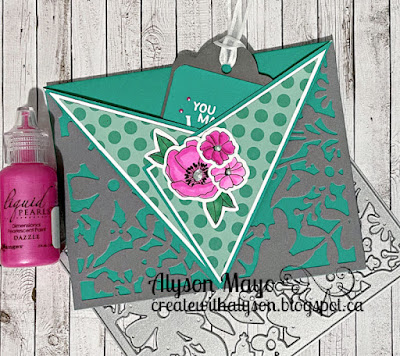
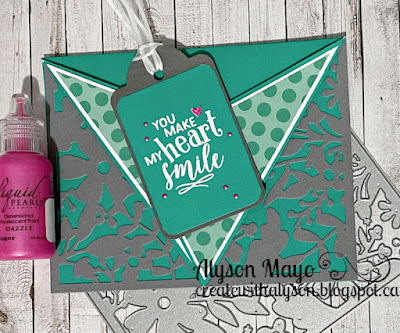
This card folds to a V in the front and has a place to write inside. The special surprise is that it holds a tag in the pocket that is created from the diagonal folds. 

I used Emerald cardstock for the card base and selected some patterned paper with that same green shade. The V section was created by folding the sides into the centre. Triangles from white cardstock and patterned paper were cut to fit the folded sections. I placed some die cut flowers and leaves in the center of the V. 

Inside the card, I placed a die cut card front and I cut out a triangle that was slightly smaller than the folded one on the front. That triangle opening allowed for the placement of a piece of white cardstock on which to write a message. 

The opening at the top is perfect for a small tag. I die cut a tag shape and added a panel of green cardstock. I embossed the sentiment in white and added some liquid pearls in the same colour as the flowers on the front. 

Products used are Close To My Heart unless otherwise indicated:

Paper: Emerald Cardstock, White Daisy Cardstock, Pewter Cardstock, Misc. Patterned Paper

Stamps: Chelsea Gardens stamp set and dies, Smile Big

Inks: Intense Black (Hero Arts), Versamark

Accessories: Floral Background Die, Tags and Tabs Die, Silver Liquid Pearls, Dazzle Liquid Pearls, White Ribbon (misc.), White Embossing Powder, Heat Tool, Markers, Corner Rounder

Enjoy,

Alyson

Friday, November 12, 2021

Double Trouble 97A - Deja-Brew

Welcome to a BONUS challenge in addition to our regular challenges. The Coffee Lover's Blog Hop is happening this week and all the design team members are participating in that. 

The small graphic is below - please visit the Double Trouble Challenge Blog for more information.

I used the current sketch from Try Stampin' on Tuesday for my card. 

I masked and stamped sets of teacups for the focal image on my card. The patterned paper I used dictated the colours for the designs on the teacups. The background was embossed with a basket weave embossing folder and there is a small tag that sides out from under the teacups to reveal the sentiment. There are two photos below that show the tag in and the tag pulled out. 


Come and join us at Double Trouble and show us how you interpret the challenge this week.

I am also linking up my card with the sketch challenge at Try Stampin' on Tuesday where I am a design team member and with the Coffee Lover's Blog Hop. 

Products used are Close To My Heart unless otherwise indicated: 

Paper: Happiness Lives Here Paper Pack, White Daisy Cardstock, Blue Belle Cardstock, Smoothie Cardstock, Neenah Solar White Cardstock 

Stamps: Tea-rrific, Border tabs

Inks: Blue Belle, Intense Black (Hero Arts) 

Accessories: Border Tab Thin Cuts, Enamel Dots, Basket Weave Embossing Folder (SU), Tri-Blend Markers, Copic Markers, Sharpie Markers, Thin Foam Tape, Corner Rounder 

Enjoy,

Alyson


Thursday, November 11, 2021

Merry Christmas Poinsettia Spray

Digital designs have become an enjoyable option for me as I am often awake late into the night... they give me something to do that helps pass the time without using a computer.  

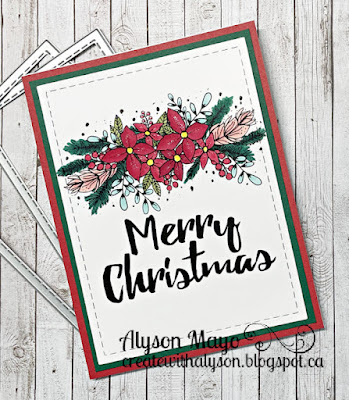
This image is from Angie Blog Digital Designs and I coloured it with a variety of markers. I wanted to keep the poinsettias red but add some other colours around the flowers. 

The coloured piece was adhered to green cardstock and then a red base. I brushed the lines of the flowers with a clear shimmer brush but I didn't add anything extra to the design as I wanted to focus to remain on the spray. 

Products used are as follows: 

Paper: Evergreen Cardstock, Scarlet Cardstock (both CTMH), Neenah Solar White Cardstock 

Stamps: none

Inks: none

Accessories: Digital Image (Angie Blog Digital Designs), Stitched Rectangle Dies (GMD), Tri-Blend Markers, Copic Markers, Touch Markers, Sharpie Markers, Clear Shimmer Brush (CTMH)

Enjoy,

Alyson

Wednesday, November 10, 2021

Acetate Floral Hugs Card

This card idea came from a beautiful card that I found a while ago created by Barbara Tarayao. I had a hard time reading the watermark on her artwork and it was by luck that I was able to find her card a second time. 

This is a top folding card with a piece of acetate joining the two front panels. All the flowers and leaves were die cut, assembled and then adhered to the open section of the card. That took a LONG time to do! The edges were created by using a stitched rectangle die and an embossing die. They were placed on the same angle as the opening. An extra flower was cut and adhered beside the sentiment which was stamped and adhered to a vellum base. 

Products used are as follows:

Paper: Cardstock - White Daisy, Pewter, Glacier, Lagoon, Sundance, Wild Berry, Lemonade, Vellum (all CTMH)

Stamps: none

Inks: none

Accessories: Stitched Rectangle Thin Cuts, Decorative Borders Thin Cuts (both CTMH), Hugs Die (PFS), Etched Crocus Stems Die (SSS), Acetate

Enjoy,

Alyson

Ribbon Pull Card

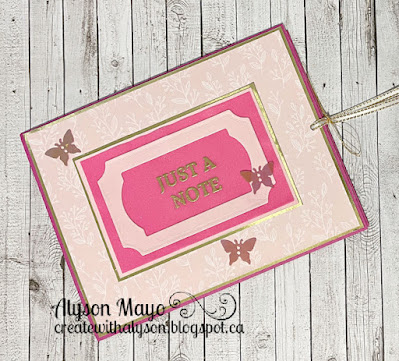
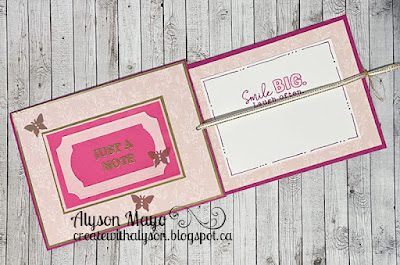
This is a neat card with a little surprise - the tutorial for this card can be found here. There is a link to the YouTube video in the post. 

I chose to do this in a monochromatic colour scheme with pinks. The patterned paper I chose made me decide to focus on a pink colour scheme, combined with gold. 

The frame on the front was die cut from two separate frame dies to create the outline. I used coloured vellum for the front but in hindsight, I would choose regular vellum the next time. The pull out section has the same colours minus the gold. The stamped image on the front was embossed in gold and the one inside was stamped and the open letters were coloured. 

I added a few holographic butterflies on the front to finish off the card. 


Products used are as follows: 

Paper: Cardstock - White Daisy, Wild Berry, Ballerina, Gold Foil, Misc. Patterned Paper (all CTMH), In Colour Shimmer Vellum (SU)

Stamps: Card Captions, Smile Big (CTMH)

Inks: Wild Berry, Versamark

Accessories: Painted Poppy Dies (SU), Gold Embossing Powder, Heat Tool, White and Gold Skinny Ribbon, Holographic Butterfly Sequins, Tri-Blend Markers (all CTMH), Sharpie Markers, Gold Metallic Thread, Small Hole Punch

Enjoy,

Alyson

Tuesday, November 9, 2021

Embossed Vellum Fold-back Card Set

This is a simple fun fold card using coloured vellum. It was inspired by Wendy Lee of Creativelee Yours

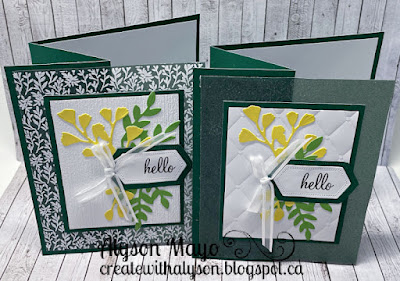
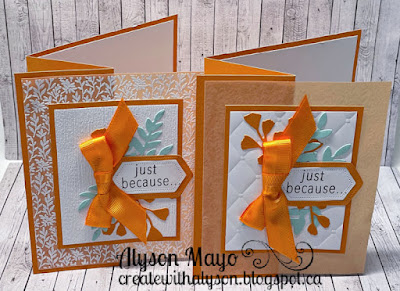
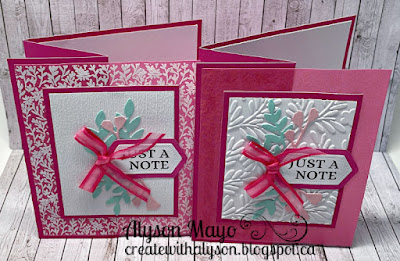
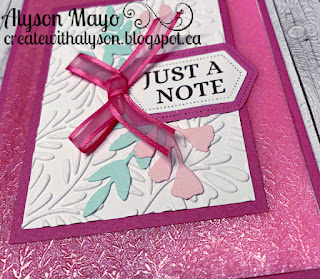
The vellum was attached only to the left side of the folded card, sitting over the right side where a message can be written. I chose to use coloured vellum and I stamped it with a vine stamp and embossed it with either clear or white embossing powder (one of each). I added some die cut leaves to the dry embossed white cardstock (behind the sentiment) and also added some ribbon to finish off the cards. This will make a great set of cards to give a a gift. 


The clear embossed vellum is hard to see but it gives a very neat texture to the vellum piece. 

Products used are as follows: 

Paper: Cardstock: CTMH - White Daisy, Wild Berry, Mint, Ballerina, Pansy, Sage, Pixie, Evergreen, Lemonade, Green Apple, Nectarine, In Colour Shimmer Vellum (SU)

Inks: Black Onyx (Gina K. Designs), Versamark

Stamps: Card Captions, Delicate Vines (Photoplay) 

Accessories: Forever Fern Dies (SU), Stitched Nested Label Dies (SU), Leaf Embossing Folder (Sizzix), Subtle Embossing Folder (SU), Quilted Embossing Folder (SU), Leaves Embossing Folder (Sizzix), All Ribbon (misc.), Clear Embossing Powder, White Embossing Powder, Heat Tool

Enjoy,

Alyson

Monday, November 8, 2021

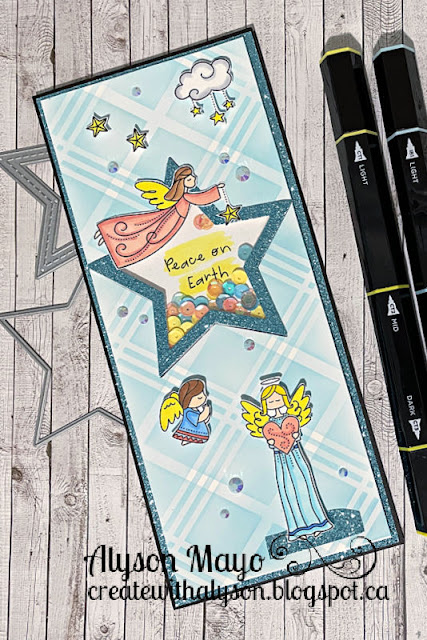
Peace on Earth Slimline Shaker

This beautiful idea for a slimline card was inspired by a friend of mine, Allison Bunt. She is a CTMH Maker in Australia. 

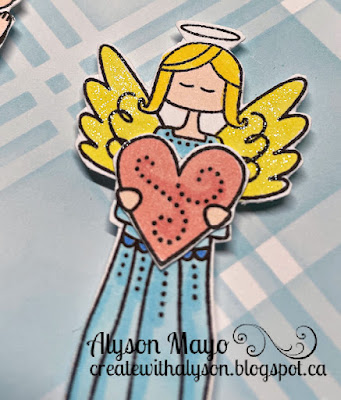
I started by blending a plaid background using two layering stencils. The images were all stamped, coloured and fussy cut. I die cut a star shaker from the center of the card and stamped the sentiment inside the shaker component. The sentiment was brushed with a yellow shimmer brush and coordinating sequins were added inside the star. The images were all adhered with foam tape and the wings of the angels were brushed with a clear shimmer brush. The last step was to add some clear gems around the card.

This close up shows the shimmer on the angel's wings. 

Products used are as follows: 

Paper: White Daisy Cardstock, Black Cardstock, Capri Glitter Paper (all CTMH) 

Stamps: Peace and Love (CTMH)

Inks: Tumbled Glass DO Ink, Intense Black (Hero Arts) 

Accessories: Star Shaker Die, Star Acetate and Foam, Lemonade Shimmer Brush, Clear Shimmer Brush (all CTMH), Slimline Diamond Plaid Stencil, Glacier Gems (both PFS), Tri-Blend Markers, Touch Markers, Misc. Sequins, Foam Tape 

Enjoy,

Alyson

AH 446 - Let's Celebrate!

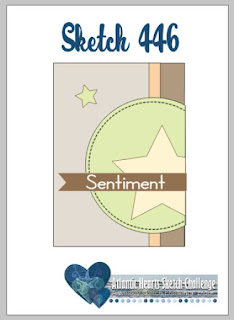
Welcome to Atlantic Hearts Sketch Challenge 446!

The sketch this week is very detailed - I found it easiest to use the ideas that were in the sketch itself. 

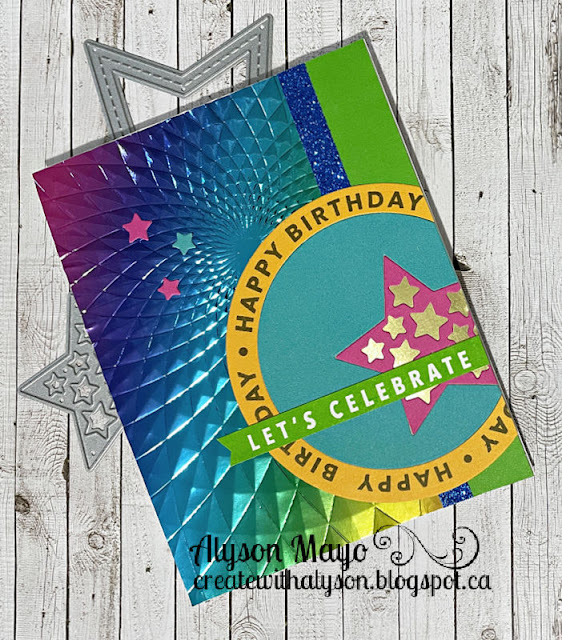
The background for my card is a piece of holographic cardstock that was embossed with a 3-D embossing folder. I wanted that to remain the focus so I used colours that were found within the holographic paper. I die cut a circle and stamped a birthday sentiment in black. The inside of that circle was cut in a different colour and I cut out a star within the inside circle. The star itself was die cut from another cardstock colour and backed with gold foil. The star fit within the cut section inside the circle. I stamped a sentiment in green and placed it across the other elements. A few stars from the die cut were placed in the top corner. 

Come and join us at Atlantic Hearts and show us how you interpret the sketch shown above. 

You have until Sunday evening to link up your project. 

We can't wait to see what you create! 

Products used are Close To My Heart unless otherwise indicated: 

Paper: Holographic Cardstock (SSS), Cardstock - White Daisy, Sundance, Lagoon, Willow, Wild Berry, Gold Foil, Neenah Solar White Cardstock 

Stamps: One Year Older 

Inks: Willow, Premium Black Ink (Gina K. Designs) 

Accessories: Shaker Window Thin Cut, Star Shaker Thin Cut, Blue Glitter Tape (Misc.), Triangle Burst Embossing Folder (SSS)

Enjoy,

Alyson