Thursday, August 4, 2022

Ornate Circle Christmas Cards

 This card design was inspired by one I found on Facebook in a group for Pinkfresh Studio products. 

The background of each card was embossed with a subtle design. The flowers were stamped, stencilled and die cut, along with an ornate circle. I also die cut a stitched lattice background for the centre of each circle. The floral image was arranged around the circle and the sentiment was added just under the image. On the silver card, I brushed the flowers with a clear shimmer brush and added white sparkly dots. On the gold card, the flowers were brushed with a gold shimmer brush and red enamel dots were added. 


Enjoy,

Alyson

Wednesday, August 3, 2022

AH 484 - Celebrate Stars Card


Welcome to Atlantic Hearts Sketch Challenge 484! 

I chose to rotate the sketch to make a vertical card instead of a horizontal card. 

The background is a reverse hot foil image - I used rainbow foil and the results came out perfectly! Reverse foiling can be tricky... this one was a pleasant surprise. I added a top and bottom border as shown on the sketch and added an additional piece of turquoise cardstock above the bottom border to simulate the open line on the sketch. The sentiment was die cut along with three stars. I layered the stars using three colours of glitter paper and adhered them around the sentiment. Some gems in the same colours as the stars were added (you can see this better in the close up photo). I also brushed the sentiment with a clear shimmer brush. The card front was adhered to a top folding card base with craft foam. 


Come and join us at Atlantic Hearts and show us how you interpret the sketch shown above. 

You have until Sunday evening to link up your project. 

We can’t wait to se what you create! 

Enjoy,

Alyson

Tuesday, August 2, 2022

TSOT 567 - Teal Birthday Silhouette

 Welcome to Try Stampin' on Tuesday Challenge 567!

The optional theme this week (in addition to the sketch) is plants. 

I created a square grid background on my Cricut and cut it from Gina K Designs' Masking Magic. Once that piece was placed over the card front, I blended three colours of Distress Oxide ink, removed the Masking Magic and embossed both the image and the sentiment in black. The card front was adhered to a black base with craft foam and I added some clear dew drops around the image. 

Come and join us at TSOT and show us how you interpret the sketch shown above. 

You have two weeks to link up your project. 

We can't wait to see what you create! 

Enjoy,

Alyson

Monday, August 1, 2022

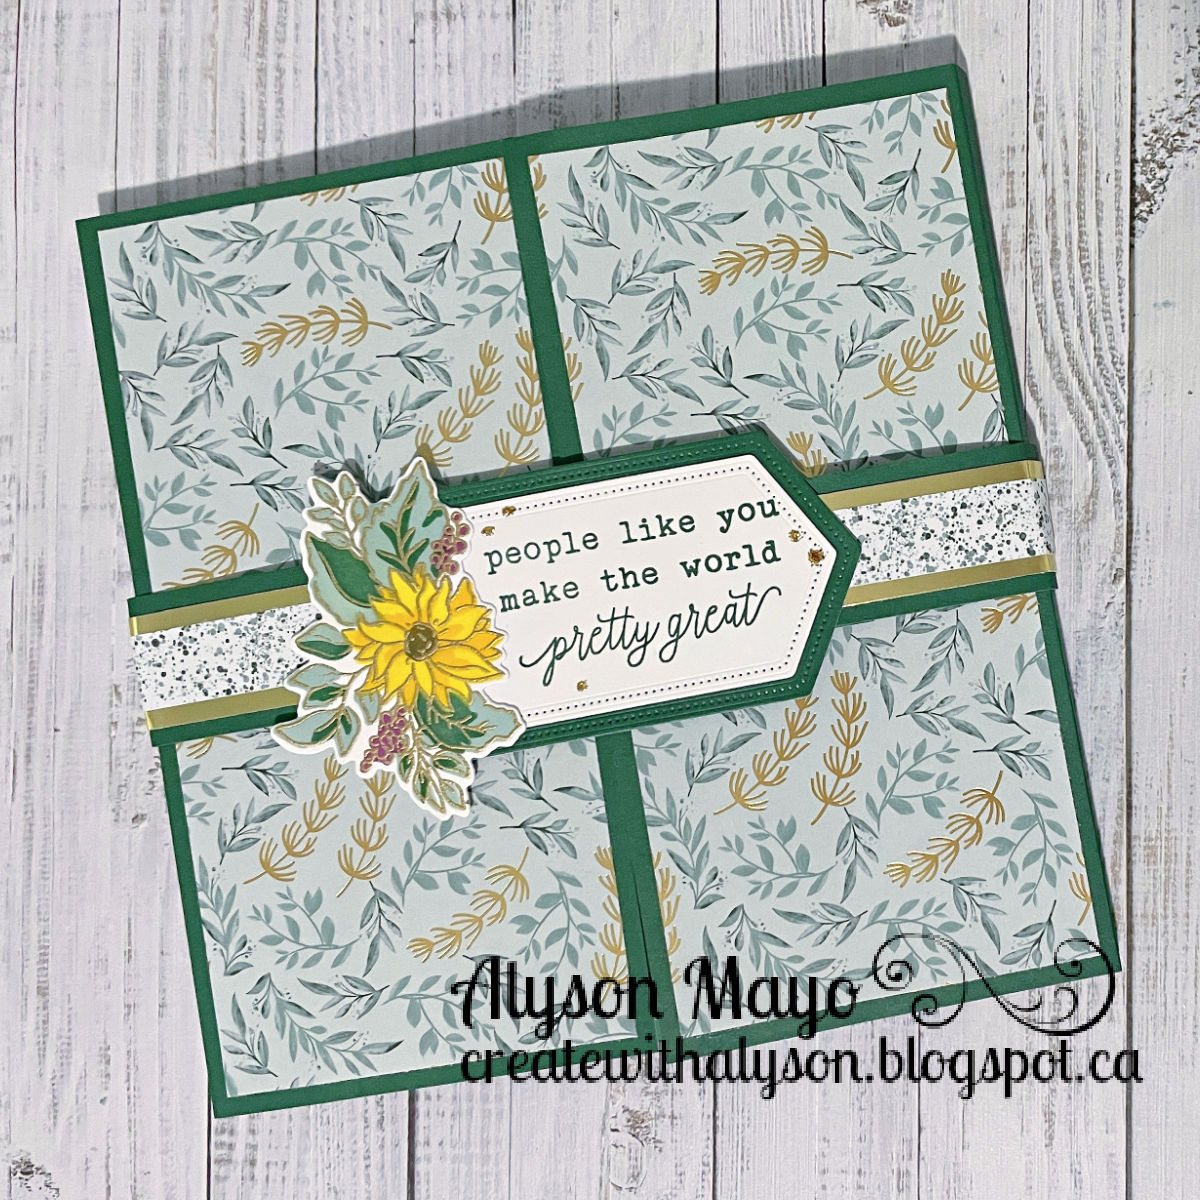
DT 117 - People Like You... Fancy Fold Card

 Welcome to Double Trouble Challenge 117! 

This week, it's all about fancy folds (fun folds) and layers. The small graphic is below - please visit the Double Trouble Challenge Blog for more information. 

I chose a fun fold card that is one of my all time favourites - it is called a Cascading Gatefold Card. Each card (a cascading card and a gatefold card) are fun folds on their own but this card combines the two ideas. 

These papers were chosen to work with a set of sunflowers. I stamped and gold embossed the sunflower outline images and then stencilled in the colours. Those pieces were die cut. The papers were all cut to size and some of the inside pieces were dry embossed. The sentiments were stamped and they were die cut along with a border for each. The sunflower images were adhered to the inside sections of the cascade and I also added a sunflower image to the front sentiment. There is a page to write a message on the back panel. A belly band is needed to hold the card together. Needless to say, there are tons of layers on this card - when folded flat, I counted 23 layers on one side - that's a LOT! In order to keep it as flat as possible, I added only gold Stickles to the two sentiments. 


The second photo shows the card open with the belly band at the left. 


Come and join us at Double Trouble and show us how you interpret this week's challenge. 

You have two weeks to link up your project. 

I am also linking up my card with the Creative Creases Challenge (fun fold card). 

I run a private group on Facebook where I teach live twice per week. All cards have direct links to both a file and the video and videos can be accessed on replay. I do many fancy fold cards and present lots of ideas. If you wish to join this group, there should be a link below. If you can't access the link, please search for Create with Alyson - Membership and request to join. I would love to see you there!

https://www.facebook.com/groups/723887278295009 

We can’t wait to see what you create! 

Enjoy,

Alyson

Sunday, July 31, 2022

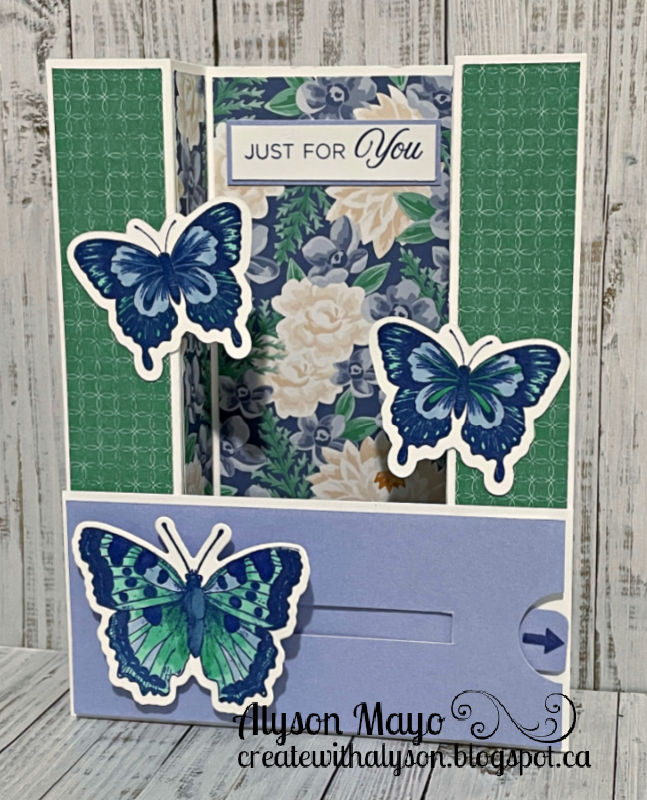
Gatefold Card with Slider

 I saw this cool card on a blogger website and figured out how to recreate the same idea - there is a slider component along the bottom. 

The base card is a gatefold and it has been sized to fold flat for a standard A2 card. I chose old floral paper that I had in my stash and used both the front and back patterns. The slider on the front has a butterfly attached to it and that can slide back and forth using the tab on the right side. I only added a simple sentiment as I wanted this card to be able to fold flat for mailing. There is a panel on the back to write a message. 


Enjoy,

Alyson

Saturday, July 30, 2022

Rainbow Hello Tulips

 This pretty card was inspired by one made for a Simon Says Stamp product release. 

A panel of white cardstock was inked wth three Distress Oxide inks and adhered to a white card base. The top and bottom panels were die cut with stitched border dies and then cut to create a card front. The tulips and sentiment were die cut and added to the front. The smaller sentiment was stamped in black and added to a black cardstock strip before being placed on the card. Some clear gems were placed around the flowers and the sentiment. 

Enjoy,

Alyson

Friday, July 29, 2022

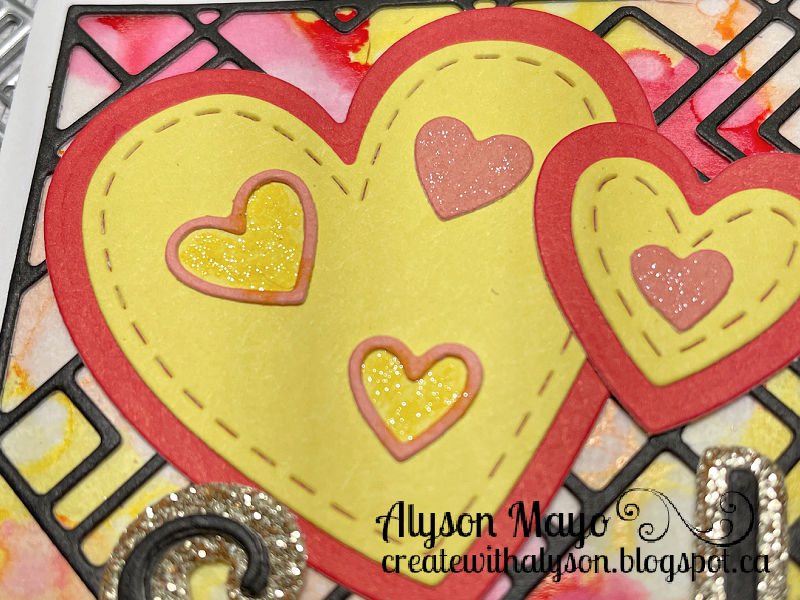
CD 507 - Sending Smiles with Hearts

 Welcome to Colour Dare Challenge 507!

This week, it is a triple play challenge - you must use all three colours. Black, white and gold are free to use as desired.

I created a background on vellum using three alcohol markers in the designated colours. Rubbing alcohol was splattered on the background to make the colours move around. I die cut a black open background piece and adhered it on top of the vellum and then that entire piece was adhered to a white card base. The hearts were die cut with red base and a yellow stitched front. Tiny hearts were die cut in Papaya and added to the centres of the larger hearts. The sentiments were die cut from gold glitter paper and black cardstock, stacked and added to the front of the card. I brushed the centres of the yellow hearts with a Lemonade shimmer brush and used a clear shimmer brush for the tiny hearts. 


Come and join us at Colour Dare and show us how you interpret this week's challenge. 

You have two weeks to link up your project. 

We can’t wait to see what you create! 

Enjoy,

Alyson


Thursday, July 28, 2022

Leaf Stencilled Hugs

 I love rainbow colour schemes so I decided to use a two-part leaf stencil to create this card. 

The first leaf layer was inked using seven Distress Oxide inks. I used the same number of inks for the detail on the leaves in seven darker shades of the original colours. I added two ribbon cross pieces before adhering the card front to a black base with craft foam. The sentiment was die cut and added to the bottom left and I placed some gold glitter gems around the leaves. 

Enjoy,

Alyson

Wednesday, July 27, 2022

Make the Cards 60 - Bold Blooms on Black

 Welcome to Make the Cards Challenge #60!

This week, it is a technique challenge - use a black cardstock background. 

Black can be overwhelming so I decided to offset it with very bold colours. I chose bright pink and green shades.

The black cardstock was embossed with a floral embossing folder. I die cut all the floral and greenery pieces and inked many of the pink ones for additional interest. They were all assembled and adhered to the embossed base. I stamped a sentiment in the same shade of bold pink and added a strip of coordinating glitter paper underneath. The last step was to brush the lines of the flowers with a clear shimmer brush and add Stickles to the centres of the flowers. 


Come and join us at Make the Cards Challenge and show us how you interpret this week's challenge. 

You have two weeks to link up your project. 

We can't wait to see what you create!

Enjoy,

Alyson

Tuesday, July 26, 2022

Triple Diamond Card - Version 2

 I posted one of these cards a couple of weeks ago - it is not a difficult card to make and this time, I didn't use stamped image but ephemera for the images. 

The paper is all from a recent Gina K. Designs release and the patterns are gorgeous. I used several patterns along with dark grey cardstock. The sentiment was stamped on the right side of the first diamond and the images were arranged around that. The only embellishment added was Twinkle Stickles in the centres of the flowers. 


Enjoy,

Alyson