Monday, June 29, 2020

Double Trouble #60 - Something, Anything and Everything

It's the 5th Monday in the month and that means that there is a one week challenge at Double Trouble - a something, anything, everything challenge. 


If you are so inclined, one of the twists is to use red, white and blue on your project as it is Independence Day in the US. I'm not from the US but still managed to complete this task :) 

We also encourage you to link up up one or more of our previous challenge partners - the entire list with links can be found on the Double Trouble website

I chose to create a birthday card that is appropriate for a masculine birthday. It seems like whenever I need one of these cards, I always have to create it at the last minute. 

I began by creating my blue background by taping down a piece of watercolour paper and painting it blue. I then dropped small droplets of rubbing alcohol onto the painted surface. Just before it was dry, I used a paper towel to wipe across the surface, making the circles darker and the background lighter. If I had left it to dry on its own, the result would have been the opposite effect with the circles appearing lighter in colour.

My card design is based on a sketch from Make It From Your Heart - Vol. 4. I rotated the sketch 90 degrees and added my side piece and some banners. The sentiment was stamped on stitched circles and adhered to regular circles of cardstock. The word birthday was stamped and cut as a banner along with a piece of cardstock cut the same size - they were mounted slightly offset. I added 3 acrylic hearts and drew a border around the edge of the card to to finish it. 


Come and join us at Double Trouble and show us your projects. 
Complete details can be found on the website. 
This challenge ends on Sunday evening - remember, it is only one week long! 
Check out the partner challenges as well and see if you can link up your project with any of those challenges. 

I am linking up my project with Crafting Happiness as their theme is Anything Goes. 


Products used are Close To My Heart unless otherwise indicated: 

Paper: Watercolour Paper, White Daisy Cardstock, Bluebird Cardstock, I Heart Us Paper Pack, More Magical Paper Pack, Tis the Season Paper Pack, Neenah Solar White Cardstock
Stamps: Birthday Joy
Inks: Bluebird
Accessories: Watercolour Paint, Paintbrushes, Rubbing Alcohol (not CTMH), White Shimmer Trim, Acrylic Hearts, Blue Sharpie Marker, Stitched Circle Thin Cuts, Basic Circle Thin Cuts

Enjoy,
Alyson

H2H - So Much to Love...

Welcome to this week's Heart 2 Heart challenge!

Since it is right at the end of June, this challenge is being carried over into July so you have all month to link up your projects. 

The theme this week is Family Time.


I created a card that is perfect to show the loved ones in my life how I feel about them. 

I started with a piece of striped paper and a piece of Sapphire cardstock. The right side of the card front is embossed using the Stitched Circles embossing folder. I stamped and die cut several flowers and leaves and coloured a few of the images as needed. They were placed in a cluster and some were adhered using thin foam tape and regular foam tape. The ribbons were adhered under the flowers and I added some gold Stickles to the tiny stamped sections inside each flower centre. The sentiment was stamped and mounted on cardstock and some gold gems were added to finish off the card. 


Come and join us at Heart 2 Heart and show us your projects related to family. 
You have until the end of July to link up your project. 
We can’t wait see what you create! 

Products used are Close To My Heart unless otherwise indicated: 

Paper: Stitched Together Paper Pack, French Vanilla Cardstock, Sapphire Cardstock, Neenah Solar White Cardstock 
Stamps: Beautiful Day, Artistic Impressions (SU)
Inks: Sapphire, Lagoon, Sweet Leaf, Peach, Lemonade
Accessories: Beautiful Day Thin Cuts, Goldenrod Stickles, Gold Glitter Gems, White and Gold Skinny Ribbon, Stitched Circles Embossing Folder, Tri-Blend Marker, Foam Tape, Thin Foam Tape

Enjoy, 
Alyson

Sunday, June 28, 2020

Child's Mini Album - Teacher Thank You!

A few weeks ago, a good friend asked if I had any ideas for her 5 year old daughter regarding a kindergarten teacher's gift. We looked at some options and decided to do a mini album (there were two teachers so two albums were required). 

The design was very simple - I used my Cricut to cut the same shape in rainbow colours as the class had learned about rainbows during the year. A piece of white cardstock was placed in the middle of each coloured cardstock piece, large enough on which a 5 year old could print. The pieces were attached with a binder ring and some ribbon was added on the ring for decoration. The front of each album was created by layering strips of the same cardstock colours used inside the albums on a piece of white cardstock and then running letter dies on that multi-coloured sheet through my Big Shot. 

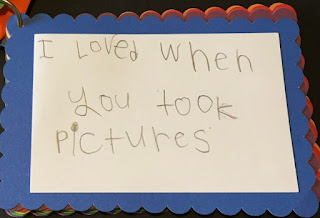
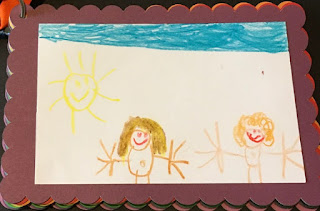
I asked my friend if she would photograph the finished album pages for me before they were delivered to the teachers - and what a treat it was to receive these photos! 

Here is one of the albums - each page included. I just love the messages and the drawings! The second album is very similar to the first. 


Products used are Close To My Heart unless otherwise indicated: 

Paper: White Daisy Cardstock, Black Cardstock, Lemonade Cardstock, Nectarine Cardstock, Candy Apple Cardstock, Green Apple Cardstock, Bluebird Cardstock, Thistle Cardstock, Eggplant Cardstock
Stamps: none
Ink Pads: none
Accessories: Art Philosophy Cricut Cartridge, Artiste Cricut Cartridge, Basic Hearts Thin Cuts, Stitched Hearts Thin Cuts, Block Alphabet Thin Cuts, Stitched Rectangle Thin Cuts, Red Shimmer Trim, Binder Ring (not CTMH), Various Ribbon (not CTMH)

Enjoy,
Alyson

Friday, June 26, 2020

Colour Dare 400 - Friendship Flower

Welcome to Colour Dare Challenge #400! 

This is a milestone for Colour Dare so several prizes are being given away for this challenge. Be sure to enter before the deadline! 


This week, we have three colours - purple, green and blue - and you can also use black, white and grey. 
----------
I went back to see when I first entered the Colour Dare challenge - it was Jan 10, 2016 and challenge #175! Here is a picture of the colour scheme and my entry...


Wow - that seems like ages ago now! 
----------
On to this week's challenge...

I have wanted to use this large protea flower for ages and haven't had the chance until now. I stamped the image and then die cut the flower from sticker paper. That was placed over the stamped image and I used three blue distress inks to create the background by sponging around the mask. Once the mask was removed, I coloured the flower and leaves. I like the white border around the image - I wasn't sure if that would be the case.

The sentiment was stamped on patterned vellum using Staz-On ink. That was adhered around the bottom of the card and the frame was placed on top. I added some Lavender Stickles to the centre of the flower and I brushed the shaded sections with the Clear Shimmer Brush. A few coordinating glitter gems were added. 

My camera is not picking up the colours in the full card photo very well. The close up photo colours are much closer to the actual colours on the card. 


Come and join us at Colour Dare and show us how you use the colour palette shown above.
You have two weeks to link up your project.
We can't wait to see what you create! 

Product used are Close To My Heart unless otherwise indicated: 

Paper: White Daisy Cardstock, Willow Cardstock, Leaf Patterned Vellum, Neenah Solar White Cardstock 
Stamps: Blossoming Friendship
Inks: Intense Black, Black Staz-On, Distress Inks - not CTMH (Tumbled Glass, Mermaid Lagoon, Chipped Sapphire)
Accessories: Blossoming Friendship Thin Cuts, Stitched Rectangle Thin Cuts, Tri-Blend Markers, Little Dreamer Glitter Gems, Clear Shimmer Brush, Lavender Stickles (not CTMH)

Enjoy, 
Alyson

Tuesday, June 23, 2020

TSOT 463 - Amazing Swan

Welcome to Try Stampin' on Tuesday Challenge 463!

The sketch is below and the optional theme (in addition to the sketch) is Make a Splash. 


I stayed very true to the sketch this time - I pulled out an old stamp set called Thankful for You. It has  a couple of swans and some related images so that allowed me to add in the optional theme of Make a Splash. 

The card background was random stamped using three images from the stamp set. I die cut a frame outline from Sapphire cardstock and filled in the triangles with white cardstock. That was placed on a Canary background. The swan, bullrushes, lily pad and flower were stamped and die cut and the waves were stamped directly on the background. Once the scene was together, I built the rest of my card based on the size of that piece. The sentiment was stamped on the same background paper and I added a dotted ribbon underneath. A few enamel dots were added and this card was finished! 


Come and join us at TSOT and show us how you interpret the sketch shown above. 
You have two weeks to link up your project. 
We can’t wait to see what you create! 

Products used are Close To My Heart unless otherwise indicated: 

Paper: Happy Times Paper Pack, Blue Skies Paper Pack, White Daisy Cardstock, Sapphire Cardstock, Neenah Solar White Cardstock
Stamps: Thankful for You, Word Up (Reverse Confetti)
Inks: Pebble, Toffee, Fern, Canary, Sapphire
Accessories: Thankful For You Thin Cuts, Stylish Frame Trio Dies (Memory Box), Polka Dot Tulle Ribbon (SU), Seas the Day Enamel Dots, Corner Rounder, Blue Sharpie Marker

Enjoy,
Alyson


Monday, June 22, 2020

AH 374 - Criss Cross Card


Welcome to Atlantic Hearts Sketch Challenge #374!


I stayed true to the sketch except that the side of my triangles come to the top of my card since I decided to create a standard cross cross card for this challenge. 

I used papers and colours from the Stitched Together paper pack. The large floral pattern is 
one that I love. 

An old stamp set, A Budding Friendship, has recently been brought back by Close To My Heart for the Brushed campaign. I still have my original one as I really like the sentiments and flowers in that set. I used the small flower and I chose to stamp just the outline instead of stamping the inside (two step option) because I wanted to colour the inside of each flower. I heat embossed them after stamping with Sapphire pigment ink. The leaves were heat embossed after stamping with Fern pigment ink. The card came together quickly as a criss cross card is easy to make. I decorated both the outside and the inside with the stamped flowers and leaves. A glitter gem was placed in the centre of the flowers that show. A background stamp was used on the insert, just to highlight the paper a bit. A small piece of red ribbon was attached at the top to allow the insert to be easily slid out of the card. 


Come and join us at Atlantic Hearts and show us how you interpret the sketch shown above. 
You have two weeks to link up your project. 
We can’t wait to see what you create! 

Products used are Close To My Heart unless otherwise indicated:

Paper: Stitched Together Paper Pack, Lemonade Cardstock, Glacier Cardstock, Sapphire Cardstock, French Vanilla Cardstock
Stamps: Handmade Essentials (scrapbook.com), A Budding Friendship, Strokes of an Artist
Inks: Sapphire Pigment Ink, Fern Pigment Ink, Sapphire 
Accessories: Tri-Blend Markers, Clear Embossing Powder, Heat Tool, Foam Tape, Thin Foam Tape, Blue Enamel and Glitter Gems, Cranberry Grosgrain Ribbon

Enjoy,
Alyson

Saturday, June 20, 2020

Brushed Blog Hop

Welcome to the Brushed Blog Hop!


The Brushed paper pack is a returning paper pack that was retired a few years ago. It has a beautiful mix of colours and patterns.

You should have arrived here from Michelle Loncar's blog.
If you get lost, a complete list of all participants can be found on Melinda Everitt's blog.

My order with the revised paper pack didn't arrive in time so I had to use the older version. The colours in the new pack have been revamped to reflect the current CTMH colours.

I went back in time for a sketch as well - to Make It From Your Heart - Vol. 1. It worked for what I had in mind.

My first step was to stamp the largest flower in Versamark and emboss it in white on Candy Apple cardstock. That piece was used as the background for my card. It was pretty bold when it was done so I placed a piece of vellum over the piece to tone it down. Vellum can be very difficult to adhere if there aren't places to hide the adhesive. In this case, I didn't want the edges lifting so I cut the vellum about 1" larger than the cardstock and scored it to wrap it around the back of the card. That way, no adhesive on the front was needed. A photo of that step is shown below.


I cut the patterned papers and mounted each of them on black cardstock. The scalloped border was cut using Julep cardstock and my Cricut (Art Philosophy) and attached under the long piece. I stamped the flower and some leaves and coloured them with the Tri-Blend markers. I added some shimmer by just going over the lines on the flower petals. Bitty Sparkles were coloured and attached in the centre of the flower. That floral piece is mounted using craft foam. I cut a stitched bracket and stamped the sentiment on the top, attaching the remainder of the bracket under the white cardstock. A striped bow was added along with some black enamel dots.


I went through some old artwork and found this display tray that I created featuring my dog. I used the Brushed paper pack along with several other stamp sets and embellishments from the time Brushed was first available. 

I hope you enjoyed my projects.
The next blog to visit on this hop is Jen Rubio's blog.
I'm sure she has something amazing to share with you!

Products used are Close To My Heart unless otherwise indicated (does not include display tray products): 

Paper: Brushed Paper Pack, White Daisy Cardstock, Black Cardstock, Candy Apple Cardstock, Julep Cardstock, Vellum
Stamps: You Make Me Happy, A Budding Friendship
Inks: Intense Black, Black, Versamark
Accessories: Art Philosophy Cricut Cartridge, Stitched Bracket Thin Cuts, Black and White Dots, Bitty Sparkles, Craft Foam (not CTMH), Tri-Blend Markers, Striped Ribbon Bows, White Embossing Powder, Heat Tool, Clear Shimmer Brush

Enjoy,
Alyson

Friday, June 19, 2020

Colour Dare 399 - All About Yellow

Welcome to this week's Colour Dare challenge! 


For Colour Dare 399, it's all about shades of yellow. Yellow plus any neutral shades may be used.

I pulled out an old rubber stamp from SU called Blended Bloom. I love this image and I wanted a large, simple flower for my card. 

I started by stamping the flower 3 times on black cardstock using Versamark ink. It was then embossed with white embossing powder. I cut the card front small enough that I could place a piece of Lemonade (Yellow) cardstock behind that along with another layer of black. The sentiment was stamped the same way and the oval and oval scalloped border were cut using Nestabilites dies. I didn't add anything else to this card - the intention is for it to grab your attention with just the colours. 


Come and join us at Colour Dare and show us how you interpret the colour scheme shown above. 
You have two weeks to link up your project. 
We can’t wait to see what you create! 

Products used are Close To My Heart unless otherwise indicated: 

Paper: Lemonade Cardstock, Black Cardstock, Neenah Solar White Cardstock 
Stamps: Blended Bloom (SU), Wreath Builder (Gina K Designs) 
Inks: Versamark
Accessories: White Embossing Powder, Heat Tool, Nestabilities Dies (oval and circle)

Enjoy, 
Alyson


Tuesday, June 16, 2020

Explosion Sunflower Card

I found a terrific tutorial to create an explosion card - there are lost of projects using that name but that is how Nicole Wilson titled her card tutorial. 
A link to that tutorial can be found here on Nicole's blog

I used the Sunflower Sympathy stamp set and stamped and coloured 8 sunflowers. That took a LONG time! The flowers along with a few leaves were die cut and then the work began on the interior. The sunflowers had to be adhered together in a very specific way and I am the first one to say that although I followed the directions exactly, I had problems. Once the flowers are adhered, they are very tight to open. I had to do a mock up using printer paper (as suggested by Nicole) to see just how tightly they fit together. I was able to separate most of mine as I didn't want to have to stamp, colour and cut any more of them. I adhered them together a second time. They are tight inside and that is expected - the card opens only about half way to accommodate the flowers. 

I used some of the papers from the new Timber paper pack (available in July) for the inside lining and the front of my card. An extra flower was stamped, coloured and die cut, along with some leaves. I brushed the petals with the Gold Shimmer Brush and added a few sequins. I added some gold Stickles inside each of the sequins and around the centre of the flower. The last step was to stamp a sentiment inside and add a piece of cardstock to the back for a spot to write a message. 


This was fun to create but very time consuming with the extraordinary amount of colouring that had to be done. It's such a neat card when it is finished! 

Products used are all Close To My Heart: 

Paper: Timber Paper Pack, White Daisy Cardstock, Espresso Cardstock, Saffron Cardstock, Toffee Cardstock
Stamps: For My Beautiful Friend, Sunflower Sympathy
Inks: Intense Black, Toffee, Espresso
Accessories: Sunflower Sympathy Thin Cuts, Basic Banners Thin Cuts, Tri-Blend Markers, No Worries Sequins, Goldenrod Stickles, Gold Shimmer Brush 

Enjoy,
Alyson

Monday, June 15, 2020

June Technique Blog Hop - Let It Shimmer

Welcome to the June Technique Blog Hop!


This month, it's all about shimmer! Who doesn't like shimmer on a project... it adds that little extra touch to anything.

You should have arrived here from Haley Dyer's blog

I actually ended up creating two cards for this blog hop - I wasn't satisfied with the first one and decided to do a second one. The original card is below this write-up.

This card is a flip front card - the top panel flips up to reveal the full image and another sentiment inside. 
I used the Mix-In Paper Pack because I wanted Peach and Mint as my focal colours. The flowers were stamped with Intense Black ink and coloured using the Tri-Blend markers. I have learned from past mistakes not to add the shimmer until the very end as it gets on everything! 
I originally splattered both sentiment pieces with 2 shimmer brushes but I didn't like the way they looked so I stamped them again. They are mounted back to back and placed under a mat on the reverse side. 
A bow was added along with some gold glitter gems - and last but not least, the Gold Shimmer Brush was used to go over the flowers. 


This shows the card entirely open.


The inside...


And the shimmer details...


This is my original card... 

The sentiment section was prepared as a shaker with the confetti stars added inside. The flowers were stamped with Intense Black Ink. The leaves were coloured using a Tri-Blend marker and I used the Raspberry re-inker along with the Clear Shimmer Brush to colour the leaves. It is very difficult to get shades between light and dark with the shimmer brush and re-inker so I allowed the brush to release some shimmer and mixed a tiny bit of re-inker in with that to create a lighter shade of pink. On many of the little dots on the flowers, I added Silver Stickles. 

The entire card was mounted on a base and I added a stitched frame around the outside to match the shaker frame. 


The next blog on this hop is Maz Wood's blog.
I am sure she has something awesome to share with you! 

Products used are all Close To My Heart:

Paper: Mix-In Paper Pack, Peach Cardstock, Mint Cardstock, White Daisy Cardstock, Raspberry Cardstock 
Stamps: Say it in Style, A Million Little Things, Be Kind, Sweet Hummingbird 
Inks: Intense Black, Smoothie, Black, Raspberry Re-inker 
Accessories: Stitched Square Thin Cuts, Stitched Rectangle Thin Cuts, Foam Tape, Gold Shimmer Brush, Gold Skinny Ribbon, Gold Glitter Gems, Clear Shimmer Brush, Tri-Blend Markers, Confetti Stars, Silver Stickles 

Enjoy,
Alyson

Double Trouble 59 - Masculine Birthday Shaker

Welcome to Double Trouble Challenge #59! 

This week, the challenge is to use a 3-2-1 formula (this is the minimum - you CAN use more):
  • 3 colours (I used Sapphire, Peacock, Sage and White - there is a bit of Charcoal in the arrow pattern as well)
  • 2 embellishments (sequins and embellishing thread)
  • 1 sentiment (stamped) - mine is Happy Birthday from a stamp set from 2015


If the stamp is more than one year old AND you have used the sketch shown above, you can also link up with the Retro Rubber Challenge as their requirement is to meet both of these stipulations. 

I chose to use the Aurora paper pack to create a masculine birthday card. My first attempt at this was a compete disaster... I wanted to create a shaker within a shaker but was having some Cricut issues so I cut the triangle with my trimmer. To create a shaker within a shaker, the inside shaker shape must also be cut from acetate from the front of the card. My measurements were just slightly off and I ended up with tiny little sequins (not the ones I used here) all over the place. Consequently, I ended up redoing the card but without the larger shaker component. 

The shaker is the triangle form shown on the sketch. There are 3 colours of sequins (coordinating with the papers) along with some die cut stars inside. I added a few of those loose sequins around the shaker and also added some silver embellishing thread (that makes 2 embellishments). 


Come and join us at Double Trouble and show us how you interpret the elements 
required for this challenge.
You can also link up (as I am) with the Retro Rubber Challenge if their requirements are met. 
You have two weeks to link up your project. 
We can’t wait to see what you create! 

Products used are Close To My Heart unless otherwise indicated: 

Paper: Aurora Paper Pack, Paper Fundamentals (Sapphire), White Daisy Cardstock, Sage Cardstock, Sapphire Cardstock, Neenah Solar White Cardstock 
Stamps: Framed 
Inks: Peacock
Accessories: Shaker Window Thin Cuts, Stitched Rectangle Thin Cuts, Silver Embellishing Thread, Loose Sequins (misc.), Foam Tape

Enjoy
Alyson 


Heart 2 Heart - Adventure Abounds

Welcome to this week's Heart 2 Heart challenge! 


This week, it's all about adventure - and that can take many different forms. It could be something outdoors like water sports, athletic activities or something new. These days, an adventure may very well be one at home since we aren't supposed to be out and about (at least at the time of writing this post). Adventure greatly depends on the individual. 

I chose to use a Cricut image of paddles as the basis of my card. I have done a LOT of canoe tripping including flat water and moving water - and it is a true adventure! 

The paddle image was cut using my Cricut and mounted on a piece of Sage cardstock that was cut using a stitched square die. The card outline was cut using a stitched rectangle die (in white) and the inner patterned paper pieces were mounted leaving the same space on the inside of the rectangle as the outline. The background piece is patterned paper that shows the Northern Lights although not much of that can be seen on this card. I added some arrows with adventure related sentiments stamped on them and then a few coordinating enamel gems. 


Heart 2 Heart is looking for more design team members - the info is below. 


Come and join us at Heart 2 Heart and show us how you interpret the theme Adventure Abounds. 
Be sure to use some Close To My Heart products in your project. 
You have until the end of June to link up your project. 
We can’t wait to see what you create! 

Products used are Close To My Heart unless otherwise indicated:

Paper: Aurora Paper Pack, White Daisy Cardstock, Sage Cardstock, Peacock Cardstock, Neenah Solar White Cardstock 
Stamps: Here & There 
Inks: Sapphire, Peacock, Sage 
Accessories: You Are Here Cricut Cartridge, Here & There Thin Cuts, Stitched Square Thin Cuts, Stitched Rectangle Thin Cuts, Documented Dots 

Enjoy,
Alyson