Sunday, July 31, 2011

Dreamin' WOTG

Well, it's nothing spectacular, but I finally created SOMETHING, even if it isn't original.... I STILL haven't had time to get out my cricut and play yet - hoping for that tomorrow. 
Meanwhile, here are the Dreamin' Workshop on the Go projects. I have to say that they took me WAY longer than I expected! I am not sure if my 3 hour workshop time allotment will be long enough. I may have to rethink that. I will STRONGLY recommend that my particpants have both the Magic book and the Wishes book for sure! Pre-cutting paper at home would be a HUGE advantage!
Anyways, here are the photos of both layouts and the cards. 

I will be posting additional artwork with the Dreamin' kit when I receive my Sept. Stamp of the Month. 

The new Fall/Winter Idea Book will be available to view tomorrow and you can order the new products online from my site tomorrow as well. 

Enjoy, 
Alyson

Supplies used are all CTMH
Paper: Dreamin' Level 2 Paper Pack, Colonial White Circle Cards
Stamps: Dreamin' WOTG Stamp Set
Inks: Chocolate, Goldrush, Pacifica
Accessories: Shimmer Brads, Bronze Glitter Gel, Chocolate Striped Ribbon

Wednesday, July 27, 2011

Mini Album

Finally - I completed my Convention Mini Album! This was the project that we did at the open crop on the last day. I am using mine as a recruiting tool to show everyone what a great time I had at Convention. The photos aren't great but I journaled my thoughts about the event and how much it did to help improve my self-esteem and to push me to start my business in the right direction. I love the simplicity of the album - nothing too ornate - just enough embellishments and colour. 

Enjoy, 
Alyson

Supplies used are all CTMH
Paper: Kraft Die-Cut Cards and Envelopes, Dreamin' Paper Packet, Believe Paper Packet, Olive Cardstock, Cranberry Cardstock, Colonial White Cardstock
Stamps: Dreams (specially made for Convention)
Inks: Cocoa, Cranberry, Cocoa Marker
Accessories: Olive Brads, Decor Journaling Spots, Colour-Ready Alphabet Cork, Cricut Art Philosophy Cartridge, Foam Tape

Tuesday, July 26, 2011

It Has Been a While...

Boy, it has been a long time... and that's not like me. I apologize. I have been SO busy, but that's not a reasonable excuse - everyone is busy. We got back from a canoe trip a few days ago and I have been up to my ears sorting out and cleaning up from that, washing clothes, treating fly bites (you can't imagine how nasty the fly bites are in northern Ontario until you are swarmed by them after taking a swim in the lake...), and then most of my new goodies have arrived from Close To My Heart, so I have been sorting through those, trying so hard to put them aside and not to play but rather work on the business aspect of my business first. That has consumed ALL my time lately. I don't think Dave has seen me emerge from my office for more than an hour each day since I have returned from Convention. I'll tell you - it's REALLY tough to not play with those new products - and more are arriving tomorrow! So, I don't have any new artwork to share just yet - but the business stuff is coming along nicely (although it's not very pretty to look at, unfortunately...)
Believe it or not, my Cricut Expression arrived last week and it is still sitting in the box! How is that for self-control?? Just another two days and I'll be at it!! 
Hopefully, I'll have something to show for all my patience in the next few days...
Meanwhile, thanks for your patience. 
Uncreatively yours and not very happy about it...
Alyson

Wednesday, July 20, 2011

My Creations Memory Game Box

Here is another of the artwork projects from Convention. This is the new My Creations Memory Game Box. It can be used for so many things! It come with twenty-four 3x3 chipboard pieces inside. I chose to use sixteen of them to create a puzzle using two Studio J layouts. I have only done one side of the puzzle so far and my hands are still aching from finishing the edges with our Finishing Files. I still have to do the other side. However, I am using two very similar layouts and I am not placing them the same way on the back sides, so it will be a real challenge to assemble the puzzle! When my new supplies arrive, I will have another memory box and I intend to finish it in a coordinating colour scheme to match the puzzle and use this box for another purpose. Meanwhile, I wanted to show this one off!

It is created using the Elemental Paper Pack and the Blue Ribbon Stamp Set. The box is the perfect size to fit a handmade cupcake, which would be a terrific gift for a special someone! I can't wait to see the other uses that people come up with for this little gem!
This is the top view of the box. 
This is the view of the front of the box.
 I won't be posting for a few days as my husband and I are taking a few days to head north on a wilderness canoe trip. We will be in submersed in the bugs and heat, portaging through the hills and valleys with our canoe and backpack, fighting off the mosquitoes and flies, along with this tremendous heatwave, but loving the water and evening sunsets and enjoying the time with out little dog, Kelsie. And yes, he has his own lifejacket! Wish us luck!!

Enjoy, 
Alyson

Supplies used are all CTMH
Paper: Elemental Paper Pack
Stamps: Blue Ribbon
Inks: Cocoa, Desert Sand
Accessories: Cricut Art Philosophy Collection, Elemental Complements Dimensional Elements, Foam Tape, Pewter Mini-Medley Accents Collection, Foundry Metal Accessories Pin Clips, Finishing Files, Sponge

Tuesday, July 19, 2011

Roxie Layout from Convention

I finally had some time this afternoon to finish a piece of artwork that I started at Convention. This layout was created using the new Roxie paper pack. The girls sitting at my table during the Creative Session made the same layout but every layout turned out completely different as everyone opted to use different variations of the papers.
My layout features my mom. She is someone I look up to with great admiration. I can only hope that when I grow up, I turn out to be just like her :) She has been a wonderful teacher and mentor to me.
As always, click on the photos to see more details. 
 This is a close up of the first page. I have also shown close ups of some of the clusters.
The last photo is a close up of the second page.
Enjoy,
Alyson

All supplies used are CTMH unless otherwise noted
Paper: Roxie Paper Pack
Stamps: 10 Things
Inks: Black, Smoothie, Desert Sand, Vanilla Cream Marker, Cranberry Marker
Accessories: Colonial White Waxy Flax, Designer Ribbon Red Collection, Bling Assortment, Foam Tape, 10 Things Pocket, Cricut Art Philosophy Collection, Sponge

Monday, July 18, 2011

CTMH Convention 2011

I'm back!!! And totally exhausted!
And would you believe that of all the times for my camera to choose to act up, it was this week at Convention?! I have two decent photos from the entire event! I am going to be relying very heavily on that Convention CD when I receive it in the next few months! All my pictures are either blurry or extremely dark... I think I need a new camera. 
So, the only photo you get to see tonight is one of the stage set up... 
Nonetheless, I am not worried - my buddies took tons of pictures and I know they will forward them to me in the coming days so I will be able to add something to my scrapbook!

There were many new and exciting changes announced at Convention - watch for those announcements coming in the next few weeks if you are not a Consultant. The General Sessions were filled with laughter, fun and terrific messages, the new products were unveiled in tremendously exciting ways, the Business and Creative classes were fabulous, the artwork was stunning, the Awards Banquet was awesome and the new Idea Book is to die for! 

But most of all, the friends - old and new - are what makes Convention the most fun of all! It's great to meet up with old friends and catch up on their news and their lives, but also to meet new friends and find out all about their goals and ambitions and what they hope to get out of this amazing company. To all of you that touched my life this past week, THANK YOU! You made more of a difference than you realize, particularly after a very difficult trip and arrival at the hotel and I hope to keep in touch with each and every one of you! Thank you for making my trip to Anaheim and Disneyland as special as it was and I hope I was able to do the same for you!

Enjoy, 
Alyson

Monday, July 11, 2011

Wedding Card for a special friend

This is probably the last time I will be posting until I return from the Close To My Heart Convention in California. Tomorrow is my day to pack and organize all the last minute details before my early flight Wednesday morning. 

This card is one that a special friend of mine and his new wife will receive this evening at a special dinner. They were married earlier this week and Dave and I were not able to attend the wedding so we are getting together with them this evening before they return to their home in Dubai - that's right - DUBAI! We are lucky to get this time together with them, so I treasure the time we have coming this evening. We wish them all the best as they begin their new lives together!
Here is the inside of the card.
Enjoy, 
Alyson

All supplies used are CTMH unless otherwise noted. 
Paper: Honey cardstock, Black cardstock, White Daisy cardstock
Stamps: Universal Backgrounds, Card Chatter - Love, For Every Occasion
Inks: Black, Honey
Accessories: Black Grosgrain Ribbon, Lace Border Punch (MS), Butterfly Punch (MS), Licorice Opaques, Foam Tape, Nestabilities (not CTMH)

Friday, July 8, 2011

H2H Challenge Card

You know, it pays to ask silly questions like the one I posted yesterday... I got a quick response and a MUCH easier way to post sketch photos! Like they say, ask a silly question.... 
The Heart 2 Heart Challenge this week was to create something based on the photographs that they provided as inspiration. Those photos are below. 
Here is the card that I created. This is so out of my comfort zone - I prefer cards with two or three colours... it took me a long time to think about what I wanted to do. I'm still not sure I am happy with the final result, 
but this is it! 

Enjoy, 
Alyson

Supplies used are all CTMH unless otherwise noted
Paper: White Daisy cardstock, Pear cardstock
Stamps: Carefree, Smiles, Dreams Come True, Inspired by Nature (SU)
Inks: Gypsy, Pear, Topiary, Sunny Yellow, Cotton Candy, Tulip, Desert Sand
Accessories: 11/4 Inch Circle Punch, Sparkles - Red, Pink, Purple, Clear, Prisma Glitter, Yellow Sparkles (Michaels), Pink Ribbon (Michaels), Nestabilities (not CTMH)

Thursday, July 7, 2011

Mojo Monday Card (even though it's Thusday already...)

I am starting my post this evening asking for assistance from all of you expert bloggers out there! I am having a lot of problems copying images from other websites to my blog posts (ex. the sketch from the Mojo Monday challenge). I have been copying the screen page, pasting it into Microsoft Paint, resizing the part I want to copy to fit a full page, recopying it to another Paint screen and then saving it. Often, the picture ends up distorted as it has been increased in size so much. There must be an easier way to do this. I wanted to add the Heart 2 Heart inspiration photo but I could only make it a half a page in size without distorting it way out of proportion since it is a wide photo this week, so I have this empty bottom half of my page that I have to copy and then I can't put anything in that empty space... Anyone have any ideas to make this process easier??

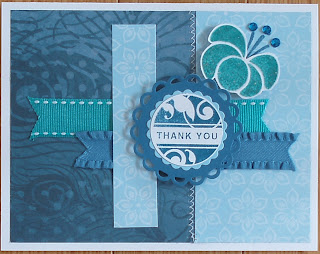
Meanwhile, here is the Mojo Monday sketch for this week, and my interpretation of the sketch.  
I know you have seen a lot of projects using Magnifique paper lately, but my favourite paper pack is about to retire in a few weeks, so I have to get the most use out of it as possible before that time!
Enjoy, 
Alyson

All supplies used are CTMH unless otherwise noted
Paper; Magnifique, White Daisy cardstock, Pacifica cardstock, Sky cardstock
Stamps: Salutation Seals, Dreams Come True
Inks: Lagoon, Pacifica
Accessories: Blue Ribbon Collection, Turquoise ribbon (Michaels), Blue Sparkles, Clear Detail Embossing Powder, Prisma Glitter, White Thread (Walmart), Heat Tool, Foam Tape, Nestablilities (not CTMH), 11/4 Inch Circle Punch

Tuesday, July 5, 2011

Flowering Cactus Layout

Well, I finally finished it! I played around with the photos that I had taken, and decided to use just one - and then I couldn't decide on the paper colours to bring it to life. That alone took me about 90 minutes... I ended up using both Grey Wool and Grey Flannel - the first time I have ever used Grey Flannel, I think! I still want to add a journaling card behind the photo but I haven't made it that far yet. With Convention coming up so quickly, there is a lot to think about right now! And I have another card workshop this Saturday.... Maybe I will get some more creative time in the next few days if I am lucky. 
A close up of the flowers in the right hand corner is shown below. They were done with the Dreams Come True stamp set. I stamped them on Grey Wool paper using Colonial White pigment ink, then quickly covered them with a mixture of clear embossing powder and glitter and heat set them. I love the way they turned out!
Enjoy, 
Alyson

All supplies used are CTMH unless otherwise noted
Paper: Bliss, Grey Wool cardstock, Grey Flannel cardstock, Topiary cardstock
Stamps: Dreams Come True, Homestead Alphabet
Inks: Topiary, Grey Wool, Colonial White Pigment Ink, Versamark
Accessories: Clear Embossing Powder, Prisma Glitter, Heat Tool, Foam Tape, Green Sparkles, Grey Satin Ribbon (Walmart), Grey Grosgrain Ribbon (Fabricland), Cream Lace (Fabricland)

Monday, July 4, 2011

Does this layout look familiar??

For those of you who follow Close To My Heart, you may recognize this layout. It is a copy of the layout on the front of the Autumn/Winter 2010 Catalogue. I tried to copy the layout exactly, just to see if I could do it. It is done with the Magnifique paper pack and features my friend of 41 years, Janet! The one thing I couldn't figure out how to do was fold the paper on the right side to line up the pattern... 
but I think it looks fine as it is.
Enjoy,
Alyson

All supplies are CTMH unless otherwise noted
Paper: Magnifique Paper Pack
Stamps: Friendship Alphabet Large, Circle of Love, Unity
Inks: Cocoa, Pacifica, Lagoon, Chocolate, Cocoa Re-inker
Accessories: Cocoa Ribbon Rounds, Blue and Green Sparkles, Mocha Adhesive Gems, Neutral Embroidery Floss, Foundry Flourishes Assortment, Blending Pen, Foam Tape

Sunday, July 3, 2011

Queen Charlotte Islands and my Clarinet

I am a musician by training and when I finished my first university degree, I spent a few summers working at a music camp on Vancouver Island. After the camp finished one summer, I flew up to the Queen Charlotte Islands to visit my family who were living there at the time. They had a home right on the Pacific Ocean and we found this piece of driftwood washed up on the shore. I took my clarinet and played my heart out on the shore for several hours while my sister took these beautiful photos. 
The layout is from Magic and I have used my most favourite paper of all time - Magnifique! There is hidden journaling as you can see by the photo of the left page. When it is inside the page protector, a brad holds the flower in place on the outside of the page and it slides around to reveal the journaling. 
As always, click on the photos to see additional detail.
Enjoy, 
Alyson

Supplies used are all CTMH unless otherwise noted
Paper: Magnifique, Colonial White cardstock, Pacifica cardstock, Lagoon cardstock
Stamps: Building Block Alphabet, Cherished Flourishes
Inks: Pacifica, Sky, Lagoon, Chocolate, Brown Staz-On
Accessories: Clear Buttons, White Daisy Paper Flowers, Colonial White Designer Brads, Antiqued Copper Brads, Chocolate Waxy Flax, Colonial White Embroidery Floss, Dimensional Elements Flower, Corner Rounder, Coluzzle Circle Cutting Guide

Saturday, July 2, 2011

Flowering Cactus

Dave and I were given a small cactus about 12 years ago by some friends and it has been gradually getting taller but it really hadn't done anything spectacular until last night. About 7:30 last night, we noticed a white flower starting to bloom. Within about 30 minutes, it had opened up about halfway and after about an hour, we had a flower in full bloom! Its beautiful scent permeated the kitchen area. We didn't want to lift the cactus from its sitting area on the window sill as it is very delicate, so the photos show the window sill behind it. The flower stayed open throughout the night and it was totally closed up and wilted by about 1:00pm this afternoon. This is only flower it has ever had and we are hoping it is not the last! What a pleasant Canada Day surprise! My next step is to scrapbook these photos!
Enjoy, 
Alyson

Friday, July 1, 2011

Iris Fold Card

I am just about ready to climb into bed for the night - at 8:30... been a really busy day. My husband and I repotted about 50 houseplants today, and then went to our city's Canada Day festivities downtown. Between the hot sun, the hard work, and preparing for a workshop that I am having tomorrow morning, I am exhausted!

I did this iris fold card a while ago and haven't had a chance to try another design. Once you figure out the basics, it isn't that difficult, but it is time consuming. I don't know that the photo shows the intricate detail of the folds. I used foil paper for the folding part and that helped to keep the card fairly thin with all the folded layers. 

We have a new water heater and gas barbecue to assemble in the coming days so I may not be back here for a few days. Enjoy the beautiful sunny weather and the long weekend, be it in Canada or the US!

Enjoy, 
Alyson

All products used are CTMH unless otherwise noted
Paper: White Daisy cardstock, Gypsy cardstock
Stamps: Friendship Blessings
Inks: Lagoon, Gypsy, Cotton Candy
Accessories: Pansy Purple Organdy Ribbon, White Flower (Michaels), Turquoise Stickles, Foil Paper