Monday, December 23, 2019

AH 348 - Cherry Blossom Shaker


Welcome to Atlantic Hearts Challenge #348!


I decided to rotate the sketch 90 degrees this week - sort of... My cross piece is still horizontal but the placement of my images are in the vertical position. 

I recently bought the Pretty Pink Posh "Cherry Blossoms" stamp and die set. I love the flowers in this set because there are so many ways to use them. I based the design of my card on a card I saw on Pinterest (but it wasn't watermarked so I don't know who created it...) 

The flowers and leaves were stamped using Intense Black and then coloured using a combination of Touch markers and Spectrum Noir Tri-Blend markers. Colouring is not a strength for me - I do the best I can. After colouring in some flowers completely, I decided that I preferred them white with just a touch of pink in the centres. I used two markers to get that effect and then I also brushed the centre with the Bashful Shimmer Brush, going just past the marker section. I also outlined all the flowers and the leaves using the Clear Shimmer Brush. That isn't visible in the photo but it looks so pretty in real life. 

The shaker was created by sponging a pink background on white cardstock and then stamping the sentiment in black. I used a stamp press to stamp the sentiment three times to make it as dark as possible. Sequins in two shades of green and clear were added. The shaker is embedded within the card so I was able to raise some of the flowers. 


Come and join us at Atlantic Hearts and show us how you interpret the sketch shown above.
You have until Sunday evening to link up your project. 
We can’t wait to see what you create! 

Products used are Close To My Heart unless otherwise indicated: 

Paper: Kraft Cardstock, Black Cardstock, Green Apple Cardstock, White Daisy Cardstock, Green Glitter Paper, Pink Glitter Paper, Neenah Solar White Cardstock
Stamps: Cherry Blossoms (PPP), Sentiment Collection (Penny Black)
Inks: Intense Black, Black, Ballerina, Pixie, Raspberry
Accessories: Shaker Window Thin Cut, Shaker Foam and Acetate, Cherry Blossoms Dies (PPP), Tri-Blend Markers, Touch Markers (not CTMH), Sequins (Dollar Store), Clear Shimmer Brush, Bashful Shimmer Brush, Foam Tape, Thin Foam Tape

Enjoy,
Alyson


Monday, December 16, 2019

Embossing on Alcohol Inks

This is the latest background I created using alcohol inks and I love the colour intensity. I tried using green and purple before and ended up with a brown mess - this time it was better. 

I decided to use white embossing powder for the images on these backgrounds. I had to find images that were large enough to fit all or most of the space... 

Both images were stamped using Versamark and then heat embossed using white detail powder. Since the inks are always a little sticky, it's difficult to remove all the excess powder that sticks to the base. 


Products used are Close To My Heart unless otherwise indicated: 

Paper: White Daisy Cardstock, Willow Cardstock, Pansy Cardstock, Yupo Paper, Neenah Solar White Cardstock 
Stamps: Hello Lovely (Concord and 9th), Fragrant Flowers (Penny Black), Peachy (Kaisercraft)
Inks: Versamark, Willow, Alcohol Inks (Ranger)
Accessories: White Detail Embossing Powder, Heat Tool

Enjoy, 
Alyson

Sunday, December 15, 2019

Technique Blog Hop - 'Tis the Season to Sparkle

Welcome to the Close To My Heart Technique Blog Hop!


The theme this month is Season to Sparkle. To me, that means bring on the bling! 

You should have arrived here from Krista Hershberger's blog.

I have SO many Christmas cards created already - and mine were mailed a while ago. I didn't want another Christmas card so I decided to create a birthday card with sparkle for this blog hop. 

I began by using my Cricut and inserted the chevron background from Artbooking onto the canvas. After a lot of slicing, I created equally spaced chevrons in the size of a standard card. I cut the entire outline and inside pieces from Bluebird cardstock. A piece of Silver Glitter Paper was used as my base and I placed the chevron pieces where I wanted them - it really helped to have the outline to be able to adhere the pieces in the correct place. 

A birthday sentiment was embossed on vellum using silver embossing powder. I lined that with a piece of silver shimmer trim cut in half and then adhered it to Carolina cardstock. The vellum is folded around the back to allow better adhesion. 

A few embellishments and this is finished - ready for an upcoming birthday. 


The next blog on the hop is Tamara Sandwisch's blog
I am certain she has something amazing to share with you! 

Products used are all Close To My Heart: 

Paper: White Daisy Cardstock, Carolina Cardstock, Bluebird Cardstock, Silver Glitter Paper, Vellum
Stamps: Birthday Greetings
Ink: Versamark
Accessories: Artbooking Cricut Cartridge, Silver Shimmer Trim, Silver Glitter Gems, Silver Embossing Powder, Heat Tool

Enjoy,
Alyson

Friday, December 13, 2019

CD 373 - Leaves with Alcohol Ink


We are pairing with the Double Trouble Challenge this week and next - the 
details are all listed below. 


THING 1: Trouble Maker 
says, "I went to the Zoo and the Zebra was my favorite animal. Won't you include something striped (no plaid) somewhere in your project. If you use a Black and White stripe you get another chance for the draw. 

You can stop here... 
OR, you can choose to include Twisted Sister's Optional Twist               


THING 3: Twisted Sister 
says, "Black and White! How boring! I want to add a little color to Trouble Maker's life with my paint ball gun. Add three additional colors to show her who's boss."

This is an OPTIONAL TWIST but you will be awarded an additional chance in Double Trouble's random draw if you include this twist in your project


THING 2: Double Dare 
says, "Oh Dear! Things are getting out of control!" If you have used Black and White and accepted Twisted Sister's twist (plus only 3 additional colors) you can join our partner at Color My Heart Color Dare Challenge #373 and #374


I used alcohol inks to create the background paper design from which I die cut the leaves. The background was mounted on white then on black and again on white. A black and white stripe runs under the twine. The most difficult part of assembling this card was coping with the foam tape both on the card front and on the leaves.... it seemed to attach itself everywhere I did not want it...


Come and join us at Colour Dare  - and don't forget to also link up with Double Trouble
You have until December 29th to link up your project. 
We can’t wait to see what you create! 

Products used are Close To My Heart unless otherwise indicated: 

Paper: White Daisy Cardstock, Black Cardstock, Raspberry Cardstock, Cats and Bats Paper Pack, Neenah Solar White Cardstock, Yupo Paper (Ranger)
Stamps: Card Captions
Inks: Lagoon, Alcohol Inks: Mermaid, Indigo, Alcohol Blending Solution (Ranger)
Accessories: Nestabilites Circle Dies, Fresh Foliage Die (Memory Box), Raspberry Twine, Foam Tape 

Enjoy,
Alyson

Wednesday, December 11, 2019

Experimenting with Alcohol Inks...

I recently purchased some alcohol inks because I love the look of the backgrounds that I have seen created using this medium. It is still a very new experience for me but I am learning...

These cards are the result of two sheets of backgrounds that were created. All the cards are based on ideas I found on Pinterest - such a great place for inspiration. 

The turquoise background was created using two inks - a light and a dark turquoise colour. I used my Cricut to create both the letters and the flowers. One is a (sort-of) Eclipse card where the letters are raised. I didn't want the extra letters to go unused so I applied them to another card. 


The second background was created using pink and blue inks. The black stamping (with Staz-On) wasn't as dark as I had anticipated... maybe I will try something else next time. 


Here's to more practice! 

Products used are Close To My Heart unless otherwise indicated: 

Paper: White Daisy Cardstock, Lagoon Cardstock, Peacock Cardstock, Carolina Cardstock, Neenah Solar White Cardstock, White Cards and Envelopes, Glossy Cardstock
Stamps: Birthday Joy, Every Little Thing Scrapbooking, Growing Through It, Greetings Mix 1 (SSS)
Inks: Bluebird, Peacock, Lagoon, Versamark, Black Staz-On, Various Alcohol Inks (Ranger)
Accessories: Artistry Cricut Cartridge, Base Camp Cricut Cartridge, Hello Die (PPP), Spellbinders Leaves Dies, Rose Wonder Thinlets (SU), Make Waves Shimmer Trim, Black and White Dots, Touch Markers (misc.), Tri-Blend Markers, Mint Shimmer Brush, Lagoon Shimmer Brush, Foam Tape, Stitched Rectangle Thin Cuts, White Embossing Powder, Heat Tool

Enjoy,
Alyson


Monday, December 9, 2019

AH 346 - Peony in Aqua


Welcome to Atlantic Hearts Sketch Challenge #346!

This is a pretty detailed sketch - and it offers lots of opportunities for interpretation as well. 


I stayed fairly true to the sketch itself but I rotated it 90 degrees. 

The Let It Snow paper collection from Kaisercraft is just gorgeous and I wanted to use it for this card. Although it is designated as winter paper, there are designs that can be used all year like the ones I selected for my card. I wanted to use aqua and silver as the focal colours. The hardwood background paper is awesome and I really wanted to add that pattern into my card. 

I stamped and coloured the flowers and leaves and then die cut them. After colouring, I used both the Mint and Clear Shimmer Brushes on all of the floral pieces. For the centre of the flower, I used Stickles to add some additional interest. The thin silver glitter strips are just the Silver Shimmer Tape cut in half. 


Come and join us at Atlantic Hearts and show us how you interpret the sketch shown above. 
You have until Sunday evening to link up your project.
We can’t wait to see what you create! 

Products used are Close To My Heart unless otherwise indicated: 

Paper: Let It Snow Paper Collection (Kaisercraft), White Daisy Cardstock, Lagoon Cardstock, Silver Foil Paper
Stamps: Budding Peony
Inks: Lagoon, Versamark
Accessories: Budding Peony Thin Cuts, Scalloped Border Thin Cuts, Touch Markers (not CTMH), Tri-Blend Markers, Silver Shimmer Tape, Clear Shimmer Brush, Mint Shimmer Brush, Clear Sparkles, Mermaid Stickles (not CTMH), Thin Foam Tape, Silver Embossing Powder, Heat Tool

Enjoy,
Alyson

H2H - Planter Box Card

Welcome to this week's Heart 2 Heart challenge! 


This week, it's "Anything Goes - Holiday Edition". Any holiday project whether it is a card, a layout or something else is more than welcome! 

I was looking through Pinterest not long ago - my favourite place to find inspiration - and came across an awesome tutorial for the card below. The original creator was Bronwyn Eastley. I loved the way this looked and wanted to try it myself. 

This is a card with a surprise inside... there is a planter box that appears when the card is opened. The card itself is not hard to do - the hardest part was deciding on the images and placing them in the best arrangement. I used Cricut cuts, all from the Flower Market cartridge. The sentiment was stamped and mounted on one of the tags from the Fancy Tag Thin Cuts. I added a Ruby border around the tag and fussy cut that to fit. 

This is the outside of the card. 


And this is the inside of the card.


The old Jack paper pack had the perfect plaid paper to use as a background for my card. I wanted the planter box to look like it was made from wood so I chose a paper from the Fresh Air paper pack. 

The red leaves of the poinsettia were brushed with the Clear Shimmer Brush and the berries and the centre of the poinsettia had Stickles added for interest. 

Come and join us at Heart 2 Heart and show us your holiday project. 
You have until the end of December to link up your project. 
We can’t wait to see what you create!

Products used are all Close To My Heart

Paper: Jack Paper Pack, Fresh Air Paper Pack, Kraft Cardstock, Canary Cardstock, Saffron Cardstock, Ruby Cardstock, Toffee Cardstock, Espresso Cardstock, Julep Cardstock, Clover Cardstock, Evergreen Cardstock, White Glitter Paper 
Stamps: Wonder of the Season
Inks: Black
Accessories: Flower Market Cricut Collection, White and Gold Skinny Ribbon, Fancy Tags Thin Cuts, Christmas Red Stickles, Goldenrod Stickles, Clear Shimmer Brush

Enjoy,
Alyson

Friday, December 6, 2019

Every Little Thing Mini-Album

I recently saw a post in a Facebook group of a gorgeous mini-album created by Kelly Brandt. I wanted to do the same type of album and purchased the file to create my own. 

Many of the decorations were modelled on her album because I love what she did. 

I used the Every Little Thing paper collection along with the accompanying stickers and PML cards. Before I gave this beautiful creation to my awesome neighbours (they have a 3 year old daughter so it was a perfect gift for them...), I added photo placeholders. These photos were taken before those placeholders were added. 

I grouped each of the mini books into a collage to avoid posting dozens of photos here. There are two different type of mini books (2 of each) - one has a flip style photo holder and the other has multiple pages that cross back and forth. 

Here is the front of the album. 


And this shows each of the mini books within the album itself. 

Mini Book #1


Mini Book #2


Mini Book #3


Mini Book #4


This was very time consuming but a really worthwhile project. 

Products used are Close To My Heart unless otherwise indicated: 

Paper: Every Little Thing Paper Pack (with stickers), Black Cardstock, Sapphire Cardstock, Wisteria Cardstock, Julep Cardstock, Evergreen Cardstock
Stamps: none
Inks: Black
Accessories: Chipboard (not CTMH), Every Little Thing PML Cards, Sparkle Flourishes (clear and black), Black Sharpie Marker, Magnets (not CTMH)

Enjoy,
Alyson

Thursday, December 5, 2019

Triple Fold Birthday Card

I saw this type of card on Pinterest and didn't think I would be hard to do - and it wasn't. 

I used one of many favourite paper packs - Boutique - to create this.

The base is Peacock cardstock with Sugarplum cardstock used as a thin border. All the other pieces are patterned paper from the Boutique paper pack. 

The pieces that are showing when the card is closed were the ones I wanted to be darker in colour, so I chose the floral pattern and the script. The belly band was crafted using three pieces of paper - cardstock, patterned paper and one of the zip strips on top. The sentiment was die cut using stitched rectangular dies. The flame on the candle has been brushed with the Clear Shimmer Brush. 


Once the card is opened, the inside sections can be viewed. On the first left inside panel, I stamped Happy Birthday three times, the middle one in second generation. The stars were stamped and then brushed with the Sugarplum Shimmer Brush. On the second inside panel, I stamped a birthday sentiment along with some leaf images around the edges. There is enough room here to write a short message to the recipient. 


Products used are Close To My Heart unless otherwise indicated: 

Paper: Boutique Paper Pack, Peacock Cardstock, Sugarplum. Cardstock, Ballerina Cardstock
Stamps: Boutique Cardmaking, Birthday Greetings, Happy Birthday
Inks: Peacock, Sugarplum, Charcoal
Accessories: Stitched Rectangle Dies, Documented Dots, Clear Shimmer Brush, Sugarplum Shimmer Brush, Touch Markers (not CTMH) 

Enjoy,
Alyson

Tuesday, December 3, 2019

TSOT 437 - Christmas Tree Shaker

Welcome to this week's Try Stampin' on Tuesday challenge!


In addition to the sketch, the optional theme is Winter Wonder. 

I chose to create a winter scene using a shaker component. All the shapes were cut using my Cricut. The sequins inside the shaker are a combination of silver, white and teal - all to reflect a winter sky which was cut in a Glacier patterned paper with yellow cardstock attached behind the open sections to make it look like stars. I brushed the tree fronts with a shimmer brush to make them stand out. 


Come and join us at TSOT and show us how you interpret the sketch shown above. 
You have two weeks to link up your project. 
We can’t wait to see what you create! 

Products used are Close To My Heart unless otherwise indicated:

Paper: Mix-In Paper Pack, White Daisy Cardstock, Candy Apple Cardstock, Canary Cardstock, Evergreen Cardstock, Julep Cardstock, Glacier Cardstock
Stamps: Beary Christmas
Inks: Evergreen
Accessories: Complete Creativity Cricut Cartridge, Cricut Basic Shapes, Acetate, Foam Tape, Julep Shimmer Brush, Loose Silver Sequins, Teal Sequins (misc.), White Sequins (misc.)

Enjoy,
Alyson

Monday, December 2, 2019

H2H - Evergreen

Welcome to this week's Heart 2 Heart challenge! 


The theme this week is Evergreen. That can take a few forms - evergreen trees, the CTMH colour of Evergreen or something else entirely... 

I chose to use a combination - evergreen trees and the colour Evergreen. 

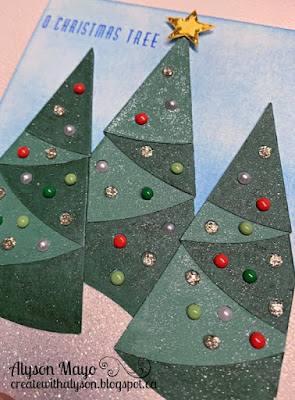
The trees were cut from the new CTMH Cricut collection called Complete Creativity. I added a variety of gems to the trees where the holes are located. I created a snowbank in Cricut Design Space simply by using circles and ovals and welding them together. That is cut from White Glitter Paper. I sponged the background with Carolina and Bluebird inks. The star was stamped, fussy cut and outlined with Stickles. I brushed the trees with two shimmer brushes - clear on the light parts and Julep on the dark parts. 


Come and join us at Heart 2 Heart and show us how you interpret the Evergreen theme. 
You have until the end of December to link up your project. 
We can't wait to see what you create! 

Products used are Close To My Heart unless otherwise indicated:

Paper: Evergreen Cardstock, White Daisy Cardstock, White Glitter Paper, Neenah Solar White Cardstock
Stamps: For the Tree, White Pines 
Inks: Carolina, Bluebird, Lemonade
Accessories: Complete Creativity Cartridge, Holly Jolly Dots, White Pearls, Gold Glitter Gems, Goldenrod Stickles, Sponges, Foam Tape

Enjoy,
Alyson

Sunday, December 1, 2019

December Stamp of the Month Blog Hop


Welcome to the December Stamp of the Month Blog Hop! 

The stamp set this month is called Reindeer Crossing and it is perfect for those Christmas cards and layouts that are still awaiting your attention. There are beautiful images and sentiments that are just right for the season. 


You should have arrived here from Michelle Stewart's blog
If you get lost along the way, a list of all participants can be found on Melinda Everitt's blog.

I chose to use just one image and one sentiment from the stamp set as I wanted to create a shaker card. I sponged a piece of white cardstock using three shades of blue. That was die cut using the Stitched Rectangle Frames, as was a piece of Sapphire Cardstock for the outline. 

The circle for the shaker was removed after it was cut and I added a snowbank and stamped the pair of deer in black ink. The snowbank was brushed with the Clear Shimmer Brush. Silver sequins were added and the shaker was then inserted back into card front which is mounted with foam tape. That way, the card sits flat on the top. 

I tried something a little different when I embossed the sentiment. I used white embossing powder with a very small hint of silver embossing powder and a sprinkle of glitter. It gives such a nice appearance - just a touch of shimmer but it is embedded so it doesn't flake off the card. 


I hope you enjoyed my project. 
The next blog on the hop is Ronda LaDuke's blog.
I'm sure she has something awesome to share with you. 

Products used are all Close To My Heart:

Paper: White Daisy Cardstock, Sapphire Cardstock, Silver Glitter Paper
Stamps: Reindeer Crossing
Inks: Black, Carolina, Bluebird, Sapphire, Versamark
Accessories: Shaker Window and Confetti Thin Cuts, Stitched Rectangle Frames, Loose Silver Sequins, Shaker Window and Acetate, Silver Shimmer Trim, Clear Shimmer Brush, White Embossing Powder, Silver Embossing Powder, Prisma Glitter (retired), Heat Tool, Sponges, Foam Tape

Enjoy,
Alyson

Friday, November 29, 2019

Christmas Peonies

Welcome to this week's Colour Dare challenge! 

I am sure you recognize the M&Ms characters that represent this week's colour choices. Chose ONLY TWO of the colours. Black, white and all other neutrals are free to use.
Since it is so close to Christmas, I selected red and green plus white and black for my card. I pulled out one of my favourite stamps - Budding Peonies - for this card. I wanted to make it into a shaker card but since the flowers are so large, the best option was to turn the entire card into a shaker. I did place some foam tape under the flowers to prevent the sequins from gathering in the corners. The flowers and leaves were coloured using the Tri-Blend markers and I brushed the flower lines with the Clear Shimmer Brush after they were coloured. The centre of each flower is done using a silver pen - since I wasn't able to use yellow... 
The sentiment was stamped using two colours and then the sequins were placed inside the shaker, which covers the entire front of the card. 

In order to get the sequins looking like they are spread over the card, I had to photograph this from above. That makes it very difficult to get a rectangular shape without the edges being "off" a little... 


Come and join us at Colour Dare and show us how you use the M&Ms family colours 
to create your project. 
You have two weeks to link up with this challenge. 
We can’t wait to see what you create! 

Products used are Close To My Heart unless otherwise indicated: 

Paper: White Daisy Cardstock, White Cards and Envelopes 
Stamps: Budding Peony, Christmas Joy
Inks: Intense Black, Candy Apple, Clover
Accessories: Stitched Rectangle Thin Cuts, Holiday Sequins, Foam Tape, Clear Shimmer Brush, Silver Marker (Sharpie) 

Enjoy,
Alyson