Tuesday, December 31, 2024

Friendship Bird Card

 I have had a card like this saved in my files for ages... finally got around to making one myself. 

The white pieces were die cut and the birds were stamped and coloured. The sentiment was masked to highlight one word. I also stamped and fussy cut a flower and some leaves. Everything was arranged on an embossed panel and that was adhered to the card base with craft foam. I added a few gold glitter gems to finish off this pretty card. 

Enjoy, 

Alyson

Monday, December 30, 2024

AH 610 - Birthday Flowers

Welcome to Atlantic Hearts Sketch Challenge 610!

I pulled out some old patterned paper and based the colours on that paper. The centre panel was splattered with two shimmer brush colours and I stamped, coloured and die cut two floral images. One was cut apart and I used that to create an extended vine. The sentiment was die cut three times and stacked before being added to a vellum shadow. I used grey Stickles for the centres of the flowers.

Come and join us at Atlantic Hearts and show us how you interpret this challenge. 

You have until Sunday evening to link up your project. 

We can't wait to see what you create!

Enjoy, 

Alyson

Sunday, December 29, 2024

Hello Triangles

 I have a hard time making masculine cards - this one was made in shades of blue. 

The triangle background was die cut using a stitched triangle background die and the triangular pieces were also die cut. I arranged them in a pattern and added a thin piece of silver foil paper along the side. The right side was stamped with a splatter stamp and I added two foiled sentiments to the front using foam tape. The card front was adhered to a piece of dark blue cardstock on the right side and directly to the white card base on the left side. Some silver gems were placed in the centres of the design. 

Enjoy, 

Alyson

Saturday, December 28, 2024

Hello Friend Split Z-Fold Card

 This fun fold card is one that has been around for ages. I chose to make it using some alcohol inked papers. 

I chose the card base colour from the patterned papers and added black mats on each section. Since the card folds flat, the branches that are standing show against the back panel when the card is closed. There is a small place to write a message as well. 

Enjoy, 

Alyson

Friday, December 27, 2024

Cut It Up 320 - Lighthouse on Rocks

 Welcome to Cut it Up Challenge 320!

Challenge 320 is an anything goes challenge - remember you must use at least one die cut!

I used oxide inks to blend a sunset background with a lake. Clear glitter paste was added through a stencil to mimic waves. Once that was dry, I die cut the sunset with an arch die and adhered it to a black cardstock base. The pieces for the rock and the lighthouse were all die cut and assembled and I also stamped and die cut a sentiment. There is a PRESS HERE section on card and the second photo shows what happens when you do that... so much fun! 


Come and join us at Cut It Up and show us your creations. 

You have two weeks to link up your project. 

We can't wait to see what you create!

Enjoy, 

Alyson


MTTC 550 - Pink Flower Hugs

 Welcome to My Time to Craft Challenge 550! 

The theme for this challenge is something new in your stash. 

This is a fun challenge - there are always new items that I want and sometimes I need the incentive to use them more often! I'm sure I am not alone...

I chose a few items new to me - a background die, silver shimmer paint and a new stamp, stencil and die set. 

I love creating with florals so I stamped, stencilled and die cut that pretty pink flower. The background was lightly ink blended in pink and I splattered silver paint in the lower left corner. The light turquoise die cut piece was adhered on top of that and I added silver metallic thread under the flower before placing it at the bottom left. I raised the sentiment with foam tape and added clear gems on and around the flower. 

Come and join us at MTTC and show us how you interpret this challenge.

You have two weeks to link up your project. 

We can't wait to see what you create!

Enjoy, 

Alyson

Thursday, December 26, 2024

Four from One - Orange Flowers

 I posted a set of cards like this a while ago - they were purple. When I taught this concept, I ended up with a second set, this one in orange. 

The images were stamped on a letter size piece of white cardstock and then stencilled. They were cut apart into four even pieces. I embossed them and added a few embellishments and a sentiment to each. This set was combined with the previous set to make a set of eight cards for a gift. 

Enjoy, 

Alyson

Wednesday, December 25, 2024

Hexagon Edge Card

 I saw a card like this on Pinterest and wanted to try it myself. 

The hexagons were die cut from gorgeous patterned paper and arranged on an acetate panel. I fussy cut around the edge and attached the acetate to a white card front. Another piece of white cardstock was placed on the back to cover the acetate and build strength for the card base. A sentiment was stamped inside and I also stamped and added a smaller sentiment across the bottom. 

Enjoy,

Alyson
Tuesday, December 24, 2024

Joy x 4 Card

 This is a card that I made as part of a virtual event but I changed the colours for this card.

The background was stencilled and I die cut the words. The smaller images were stamped and die cut. The words were arranged along the right side and I added the greenery images around the letters. Some iridescent gems were placed around the words and I brushed the letters with a clear shimmer brush. 

Enjoy, 

Alyson

Monday, December 23, 2024

Daisy Aperture Card

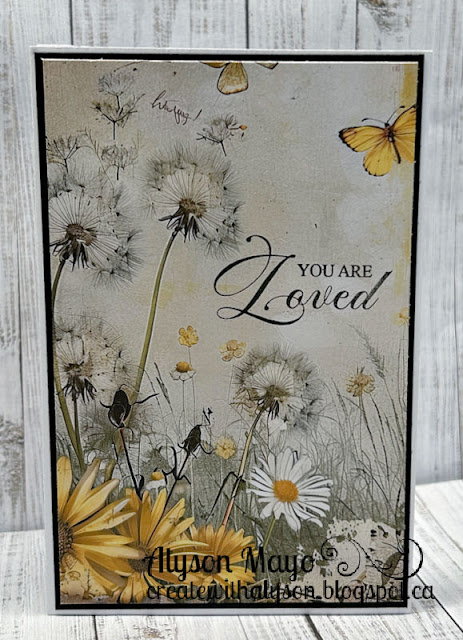
 I recently received some gorgeous scene papers and wanted to put them to use. This pretty card has an aperture inside. Many things could be placed in that opening but I chose a section of the paper that I wanted to highlight. 

The front panel had enough on it so all I did was stamp a sentiment. Inside the card. the patterned paper was arranged on the left side and inside the opening. I used a script stamp to randomly stamp along the edges of the aperture piece. Some daisies were coloured and die cut and I placed those along the bottom. Two butterflies were added around the aperture. 


Enjoy, 

Alyson

Sunday, December 22, 2024

Hexagon Card

 This is such a cute card and it folds down to an A2 size, flat for mailing. 

The top and bottom pieces were adhered around the back but since they are scored, they stand out from the card base. I chose some floral paper for the back and stamped, stencilled and die cut some extra flowers. They were added to the front so they don't hang over the edges. A small sentiment was placed across the top flower. 

Enjoy,

Alyson

Saturday, December 21, 2024

Sunflower Postage Cards

 This is a set of eight cards - two of each colour. 

I die cut the postage background and placed the postage border stencil along with the layers of the sunflower stencil on top. I stencilled the images and stamped some postage elements on each card. The "hello" sentiment was die cut and placed along the right side and I added a smaller sentiment to each card as well. 

Enjoy, 

Alyson

Friday, December 20, 2024

CD 632 - Friend Floral Card Pair

 Welcome to Colour Dare Challenge 632!

This is our last challenge of the year. Stay tuned for more colour challenges in 2025!

The graphic is below - choose at least three of the colours shown. 

I chose purple, pink, yellow and mint. 

I used an old stencil to create the floral images. The stencil makes a 6x6 panel and there are dies to cut the outside edges. It is designed to be cut into two pieces to use on two separate projects. I chose a dark purple for the background and embossed one panel with a 3D leaf embossing fodder. The other one was scored in lines and I sanded some of the colour off to enhance the design. The sentiments were stamped and added at the side and iridescent gems were placed around each card. 

Come and join us at Colour Dare and show us how you interpret this challenge.

You have until the end of the month to link up your project. 

We can't wait to see what you create!

Enjoy, 

Alyson

MTTCC 102 - Candy Cane Duo

Welcome to My Time to Craft Christmas Challenge 102!

The theme for this challenge is a sweet Christmas (goodies, treats, etc.)

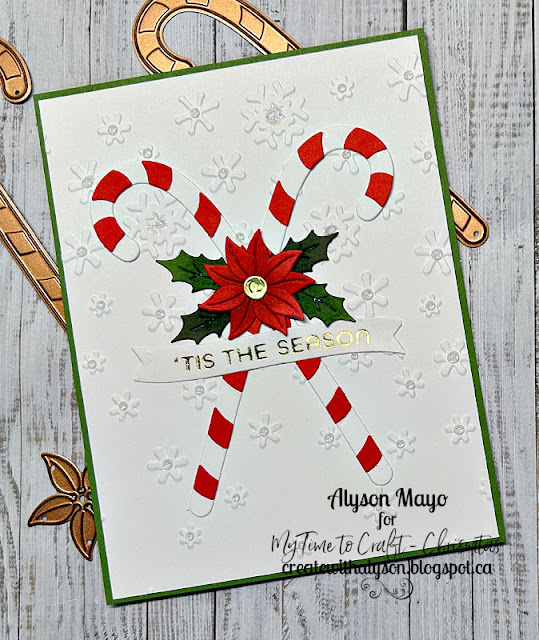
Candy canes are a symbol of Christmas and I decided to use that. 

The white background was embossed with a snowflake embossing folder. The candy canes were die cut in white and the red pieces were adhered on top (ugh - that was hard to figure out with all the tiny pieces!) I also die cut the holly leaves and poinsettia and added them to the crossed section of the candy canes. A hot foiled sentiment was placed just under the poinsettia and I added clear Stickles to the centres of the embossed snowflakes. 

Come and join us at MTTCC and show us how you interpret this challenge. 

You have two weeks to link up your project. 

We can't wait to see what you create!

Enjoy, 

Alyson

Thursday, December 19, 2024

Purple Flowers in Circle

 This is such an easy card to make and it would be great for mass production purposes. I only made one... 

I chose some gorgeous patterned paper and used that for the piece cut on the diagonal. That was set on an embossed panel and I added a rectangle and a thin strip along the side. The circle was die cut and I used a piece of ephemera for the image. The sentiment was stamped and added with foam tape at the bottom. 

Enjoy, 

Alyson

Wednesday, December 18, 2024

Seas the Day Woodgrain Card

 I saw this idea while perusing some artwork sites and watered to try it myself. 

The main image was stencilled over a die cut background. I chose some woodgrain paper and die cut two circles and adhered them together, cutting away the sections where they crossed. I saved the insides of the circles to cut the side strips. The stencilled image was placed behind the opening and the edges were trimmed. To give a different front appearance, I cut strips of white cardstock and adhered them in lines across the front panel. The woodgrain pieces were adhered to the front and I added a woodgrain layer to the card base with craft foam and then applied the front piece on top. Some brown twine was added along with a die cut sentiment and some gems. 

Enjoy,

Alyson

Tuesday, December 17, 2024

Santa and Joy Cards

 These cards are from the December Let's Stamp Together subscription program. This month, the products were made by Concord and 9th. 

There is a diagonal stencil as well as a set of Santa stencils plus stamps and dies. These cards represent different ways that the products can be used. I added some Stickles to various cards but I did stay pretty close to the original designs. 


Enjoy, 

Alyson

Monday, December 16, 2024

AH 608 - Meerkat Birthday

Welcome to Atlantic Hearts Sketch Challenge 608!

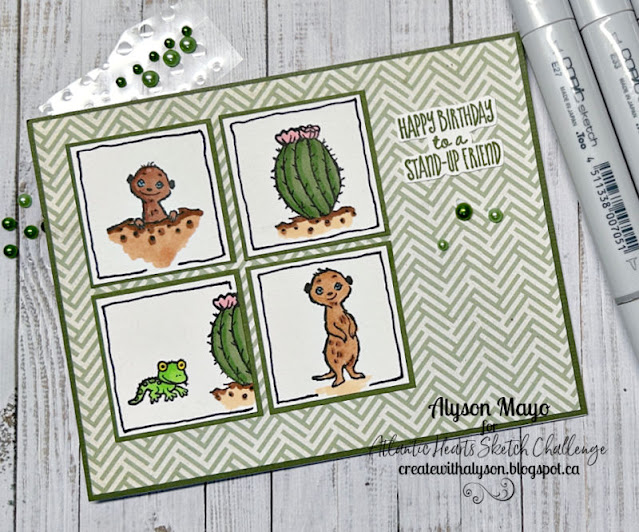
This sketch really has a lot of possibilities. I chose to stay true to the sketch although I made the squares a little larger to accommodate the images that I used. 

The meerkats and cacti were stamped and coloured. I drew black lines around each square and matted them with dark green cardstock. A sentiment was stamped and fussy cut and that was placed at the top right, along with three gems. 

Come and join us at Atlantic Hearts and show us how you interpret this sketch. 

You have until Sunday evening to link up your project. 

We can't wait to see what you create!

Enjoy, 

Alyson

Sunday, December 15, 2024

Triple Layer Scene Card

 This card took me approximately six hours from start to finish. The scene continues from the front panel through to the back and that is what took so much time to create. I had to ensure that elements on the back panel didn't interfere with elements that were in front but that each of the components were able to stand alone. 

I chose a circular opening although this could be done with any shape. Die cutting all the tiny elements took such a long time. I inked some of them and use fine tip markers to add a few details. There is no acetate used - each of the elements stands on its own, glued to the outer ring. I stamped a sentiment and placed it on the back panel and I used some old patterned paper that had a simple pattern on it. 


Enjoy, 

Alyson

Saturday, December 14, 2024

SS 766 - Joy Poinsettias

 Welcome to Sketch Saturday Challenge 766. 

The optional element (in addition to the sketch) is to use a tag. 

I chose some standard red and green papers for my card. The wide centre strip is a sheet of Christmas songs and I added a border to each of the smaller pieces. Since the patterns are busy ones, I just added hot foiled sentiments to the two smaller panels. Some gold gems were placed around the card. 

Come and join us at Sketch Saturday and show us how you interpret this challenge. 

You have two weeks to link up your project. 

We can't wait to see what you create!

Enjoy, 

Alyson

Friday, December 13, 2024

CD 631 - You're Amazing

 Welcome to Colour Dare Challenge 631.

The graphic is below. All three colours must be used. 

I chose to create a card for any occasion using a gorgeous floral image. 

The card front was embossed only on one side and that section was masked and the rest was splattered with turquoise ink. The flower was stamped, stencilled (only one colour of each pink and green ink but in varying shades), die cut and then embossed. It's hard to see the embossed detail but it is so pretty! I die cut an open frame and placed that behind the flower and added a sentiment at the bottom. Some clear gems were placed around the card to finish it off. 

Come and join us at Colour Dare and show us how you interpret this challenge.

You have two weeks to link up your project. 

We can't wait to see what you create!

Enjoy, 

Alyson

Cut It Up 319 - Smile Frame

 Welcome to Cut it Up Challenge 319!

The theme for this challenge is to use more than one die cut. 

I used 33 die cuts - yes 33 of them!

The background was embossed with a 3D burlap embossing folder and I built the fame on top. I inked some of the pieces and added details with fine tip markers and a white gel pen. The sentiment was embossed in white and added across the centre. The card front was adhered to a green card base. 

Come and join us at Cut It Up and show us how you interpret this challenge. 

You have two weeks to link up your project. 

We can't wait to see what you create!

Enjoy, 

Alyson

MTTC 549 - A Frosty Hello

 Welcome to My Time to Craft Challenge 549!

The theme for this challenge is snow. 

We get a lot of snow where I live so snowmen are often found in yards and parks. I chose a snowman theme for my card. 

I masked the moon and inked the background with shades of blue and dark purple. The area around the moon was then masked and I added some light grey ink lines onto the moon. That piece was embossed and I used clear Stickles on all the snowflakes. The white glitter base was fussy cut and adhered to the bottom of the card. The snowmen were stamped, coloured and die cut and added to the card front with from tape. A small sentiment was placed at the bottom. 

Come and join us at MTTC and show us your snow projects. 

You have two weeks to link up your project. 

We can't wait to see what you create!

Enjoy, 

Alyson

Thursday, December 12, 2024

Birthday Balloons

 This card is from another 30 Minute Card Making Stash and Dash. 

The parameters for this card were as follows: Type of card: surprise inside, Colour(s): blue, Technique: embossing, Embellishment: crafter's choice and Occasion: either holiday or crafter's choice. 

I used a die to emboss the background and then added some shimmer trim and light blue patterned paper strips at the bottom. The balloon image was die cut and coloured with markers. That was adhered to the blue background and I added a stamped sentiment at the bottom.

Inside the card, I created a little pop-up feature and placed the same balloon image on that piece. 

Enjoy,

Alyson

Wednesday, December 11, 2024

Christmas Gift Card Holder

 I have made a few of these cards now because I love the gift card option found inside one of the panels. 

This one was made using Graphic 45 patterned paper. The pinecones were my choice for decorating one of the inside panels. I love how the pattern continues across all three sections on the front! 


Enjoy, 

Alyson

Tuesday, December 10, 2024

Birthday Double Pop-Out Card

 This pretty card is one I saw on Pinterest. I figured out the measurements to make it myself. 

The card does fold flat for mailing and the centre panel forms a border around the front panel but for this purpose, I photographed it standing up. The back panel has a piece of alcohol inked patterned paper and I used a blue shade from that piece for the mat at the front. The dogwood branch was die cut, inked and adhered to the front after lightly inking green on the background. I stamped a small sentiment there and a larger one on the inside panel. The two thin panels were embossed on silver foil (you can't see the second one unless the card is pulled fully open). A sentiment can be written on the inside panel or on the back of the card. 

Enjoy, 

Alyson

Monday, December 9, 2024

Happy Moose Cut-Away Circle Card

 This is such a cute card and any critter can be used for the image. I chose a moose. 

The card base was created by die cutting circles so one functions as a border for the second circle. The moose was stamped inside the card and I masked the image to blend light turquoise ink around the top. The moose was coloured and the sentiment was stamped at the top. I die cut several hearts and stems and arranged them along the edge of the circle and at the bottom. 


Enjoy, 

Alyson

Sunday, December 8, 2024

Flip Panel Card

 I recently watched a video for this card. The imperial measurements provided were incorrect so I spent some time adjusting the pieces to fit. 

I chose a detailed paper with so many elements of Christmas - ornaments, greenery, poinsettias, etc. I pulled red and black cardstock to work with that paper so I used red as the base pieces and black for the mats. 

The front of the card (and it folds flat for mailing) has the entire patterned paper image showing and I added a die cut gold sentiment. 

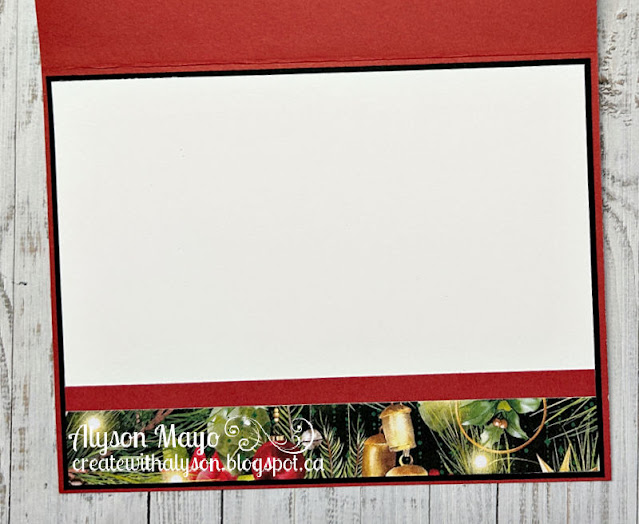
Inside the first flap, I chose to work right on the back cardstock and build a scene there. I used a gold shimmer brush on the leaves of the poinsettia but that was it. 

The next panel has a place to insert a gift card and I added a poinsettia (with shimmer) and some greenery onto the patterned paper. 

The last panel has a space to write a message. 

So happy with how this turned out! 

I recently did the 30 minute card making stash and dash and made another of these cards using a rainbow colour scheme to meet the parameters. Same idea, just a completely different appearance! 

Enjoy, 

Alyson