Showing posts with label Mini Slimline Cards. Show all posts

Thursday, May 21, 2026

I Woof You

 This cute mini slimline card was created for the 30 Minute Card Making Stash Dash. 

The parameters for this challenge were as follows: 

Type of card: slimline/mini slimline, Colour: monochromatic, Embellishment: three of a kind, Technique: fussy cutting and Occasion: thinking of you or friendship.

I ink blended a turquoise background and splattered it with water. I die cut three circles and placed black cardstock behind the inked panel.The dogs were stamped, die cut and adhered inside each of the circles. I stamped and fussy cut the sentiment and added three gems around it. 

I took the original photo BEFORE I coloured the dog's tongue pink... this is the photo after that was done! 

Enjoy, 

Alyson

Wednesday, October 8, 2025

Pair of Poinsettia Cards

 I love the Honey Bee Stamps poinsettia die - I paired it with another winter die set from Honey Bee to create these cards. 

The background plaid paper was from an old paper pack and I added a red mat before adhering that to the white card base. The elements were all die cut from coloured cardstock and I inked each piece to add a bit of dimension. Before adhering anything down, I also added either gold or clear Stickles to the images. It was easier to do that first than to add it later. Once everything was dry, I arrange the elements on each card, picked up everything with Press 'n Seal, added adhesive and placed it all back down. A few red pearls were added on each card. 

In hindsight, I thought these needed some white splatter so I went back and did that after taking the original photo... 

Enjoy, 

Alyson

Thursday, June 5, 2025

Pair of Mini Slim Floral Cards

 This pair of cards was created for what I THOUGHT was the right challenge... turned out I misread the information so I ended up with a pair of extra cards. 

I used a layering stencil to create the cards. The cards were splattered with silver paint and I used a black marker to outline some of the images and add extra details. I also used some Stickles. The vellum piece was lightly inked in purple so it didn't get lost on the card. I chose two hot foiled sentiments for the cards. 

Enjoy, 

Alyson

Monday, April 14, 2025

DT 189 - Row of Bunnies

 Welcome to Double Trouble Challenge 189!

The 3-2-1 combo this time is as follows: 3 pastel colours, 2 words in the same sentiment and 1 slimline or mini-slimline card. Eggs are a bonus. 

This card represents the THIRD attempt at this challenge... I either didn't read the info correctly or I did the wrong style of card the first two times. 

The clouds were stencilled, the brick wall was embossed and I dragged dark red ink on top to enhance the design. The adorable row of bunnies was stamped, coloured and die cut and I stamped a variety of sentiments in the word balloons above the bunnies. I also stamped several ovals and coloured them to represent a pile of eggs. That was placed at the bottom and the entire card front was adhered to a black card base. 

Come and join us at Double Trouble and show us how you interpret this challenge.

You have two weeks to link up your project. 

We can't wait to see what you create!

Enjoy, 

Alyson

Friday, January 17, 2025

MTTCC 104 - You're on the Mice List

 Welcome to My Time to Craft Christmas Challenge 104!

The theme for this challenge is to make a rectangle shaped card. That should be pretty simple as most cards are rectangular in shape. 

I chose to make a mini slimline card. 

The strings of lights were stencilled across the top and I stamped, coloured and die cut the mice and light groupings. They were arranged at the bottom and I stamped a sentiment for the top right side. I layered the front on red and green cardstock before adhering it to the base. 

Come and join us at MTTCC and show us how you interpret this challenge.

You have two weeks to link up your project. 

We can't wait to see what you create!

Enjoy, 

Alyson

Friday, January 3, 2025

PCC 226 - Penguin Trio

 Welcome to Pattie's Creations Challenge 226!

This is a new design team for me and I am so happy to be here!

This is always an anything goes challenge but either a stamped or digital image is required. 

Digital images are very new to me - this is one from Pattie's Creations Digital Images on Etsy. I printed the penguins, coloured them with Copic markers and fussy cut them. The Northern Lights background was created using a variety of Distress Oxide inks and I splattered that with white paint to look like snow. I die cut a hill from white glitter foam and adhered that at the bottom. The penguins were adhered with foam tape and I added a sentiment at the bottom. Some iridescent gems were placed around the sky. 

Come and join us at PCC and show us your projects.

You have until the end of the month to link up your project, 

We can't wait to see what you create!

Enjoy, 

Alyson

Saturday, November 23, 2024

Rainbow Birthday Card

 This card is from the 30 Minute Card Making Stash Dash event. 

The parameters were as follows: Type of card: slimline or mini slimline, Colour: rainbow, Embellishment: ribbon or string, Technique: colouring and Occasion: birthday or get well.

I ink blended a rainbow on a diagonal on the card base. The cake image was stamped, coloured (using all the rainbow colours) and die cut. That was adhered to a black circle and then a white circle. I embossed a sentiment in white and adhered it across the card. Some silver and white ribbon was added above and below the sentiment. Yellow gems were placed around the sentiment and I used clear Stickles on the flame and smaller elements of the cake. 

Enjoy, 

Alyson

Friday, April 5, 2024

CD 595 - Trio of Floral Cards

 Welcome to Colour Dare Challenge 595!

The graphic is below - I used all the colours except Seabrook. 

I pulled out a triple slim stencil and stencilled all three backgrounds at the same time and then splattered them with black ink. Once they were cut down to a mini slimline size, I adhered each of them to a black mat and then to a Flamingo card base. There is a piece of white cardstock inside each card as well. I chose three styles of sentiments - one stamped and die cut, another solid stamp done with black ink and the last sentiment stamped directly on the card front. Some black gems were added to each card. 

Come and join us at Colour Dare and show us how you interpret this week's challenge. 

You have two weeks to link up your project. 

We can't wait to see what you create!

Enjoy,

Alyson

Thursday, February 29, 2024

Just a Little Hi

 This card is from another 30 Minute Cardmaking Stash Dash event. 

The parameters were as follows: Type of card: anything EXCEPT A2, Colours: green, Embellishment: glitter or sparkle and Technique: inking. 

I stencilled a background using three shades of green ink. I also inked the edge of the card base in green. A mini slimline scalloped border was die cut x3 and stacked and the flowers were assembled to form a long stem. I added a stamped sentiment across the bottom and placed some sparkles around the flowers. Easy - but it did take me longer than 30 minutes! 

Enjoy,

Alyson

Friday, October 20, 2023

MTTC 519 - Ah, Autumn!

 Welcome to My Time to Craft Challenge 519!

The theme for this challenge is autumn leaves.

I have lots of leaf stamps and dies but I chose to use a set of layering stencils to create my card. This set of stencils actually makes three card fronts for mini slimline size cards but I only stencilled one of them. I used a huge number of inks, masked a lot of sections and ink blended the bases of each leaf with a second colour for added emphasis. I also used small stamps to stamp the veins onto the leaves. The stencilling and stamping process took me almost an hour, simply due to the detail. 

Once that piece was finished, I gold embossed a sentiment and added some gold glitter tape underneath. That was placed on the left side against a dark brown border. I used a gold gel pen to add dots around some of the leaves to finish off this bold autumn card. 


I don't normally do this but I thought it may interest you to see just how many ink colours were used to stencil the card. This is very much cleaned up from what it really looked like when I was finished - I just pushed all the inks together and put the lids on them for this photo. 

Come and join us at MTTC and show us how you interpret this week's challenge. 

You have two weeks to link up your project. 

We can't wait to see what you create!

Enjoy,

Alyson

Wednesday, July 26, 2023

Just Because Coneflower Card

 This is yet another card that was made for the 30 Minute Cardmaking Stash and Dash. I finished in just over 30 minutes... 

The parameters this week were as follows: type of card - slimline, colour scheme - monochromatic, technique - embossing, embellishment - metal.

I embossed a piece of white cardstock and adhered that behind a silver die cut scalloped border. The card base was inked on two corners. The coneflowers were die cut from various shades of teal and assembled. They were placed on the top and bottom of the card and I added a hot foiled sentiment between them. A few silver glitter gems finished off this pretty card. 

Enjoy,

Alyson

Thursday, December 1, 2022

Folk Floral Stem Misc. Cards

 I have had the Folk Floral Stem collection for a while - it was time to do something with it! 

There is so much inspiration on the Pinkfresh Studio website and that's where I found these card ideas. 

All except one are A2 size. Some of the backgrounds were die cut and inked. I stamped and stencilled the images, sometimes using all the stencils and other times doing my own ink shading. I love the different looks with the same stamp set! 


Enjoy,

Alyson


Thursday, November 17, 2022

Sending a Frosty Hello

The mini slimline card size is great for a small scene like this one! 

The images were stamped, coloured and die cut. I splattered a piece Kraft cardstock with white craft paint and then adhered the stitched borders to form the snowbanks. That entire piece was adhered to a red mat and then to the white card base. The images were adhered with thin foam tape and I stamped the sentiment at the bottom. Love the cuteness! 


Enjoy,
Alyson
Thursday, November 10, 2022

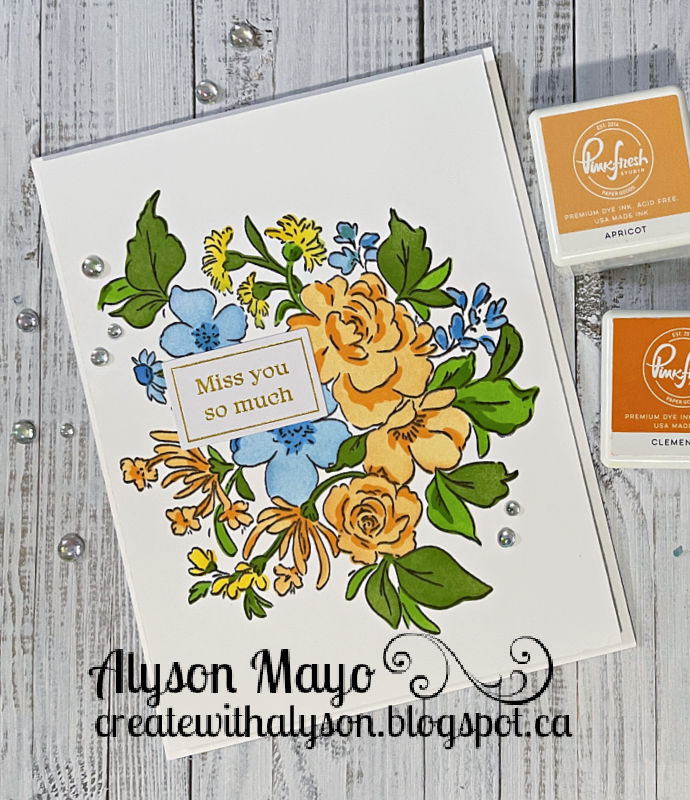
Winter Deer

 I saw this beautiful card design on Facebook and wanted to recreate it. 

It took me two attempts to get the result I wanted. I will post my first attempt further down... I ended up adding too much dark ink and the lines from the glow of the moon were lost. 

Three shades of blue ink were used to create both the sky and the ground. The ground was masked with printer paper and ink was added afterwards. The deer was die cut in both white and black and layered slightly offset. I splattered the background with white craft paint and added a sentiment inside the card. 

Here is my first attempt - I added a sentiment at the top since the lines were barely visible. 

Enjoy,

Alyson

Thursday, September 22, 2022

Half Wreath Mini Slimline Cards

 These two mini slimline cards were created from one stencilled wreath that was cut in half. 

I stencilled the wreath on a larger than usual piece of white cardstock and cut it in half. I also stencilled a flourish patterned around the outside the wreath using a very light hand. The scalloped borders were die cut and the wreath pieces were fit underneath. I added a foiled sentiment to each card, coloured the berries with red Stickles and brushed the darkest leaves with a clear shimmer brush. A few silver gems were added around the images.


I am entering these cards into the Peace on Earth Christmas challenge.

Enjoy,

Alyson
Friday, July 15, 2022

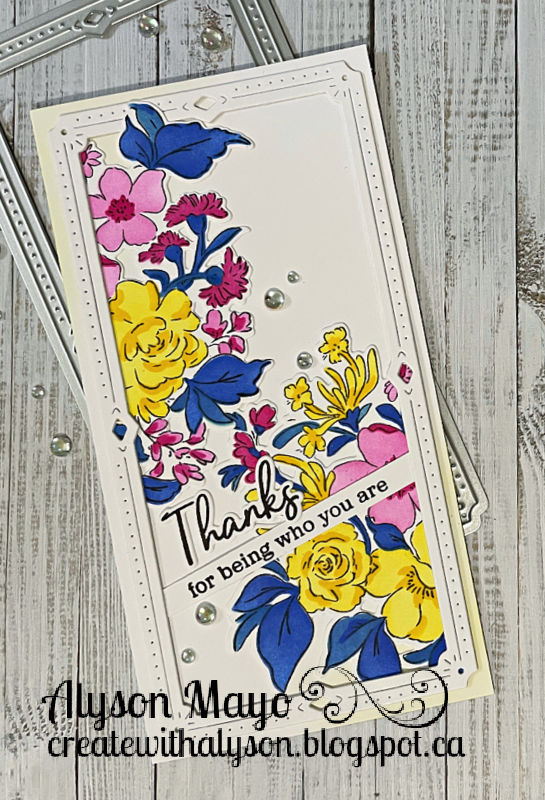
DT 116 - Blue Poinsettia Mini Slimline

 Welcome to Double Trouble Challenge 116!

July for crafters often means Christmas - and yes, it is a second challenge of Christmas in July. The small graphic is below - please visit the Double Trouble Challenge Blog for detailed information. 

I love non-traditional colours for Christmas and blue is one of my favourites. These poinsettia images are from a layered stamp set with a coordinating die. I stamped the flowers in shades of blue. The card base was inked in two opposite corners with a light blue ink and I die cut the scalloped frame twice to add to the front. A small sentiment was placed across the frame and the flowers were arranged on either side. Since bling is a requirement for Thing 3, I added some silver glitter gems and also brushed the darkest blue sections of the flowers with a clear shimmer brush. 


Come and join us at Double Trouble and show us how you interpret this week's challenge. 

I am also linking up my card with the Jingle Belles Challenge for their "Bling on the Holidays" challenge.

We can’t wait to see what you create!

Enjoy,

Alyson


Friday, June 10, 2022

Pinkfresh Studio Card Event - Day 2

These are the cards created on the second day of the Pinkfresh Studio virtual event. These products are not yet available - perhaps in future releases from the company. Please see yesterday's post for the cards created on Day 1 of the event. 

Layered stencilling is such a wonderful way to create beautiful images! 


Enjoy,

Alyson

Thursday, June 9, 2022

Pinkfresh Studio Card Event - Day 1

 I recently participated in a virtual event run by Pinkfresh Studio. There were five formal classes over two days, each using different products. The cards tended to be quite dimensional and I did opt to avoid that in some cases, but the images are beautiful! 

These are the cards that were created on Day 1 of the two day event. The products used are currently not available but some will be released in the future. That's one of the benefits of these events - getting new product before the public! 


Enjoy, 

Alyson